Buck It

[It was either Buck It or Recarostoration, so..]
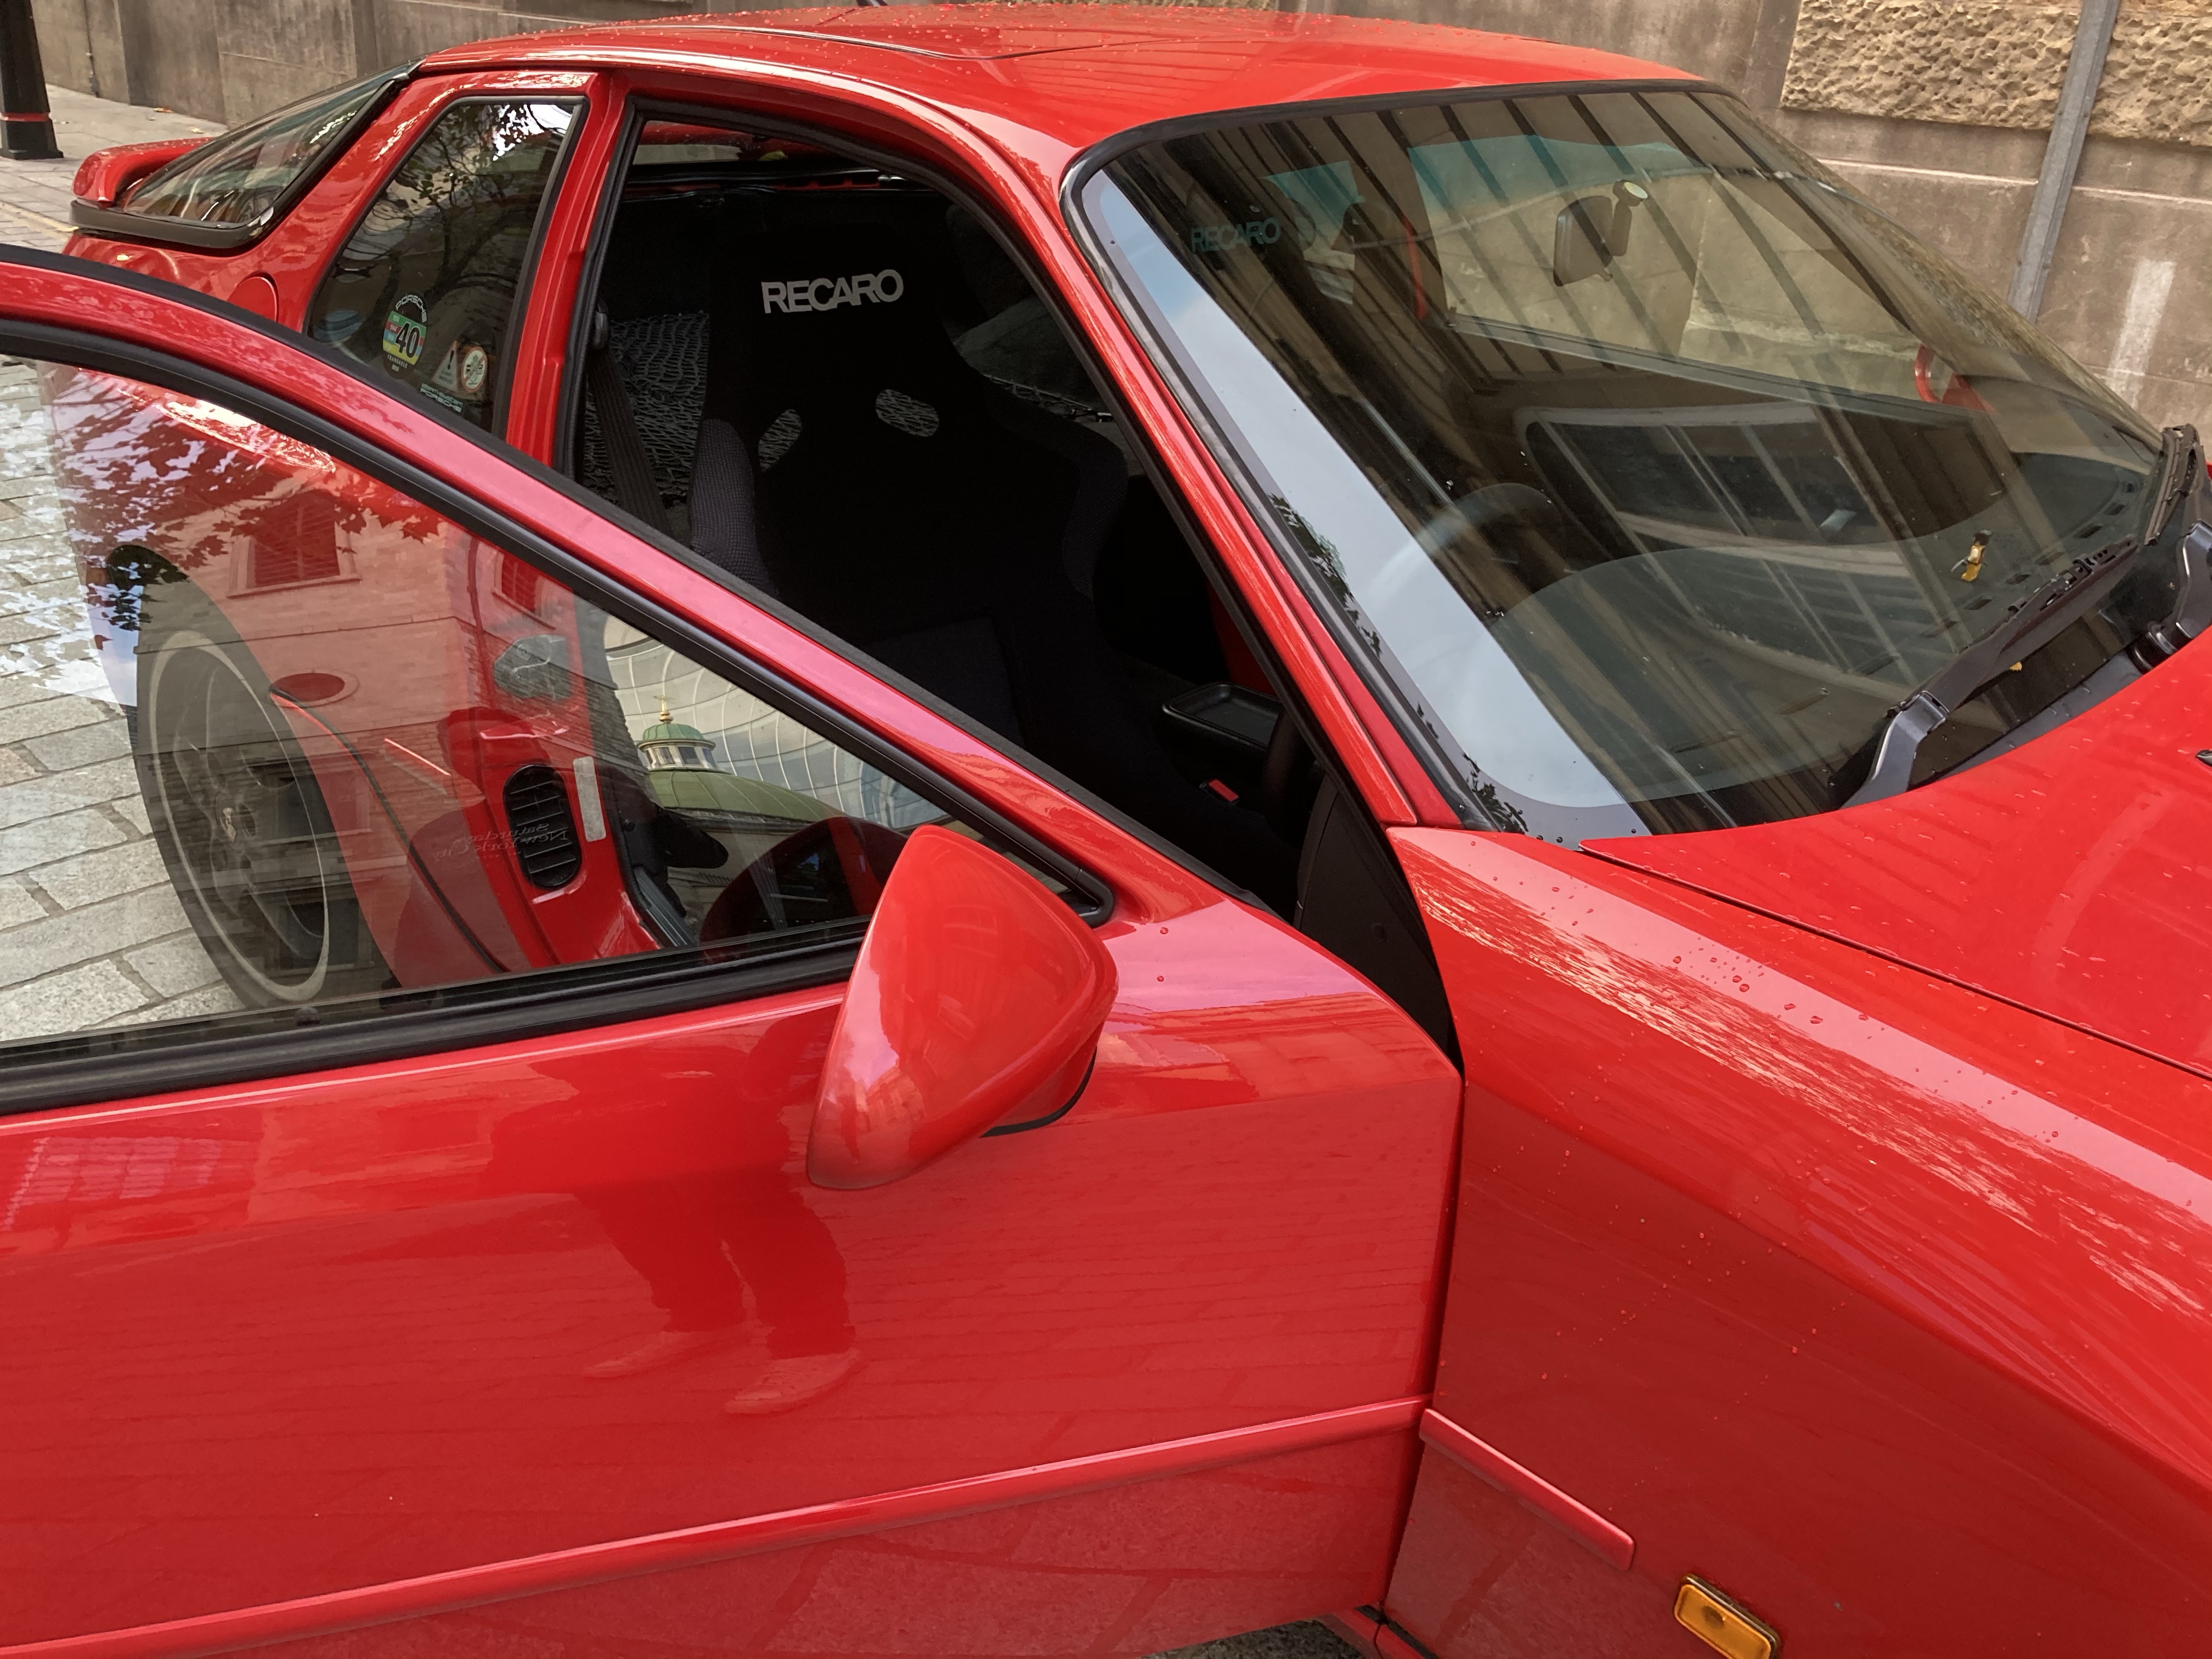
Sport, Club Sport or RennSport: any Porker is better with a set of Recaro Seats bolted to the floor, and having spent a 2500+ Mile RoadTrip sat in one, I know they are comfortable. Trouble is, as with most nice things, they are expensive, so finding a set that needed restoration or tidying was my only option short of Breaking the Bank.
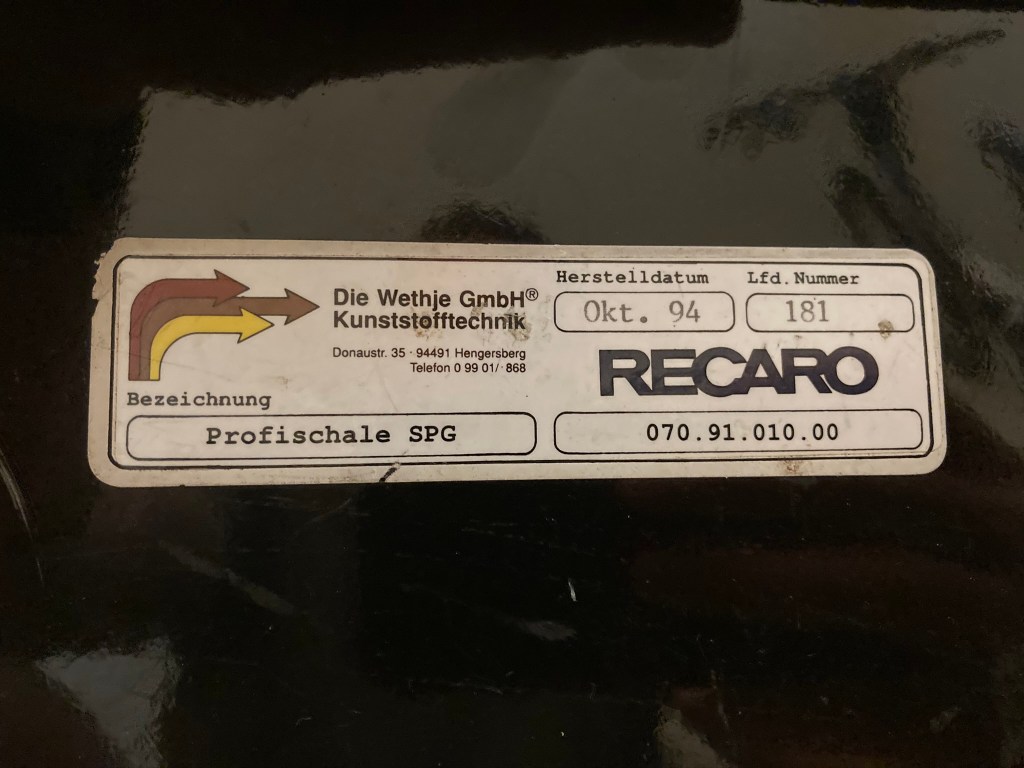
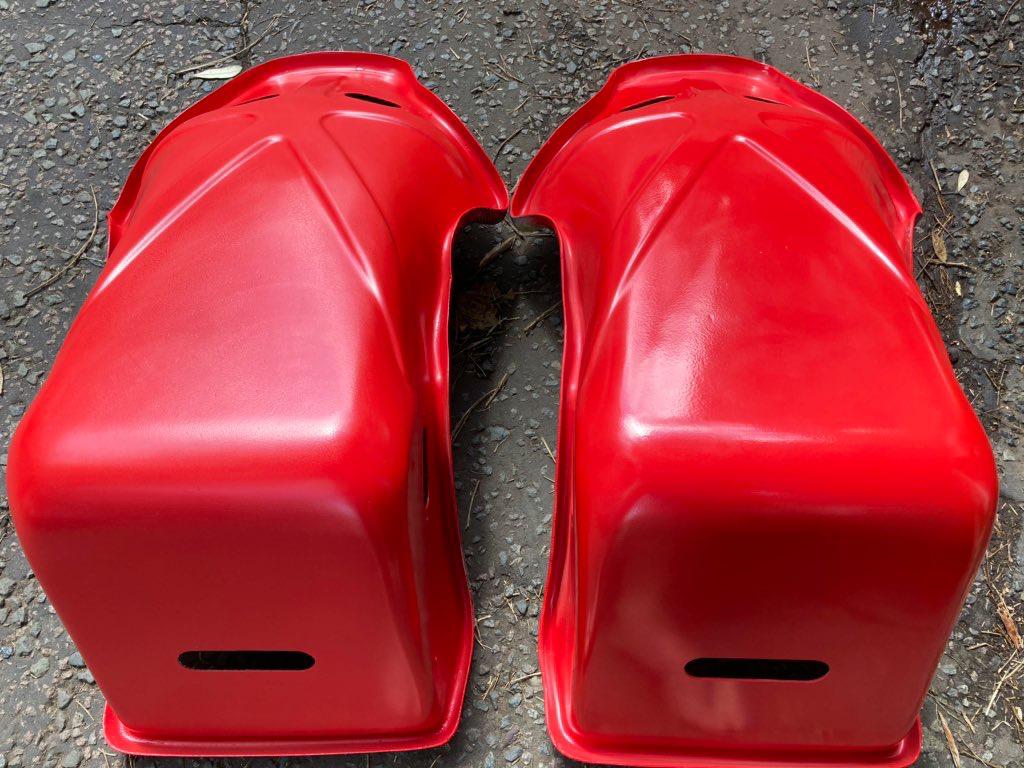
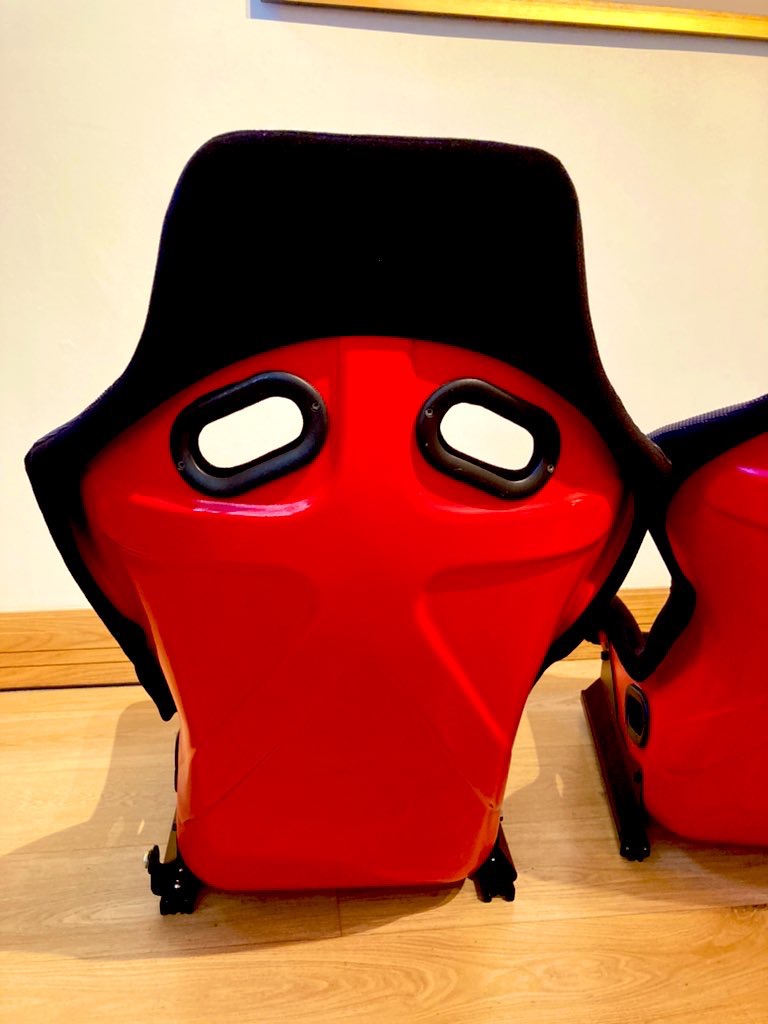
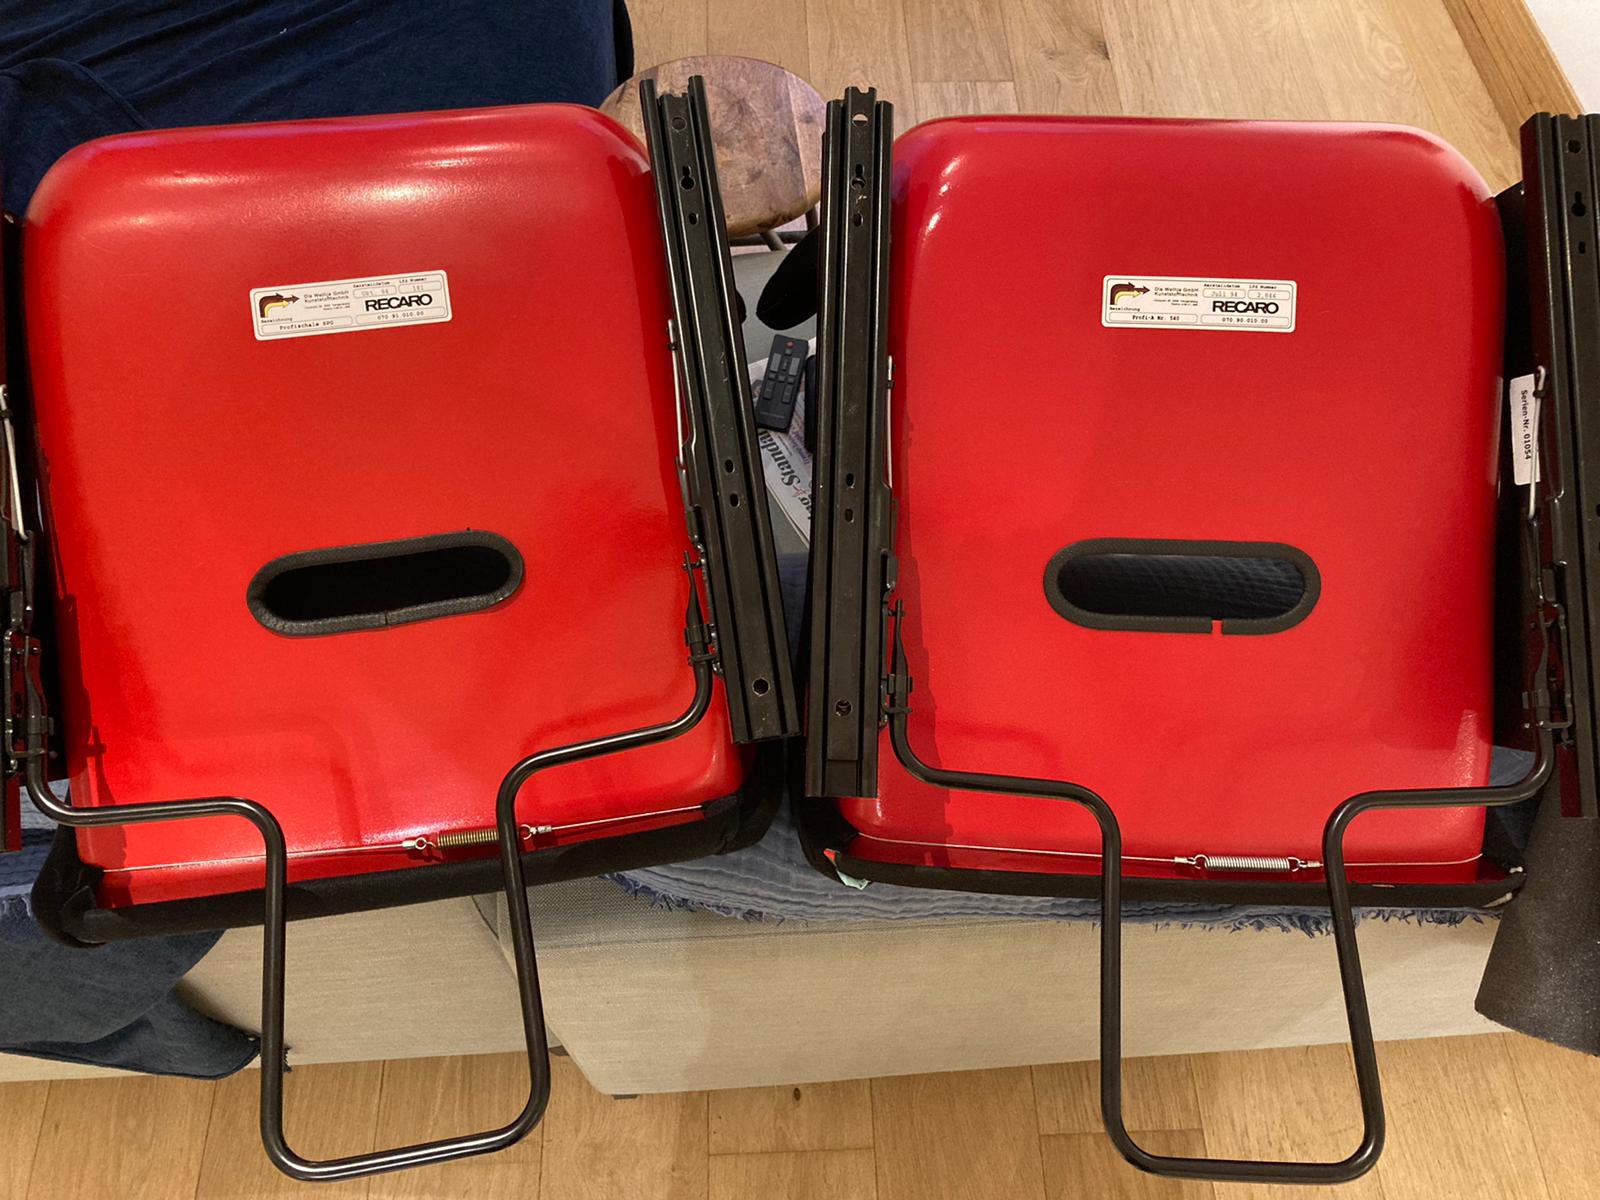
Retailing at £1000+ each new, complete with Frames & Rails, the Recaro Profi SPG [Profi is the model, SPG is the fibreglass reinforced plastic material of which it is made] is a variant on the Pole Positions I fitted in my 993. They have wings about the shoulder and a headless-stick-man-like moulding on the shell’s back. More relevant, is that they are very similar to a Club Sport standard issue Bucket Seats.
..any Porker is better with a set of
Recaro Seats bolted to its floor..
Everybody Loves a Bargain
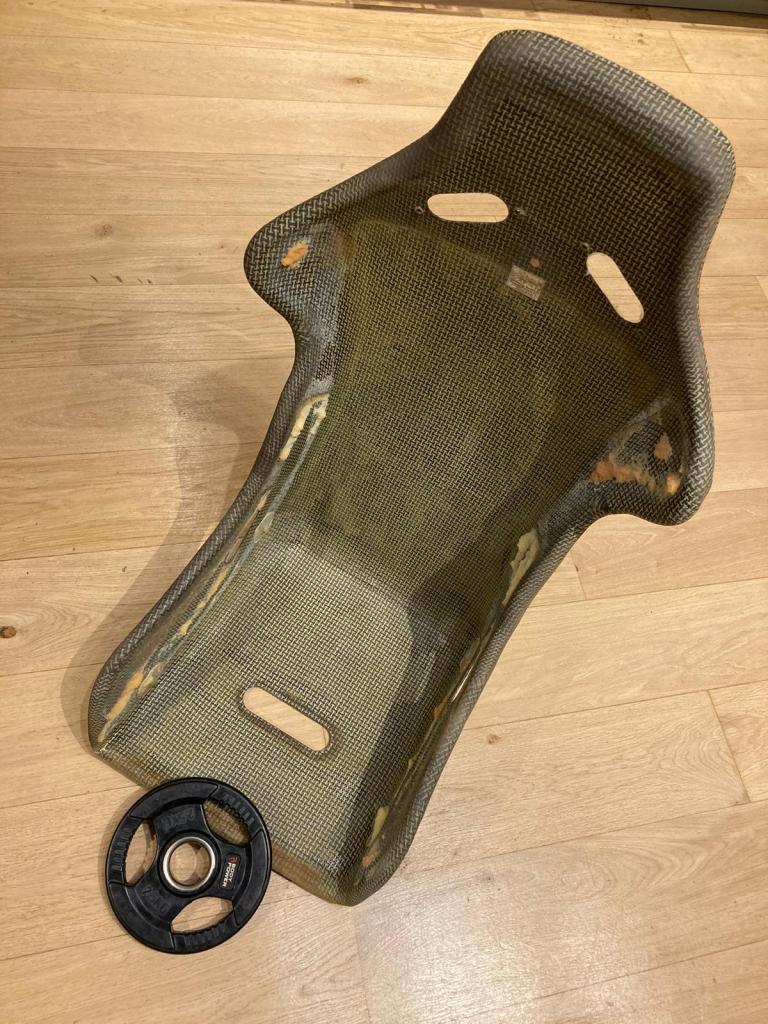
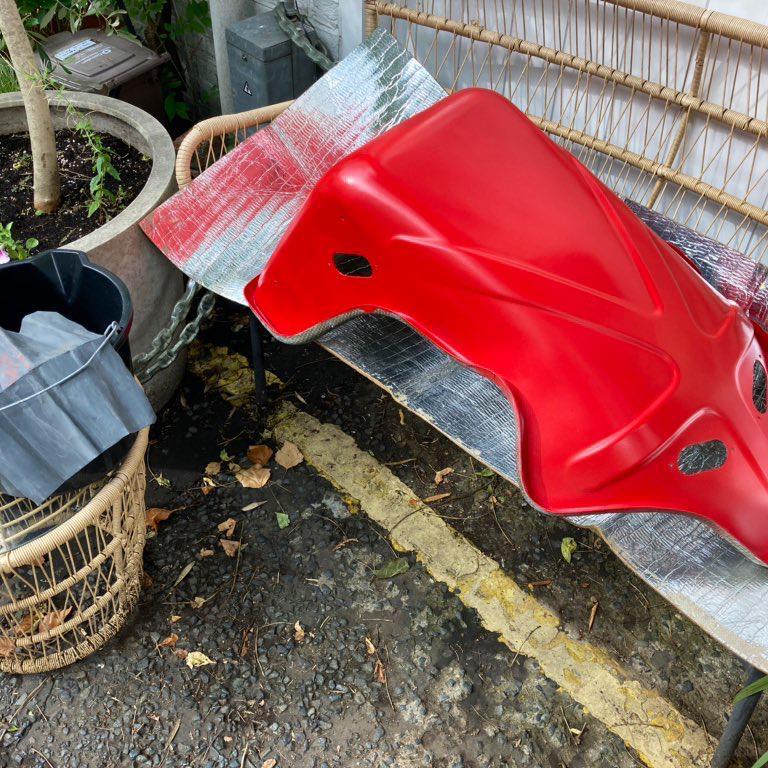
Scouring Ebay for months [Custom Search Alert], a listing popped up that had a 2am [BST] finish time, so I set my sights. £127 later, the Recaro SPG was mine. Yes, it was tatty, and yes it needed paint [I expected this of any Seat I bought], but it was what I love anyways: a Project.

What John McClane in the final
scenes of Die Hard would look
like if he were a Car Seat..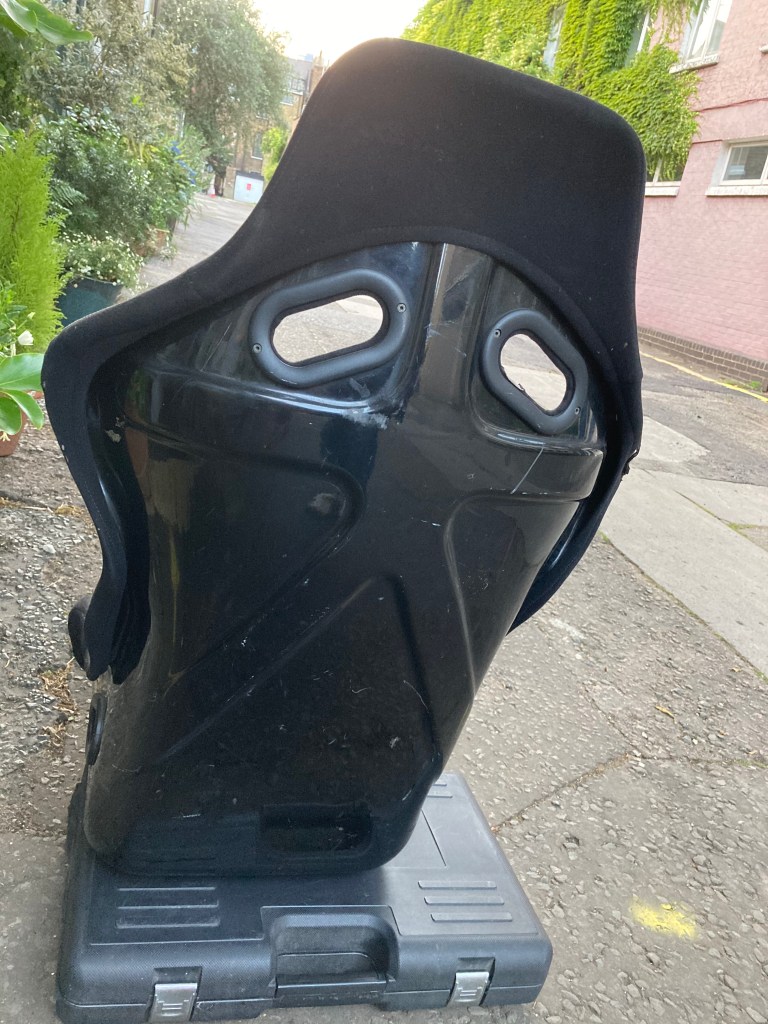
Collected from South London, I got it home and started to strip it straight away to assess the state of things.
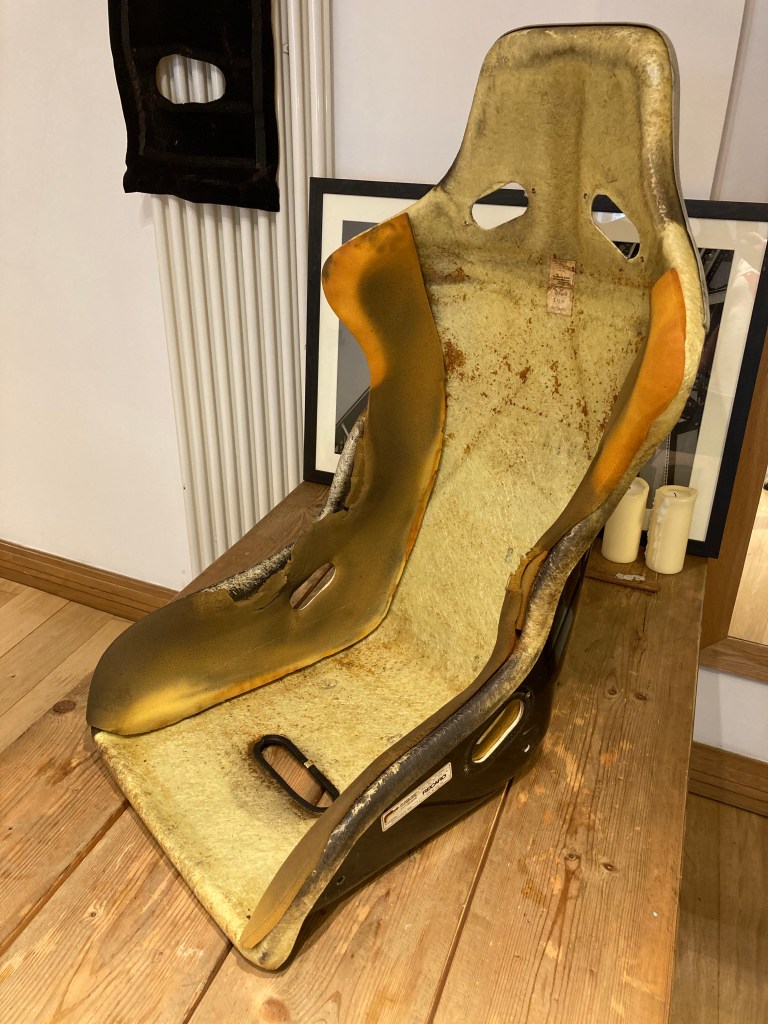

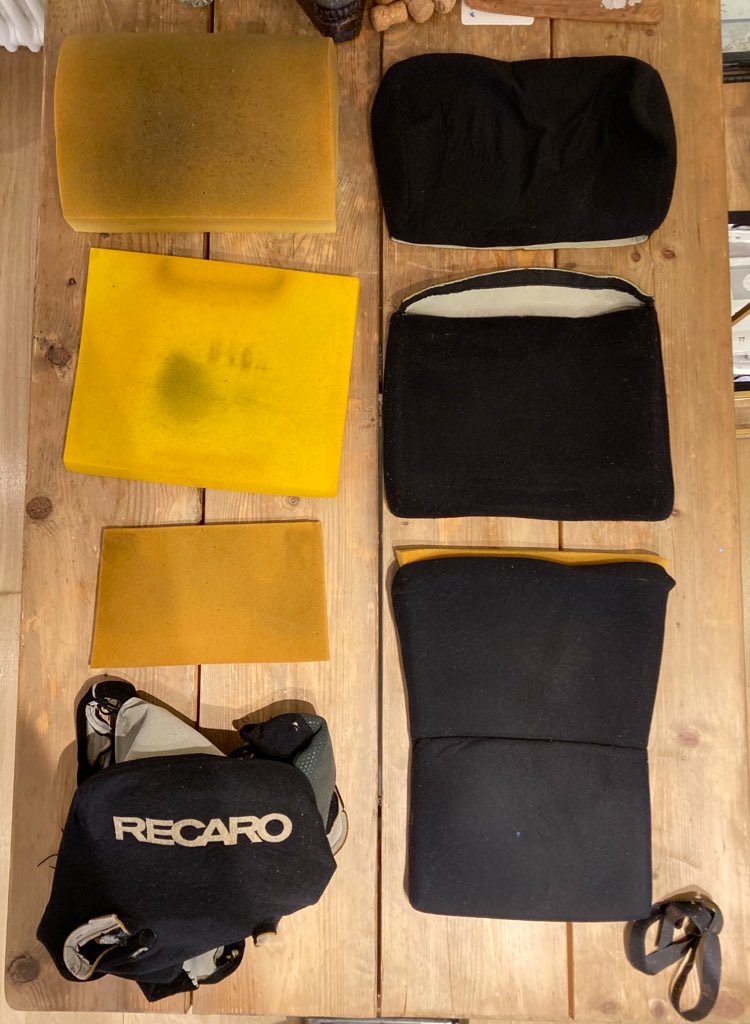
The foam was pretty feral and had seen some sweaty drivers. The cushions had seen the same, as well as bearing the brunt of many a driver [or passenger!] moment. The Cover was bin-worthy, but I knew this already. Besides, having two new Covers would make a matching pair for the 968, a much better result.
Man Maths
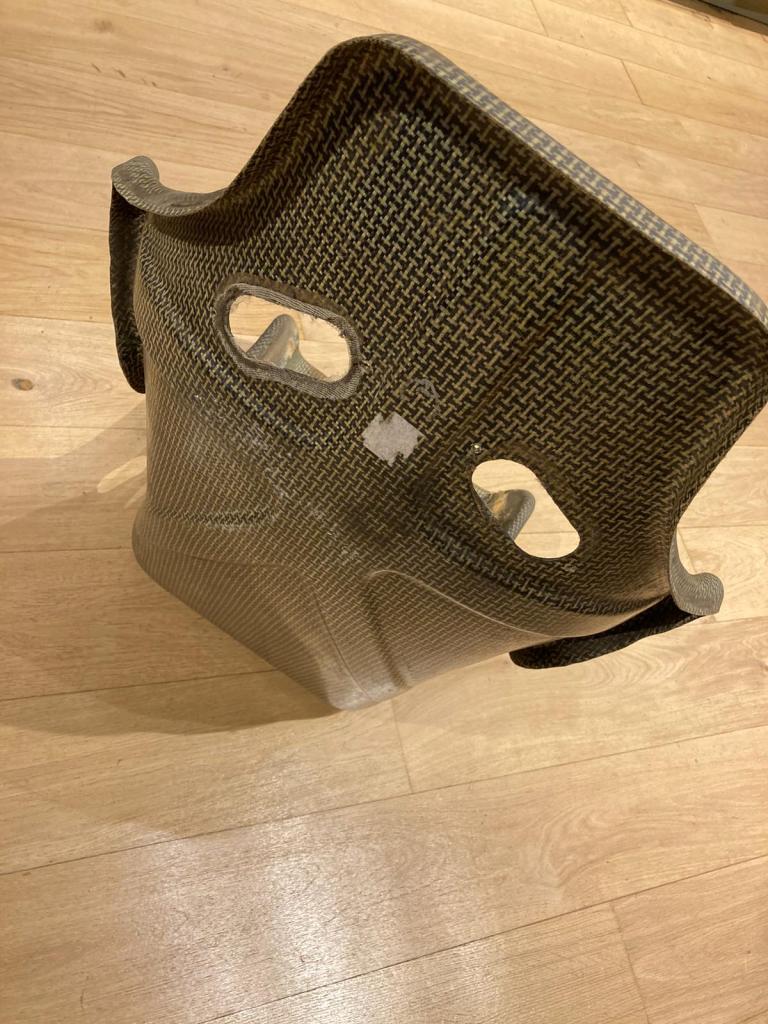
Okay, scoring the second Recaro SPG to make up the pair, wasn’t so much of a bargain, but using Man Maths meant the total cost equated to £239 each; as a friend put it “still bargainous”.


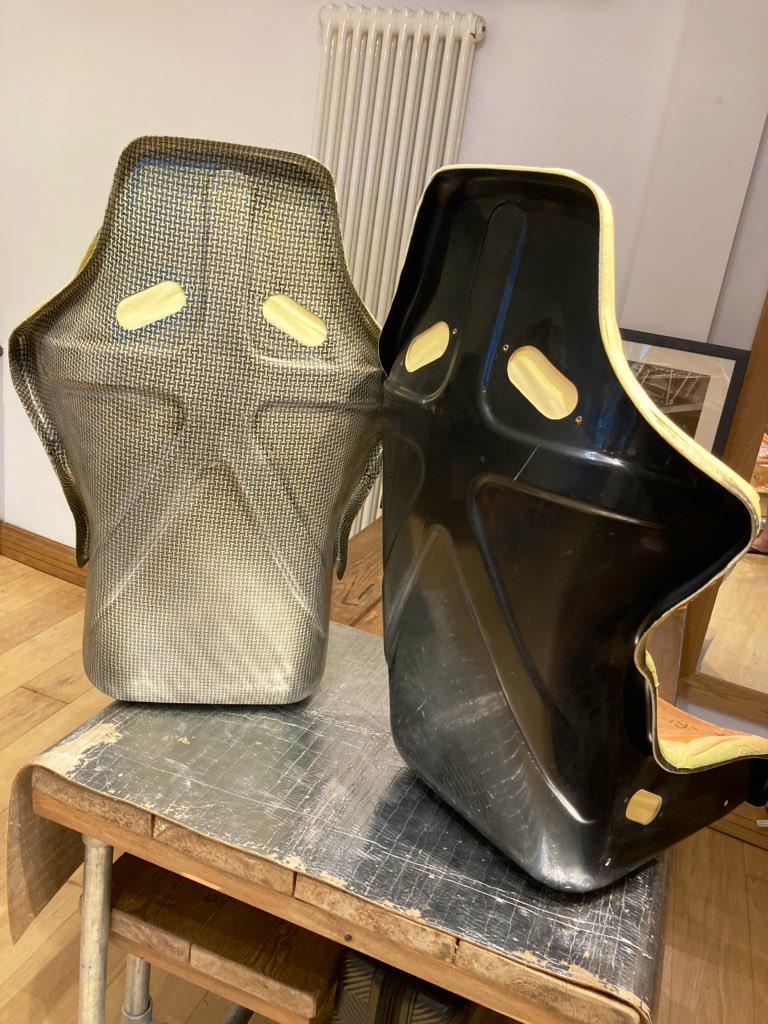
Same deal with the Died In look, feel & whiff of the foam and coverings, but will clean up nicely, and the shell weave is not textured so will finish with smooth paint.


90% Prep
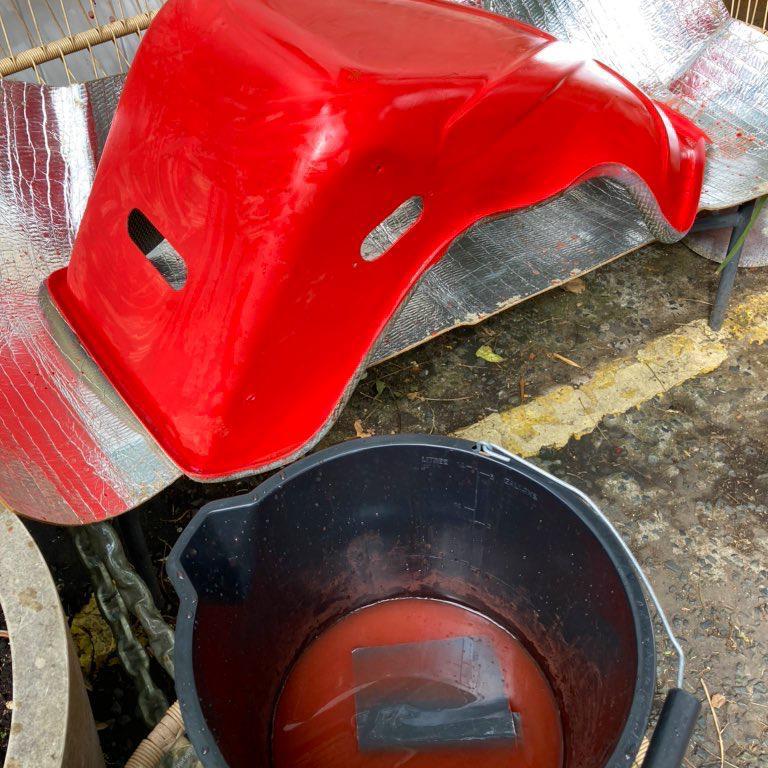
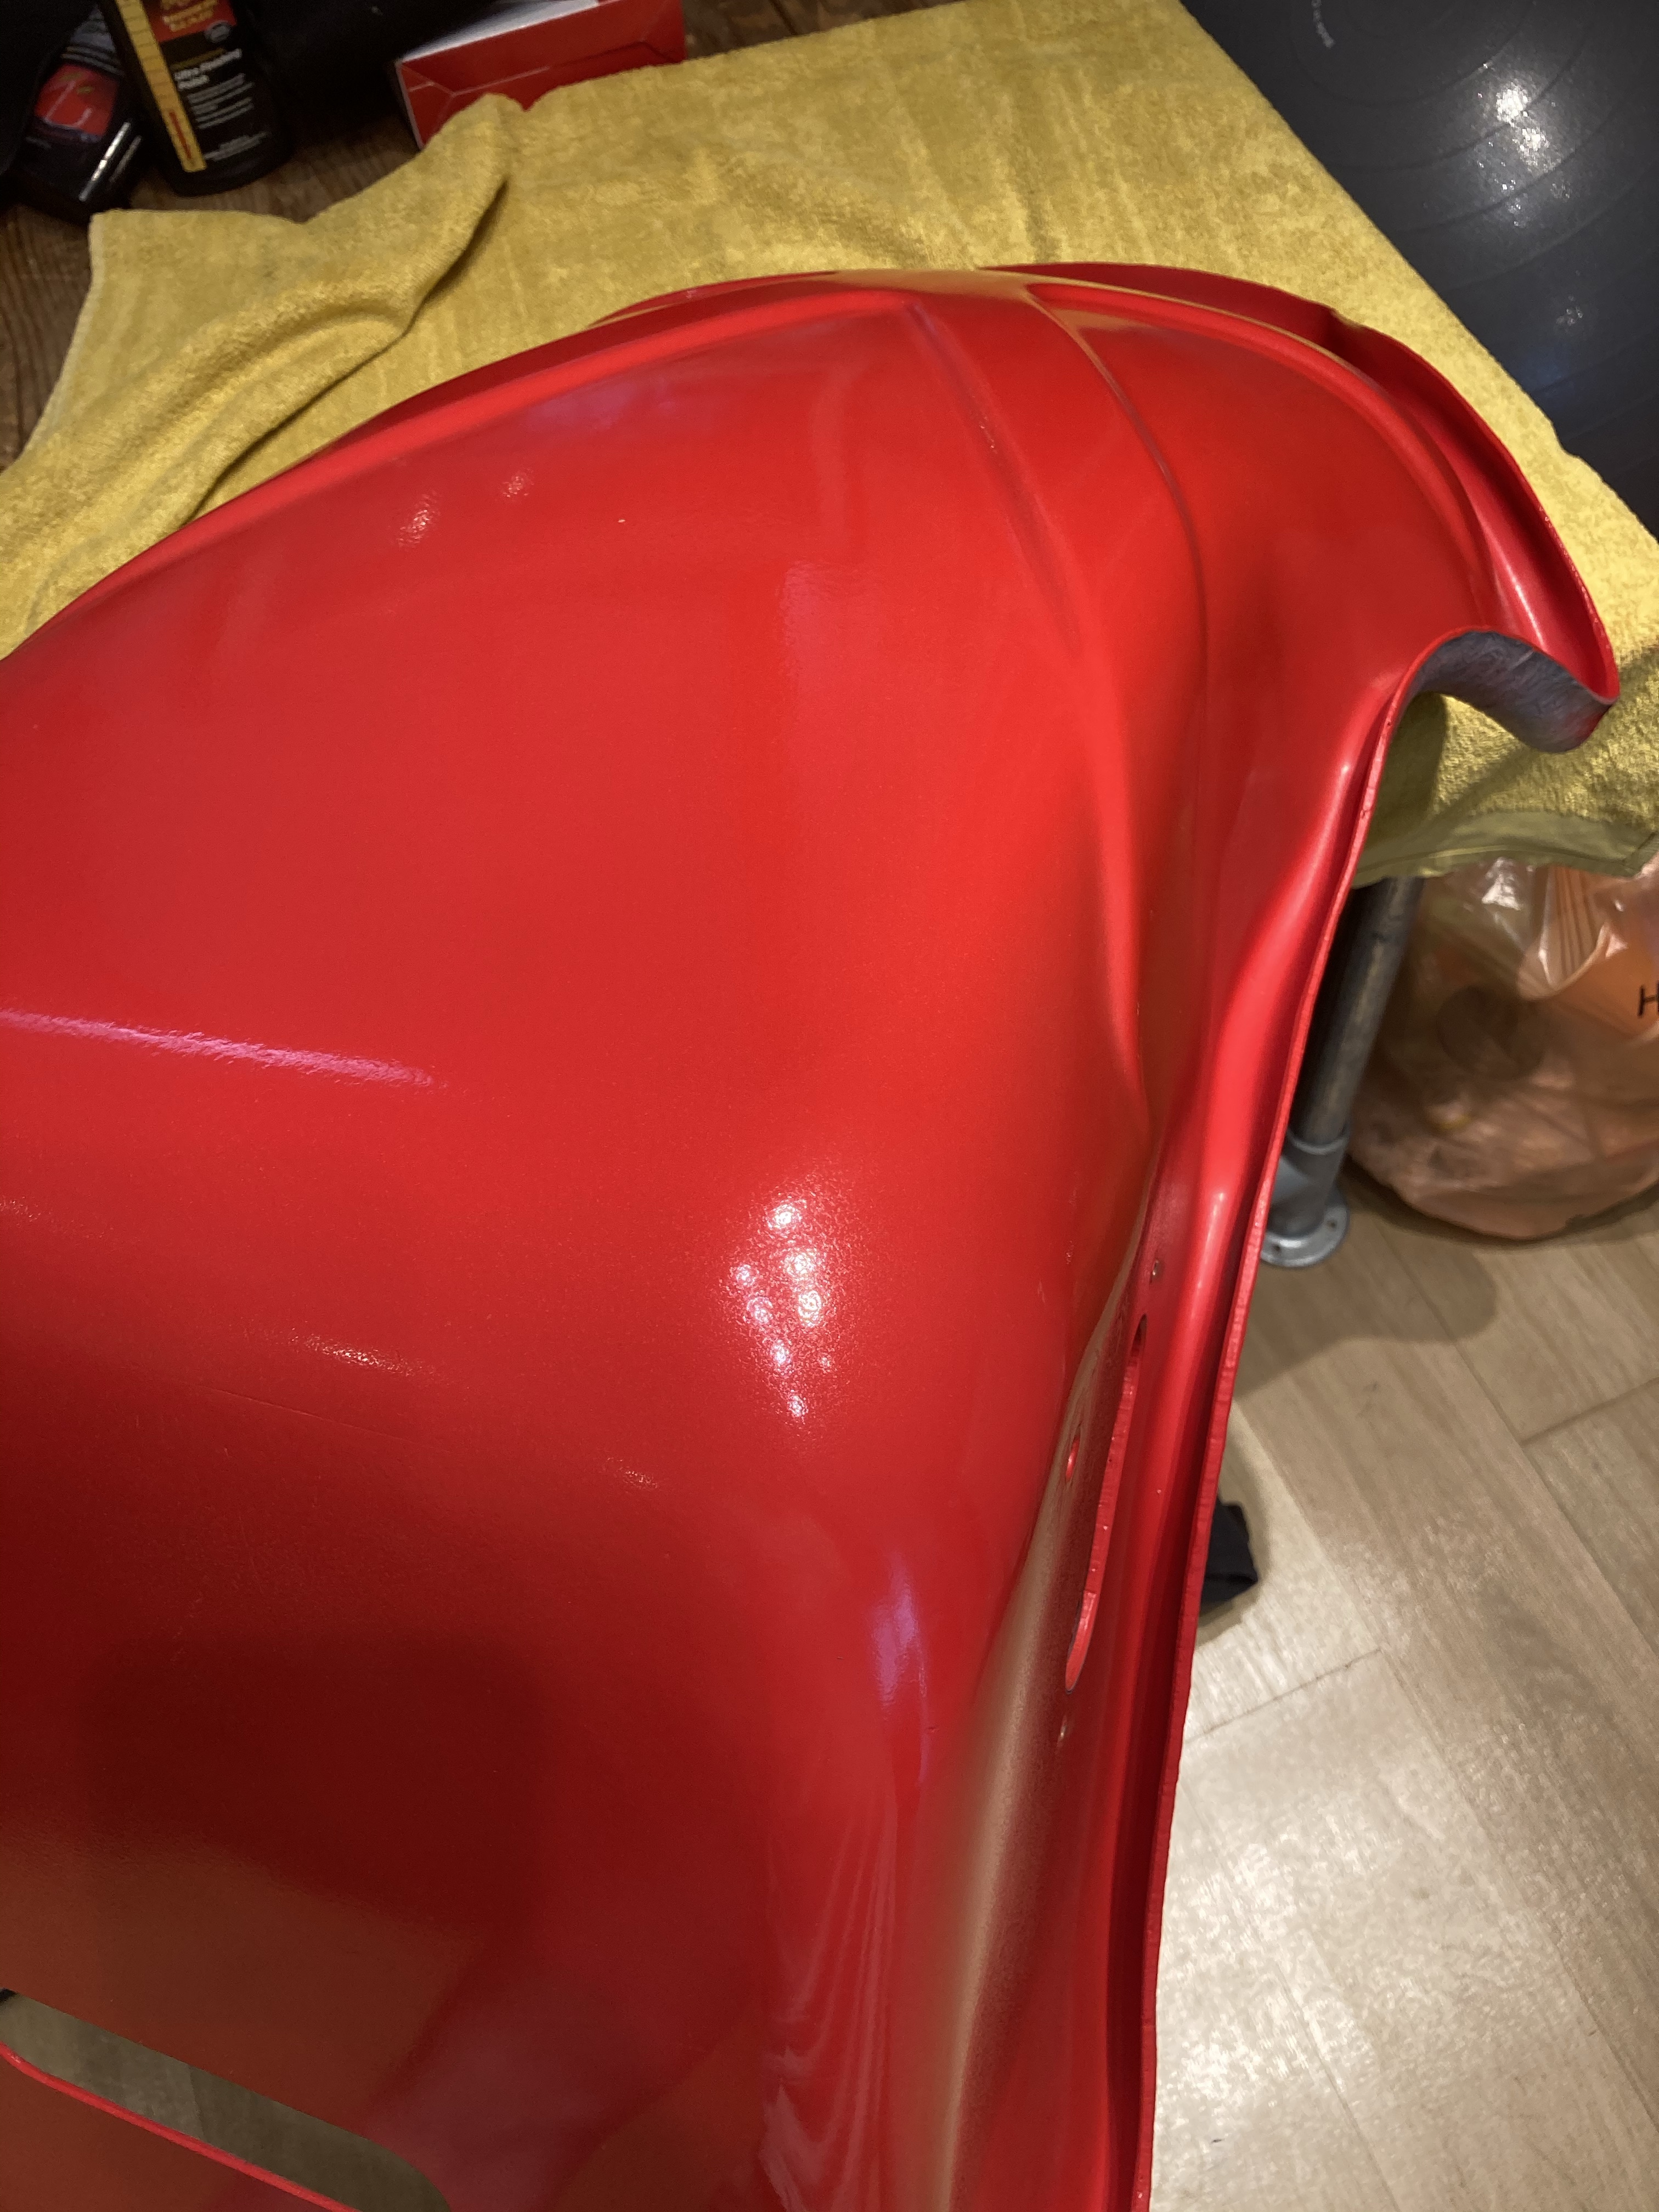
That’s the Deal with Painting anything properly; most of the Labour with Painting is in Preparing for Painting. The Recaros needs cleaning, rubbing down, cleaning again, masking, and cleaning again before any Paint can be applied. All done on the Kitchen Table of course. Get any of the preparation wrong, and when it comes to Paint, it will show, and you will more likely have to start over.
Most of the Labour with Painting
is in Preparing for Paint..
First using a handheld Sander and coarse grit paper, then going over with some 3M surface preparation to smooth the surface a little.
When it comes to the Primer, masking up is not really necessary, but thought I’d limit the amount of overspray to the inside of the Bucket, to which the Foam would need to be glued.

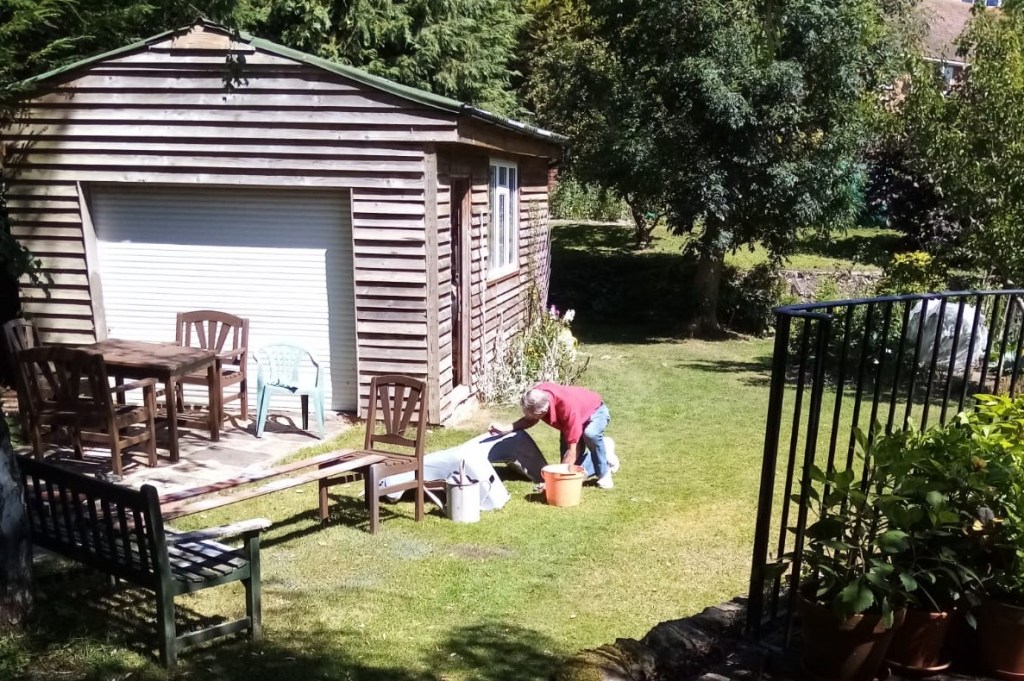
Quick trip to the South Coast with the Prepared Buckets to see my Dad, who you may remember has a bit of an Automotive Past, to use his Compressor and Spray equipment. Whilst it looks fairly agricultural, this setup does the Job rather nicely, and without so much as a Zephyr was fit for purpose.


First coat went on one seat a treat, although was a little thin [too rich on the Thinners], so the second seat had that corrected; slightly thicker and better for it. They looked bloody great. I got back in the 968 and bolted back to the Capitol with a view to coming down the following weekend for Round 2.
Trouble is, my Dad couldn’t wait that long, as this photo sent by my Mum the next day, clearly shows.
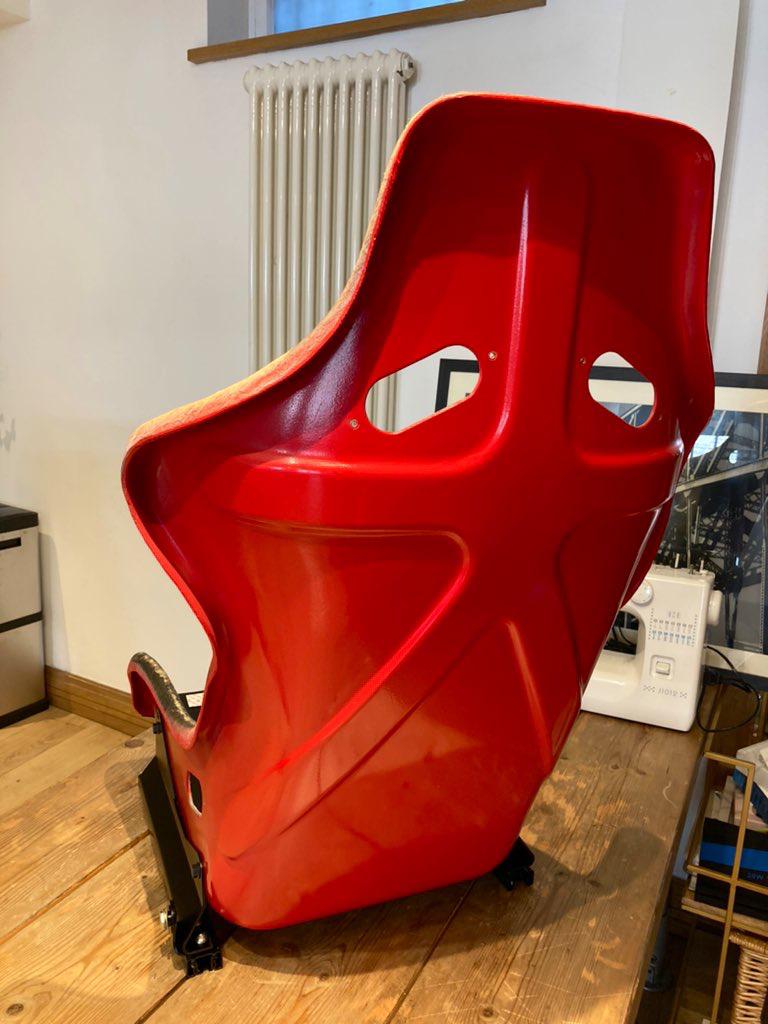
Ready for Red
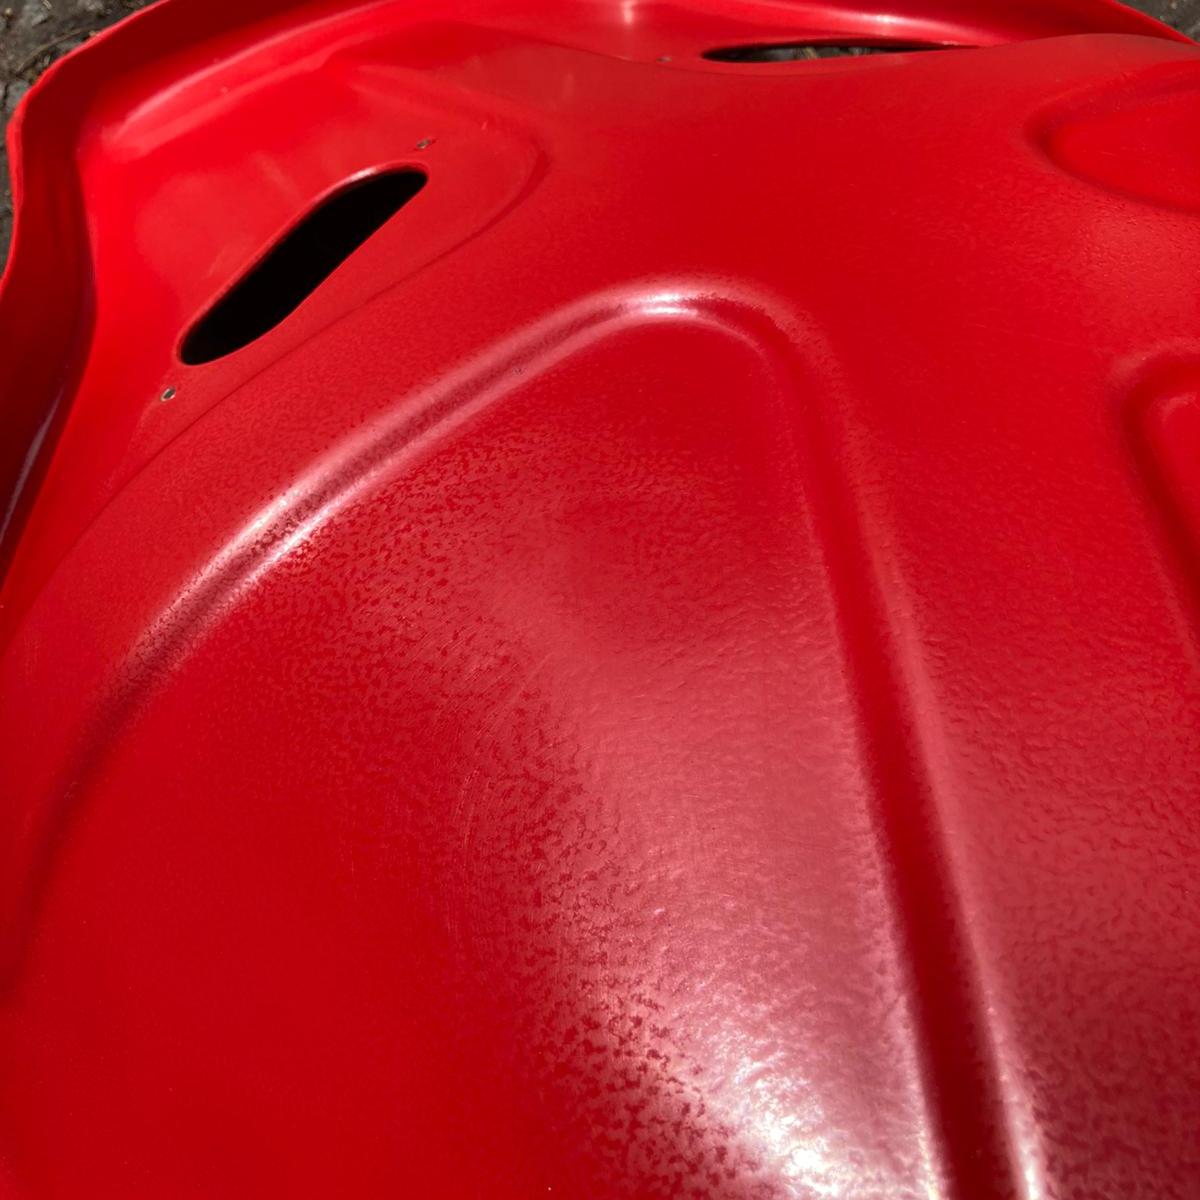
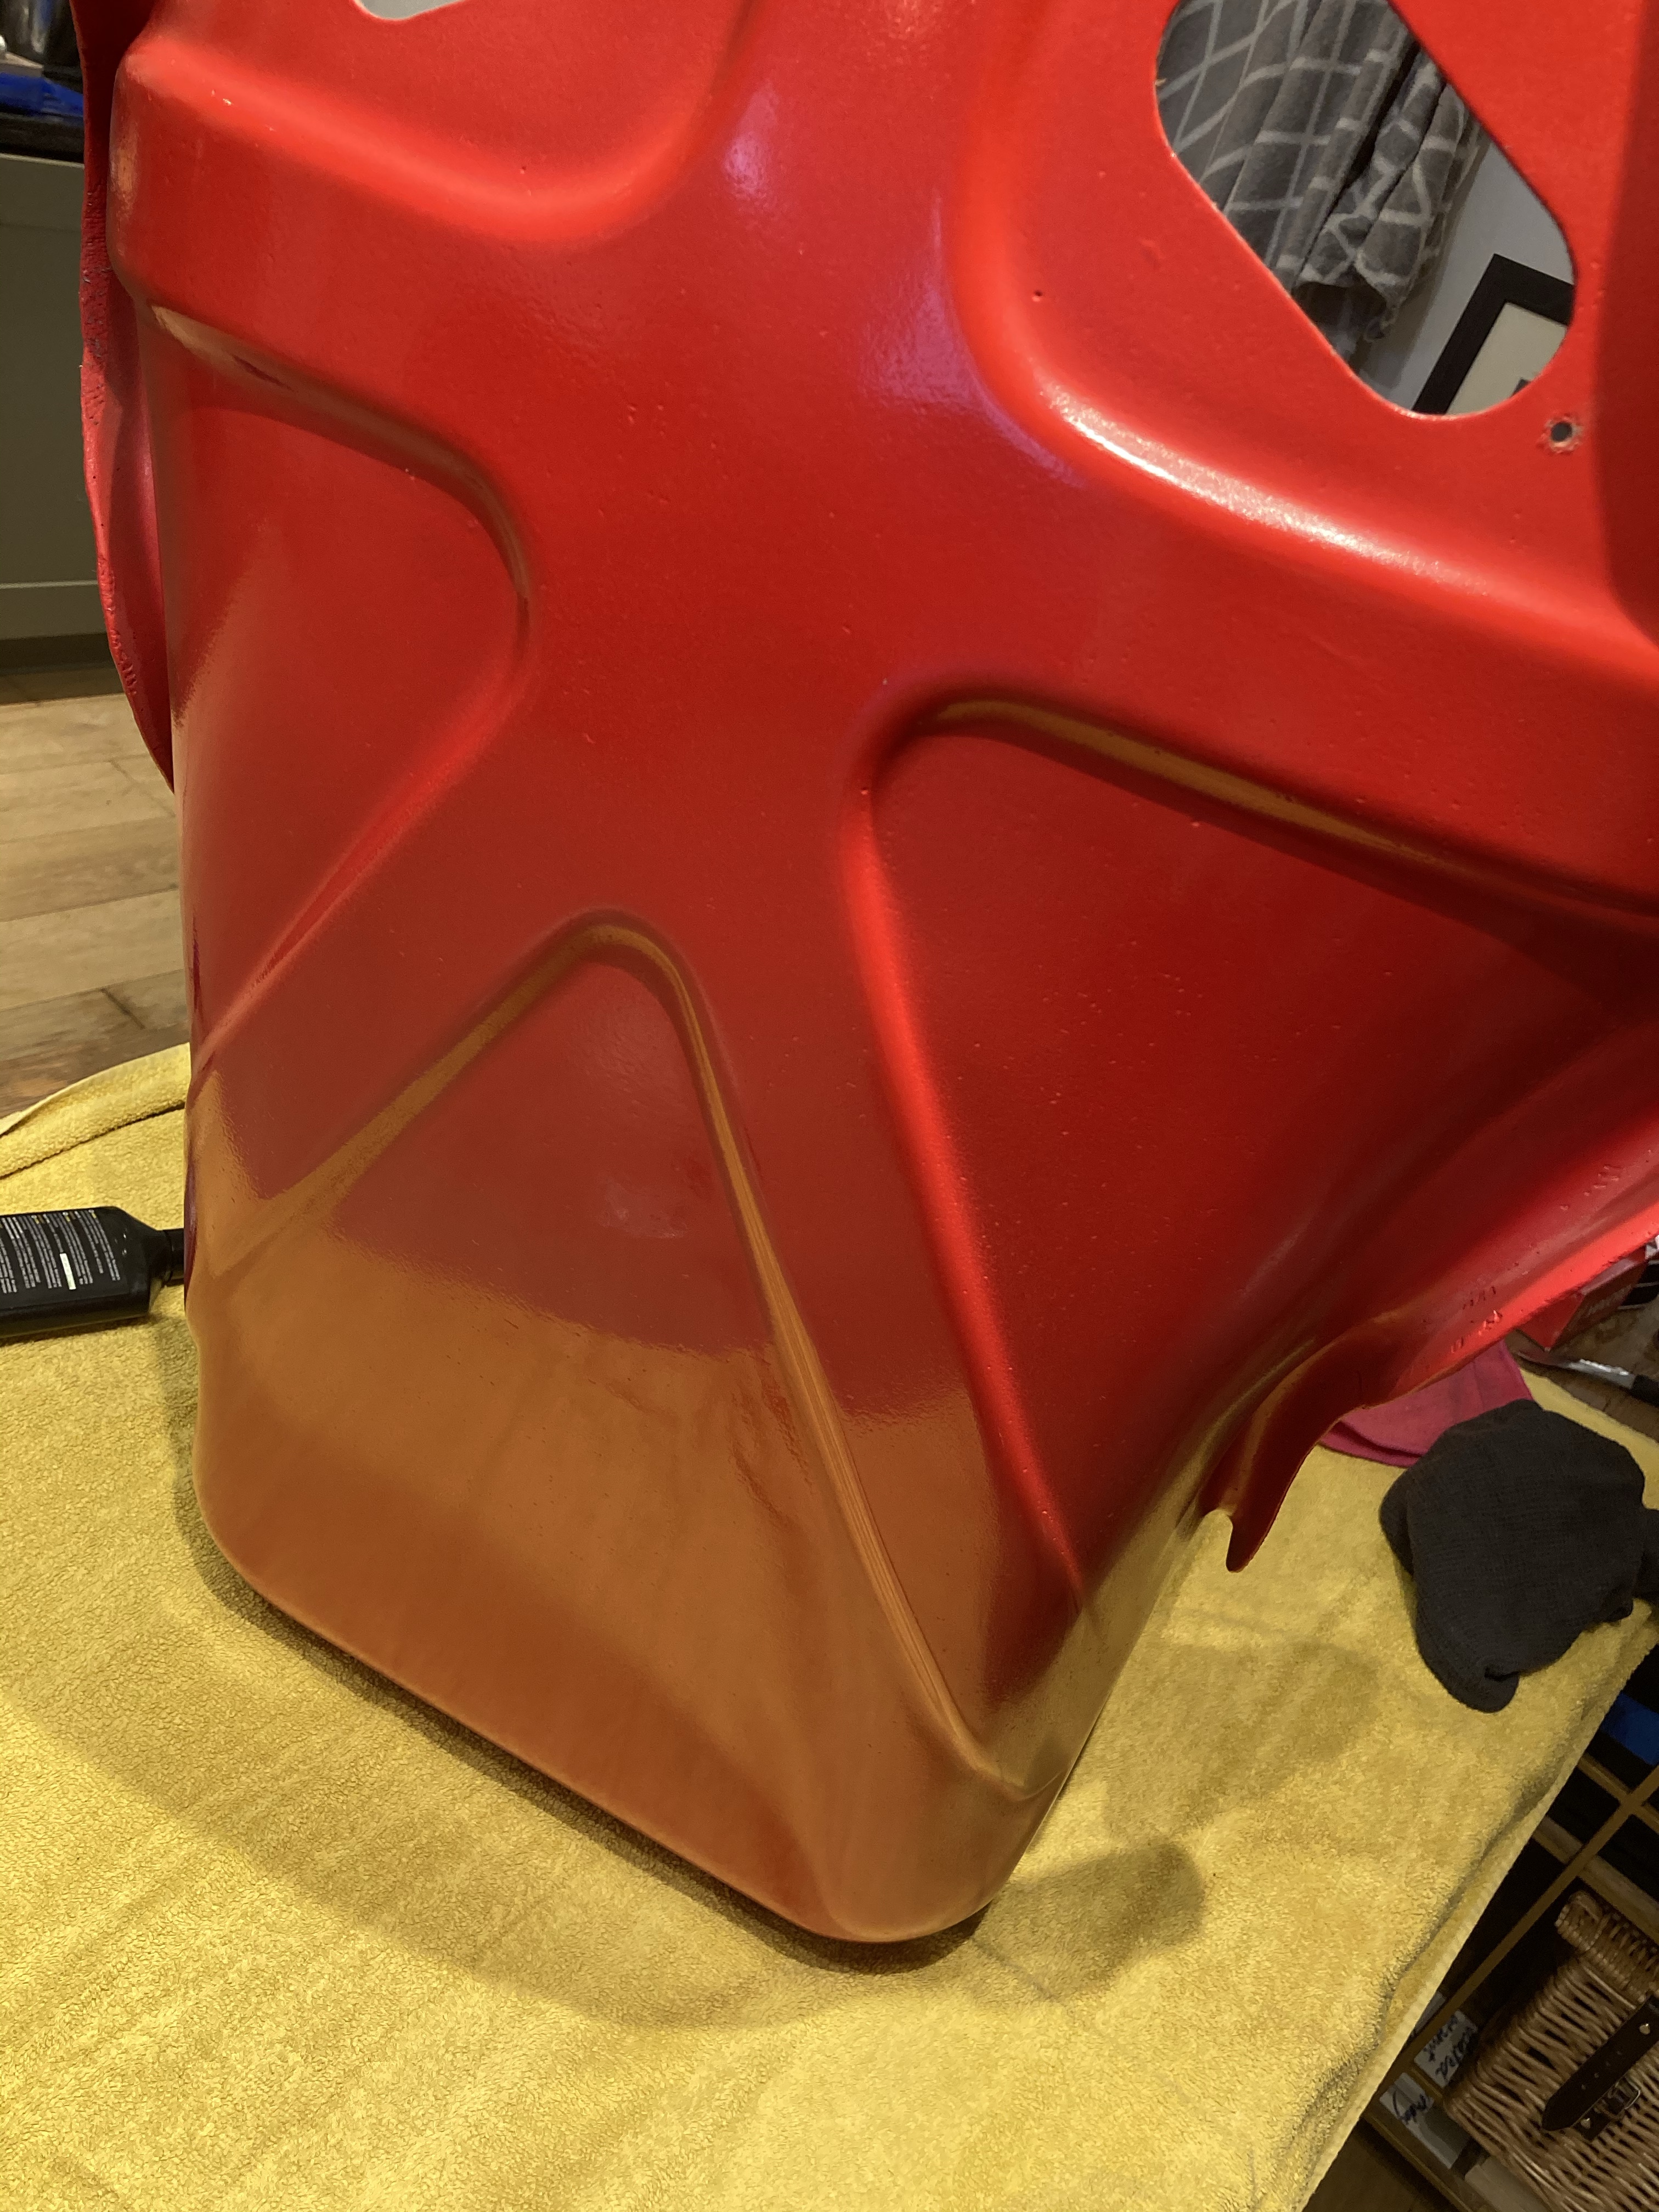
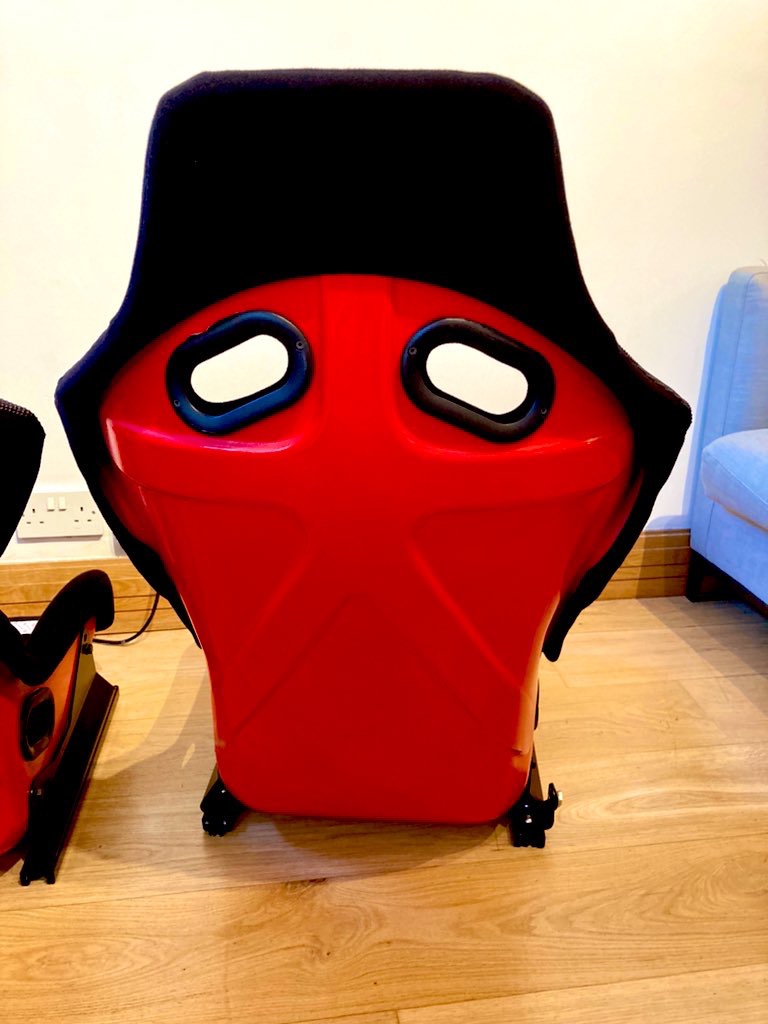
Second trip down South, it was time for the Top Coat, and the Weather turned on again making it perfect for an outdoor job. I discovered that in fact my Dad had applied 3 Coats [!] of Primer to the Recaros, rubbing down each time. They looked fantastic, and ready for Red. Opening the tin, the Guards Red was so bright, almost glowing in the Summer Sun.

Mixing up the Cellulose with the Thinners, my Dad knew the ratio; it’s fair to say that he has done this before, a few times.
..the Guards Red was so bright,
almost glowing in the Summer Sun..


First Coat went on a Treat, Second even better. Nice and thick, no drips. Next Job would be Flatting and Polishing. My Dad showed me the Paper he wanted to use, a very old piece of 600 Wet & Dry which was “almost like paper” it was so worn; perfect for the job apparently..
Flatting & Polishing
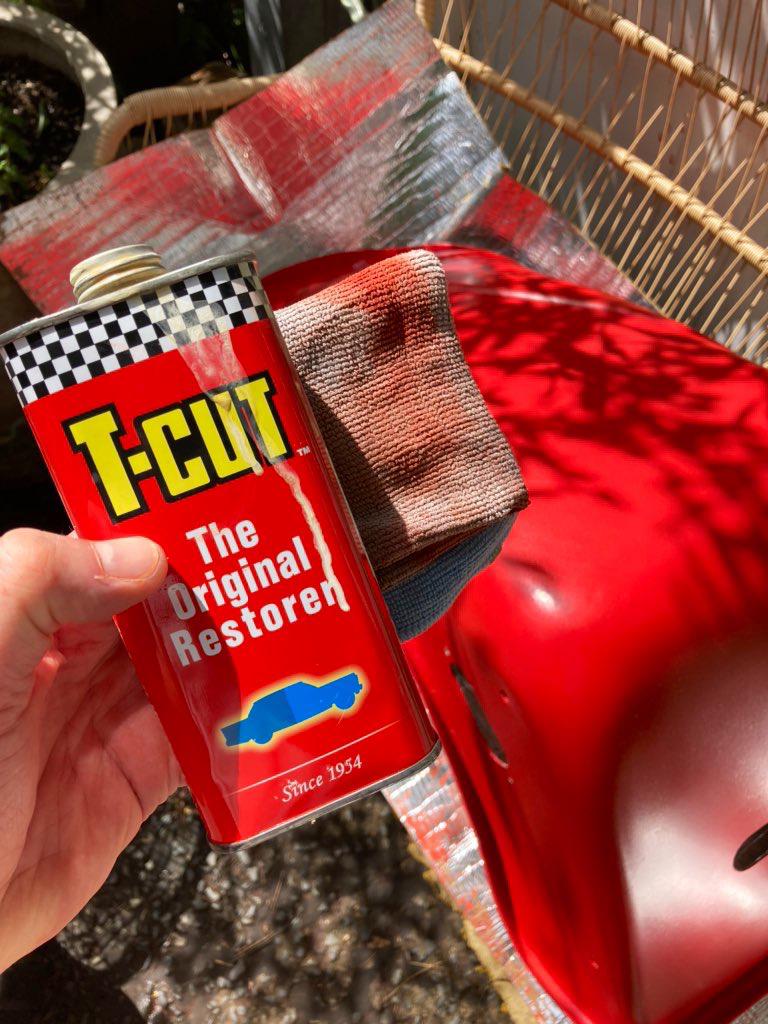
This is a rather delicate process, laborious yet delicate. You really don’t need to go heavy on the paper, in fact, the lighter the better.. This is about smoothing the finish, not taking off paint. Plenty of Water, and use a heavily worn [as mentioned above] piece of 600 Wet & Dry.

T-Cut is perfect for bring that Shine back to the now Dulled surface. Again, go easy, this Paint is new.

For the final Round of Polishing, my Brother lent me his Machine Operated Polisher, and some Finishing Paste. This stuff is awesome. I have to admit I didn’t know how to do it, so after some instruction, this is the process..
- Set MOP to lowest setting [in this case “1” of “5”]
- Mount Soft Pad to MOP
- Squeeze/squirt some Paste onto the Pad and then massage that in with your Fingers
- Place Pad onto to Surface
- Turn On and massage the surface for a minute
- Turn Off, inspect Surface.
- Go to 3. or 4. as necessary..

Mt. Buckle
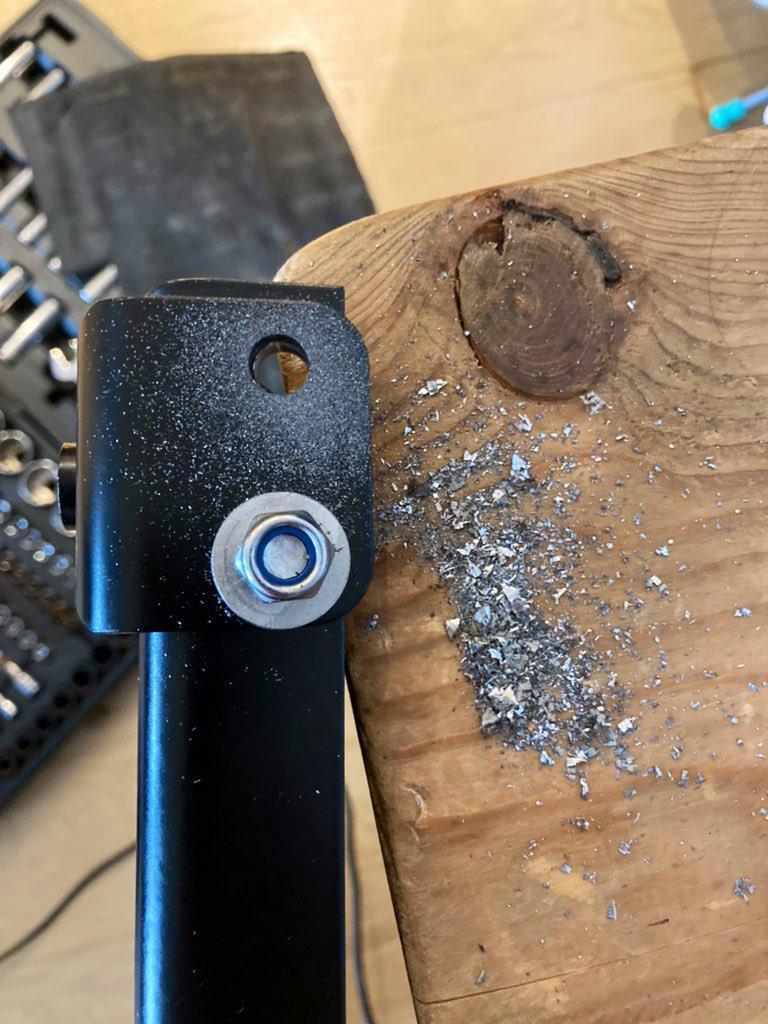
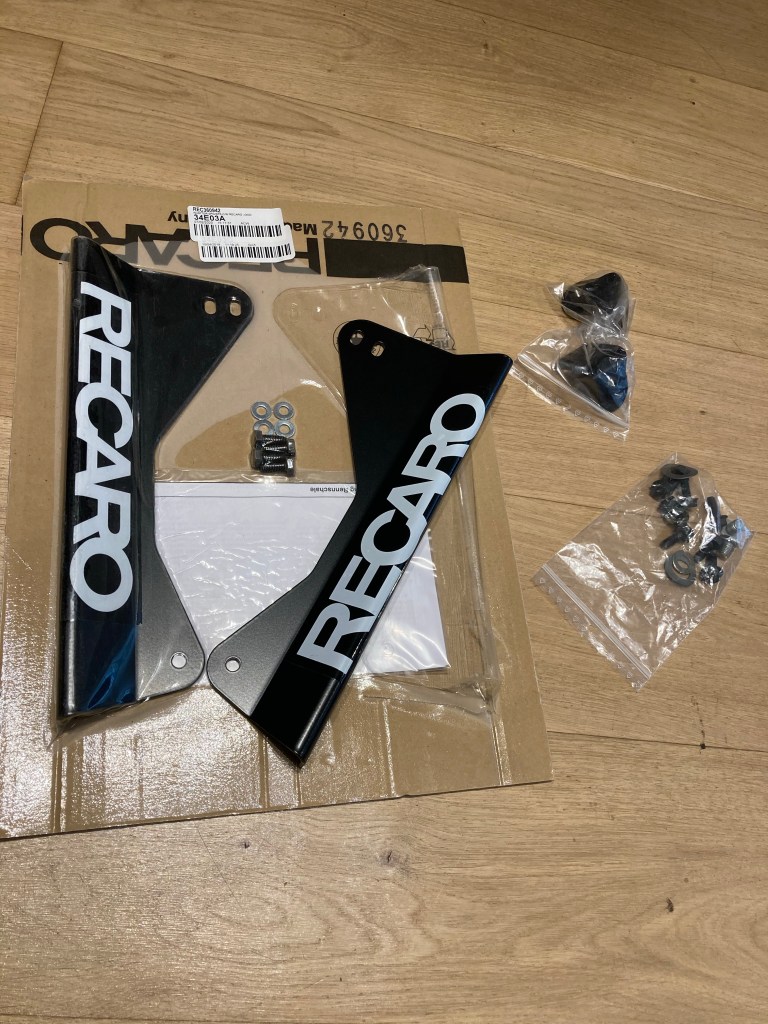
Seat Belts. They’re quite important. In any Car. And since the life I save may be my own [and my passenger’s], I chose not to cut a corner on the Front Seat Belt Socket bracket. You can select all the pieces from Rose Passion, including the necessary fasteners. Deep breath. And click Pay Now.

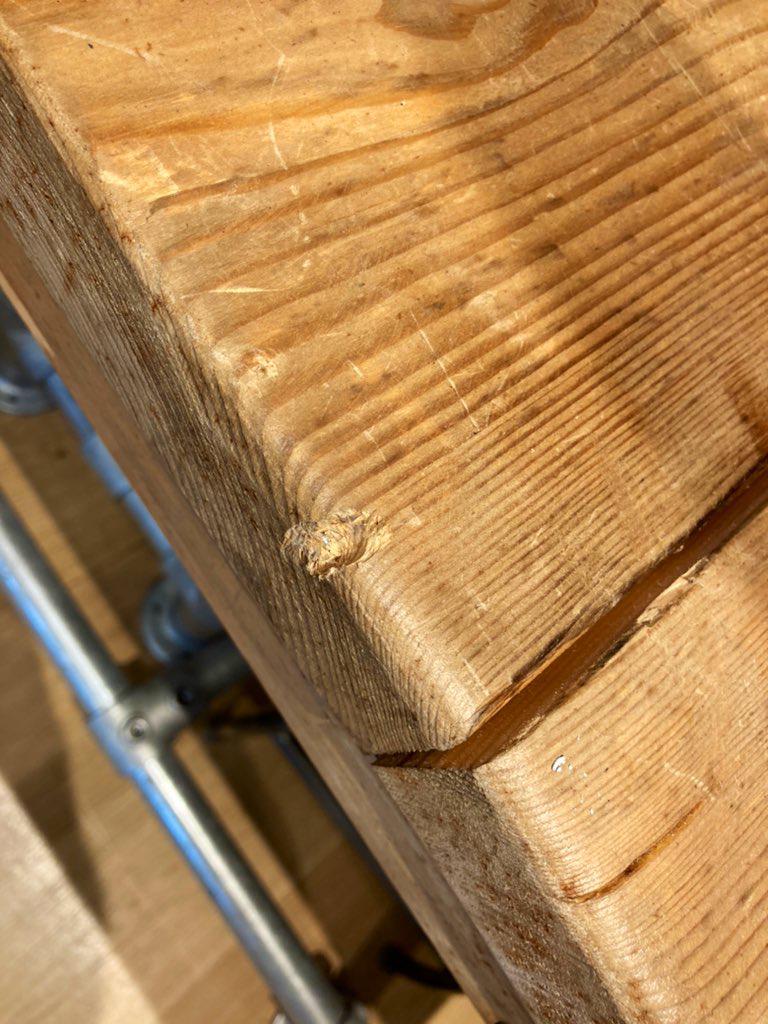
Mounting the Bracket requires some compensatory washers at the other 3 points where the Side Mounts bolt to the Rails; the Bracket is 3mm thick, so a couple of regular M8 washers should do the trick. Drilling is required however as the Rails do not have the two holes required to seat the base of the Bracket to the rear of the Rails. Wearing appropriate Safety Footwear and drilling a hole in Dining Room table in the process of course..
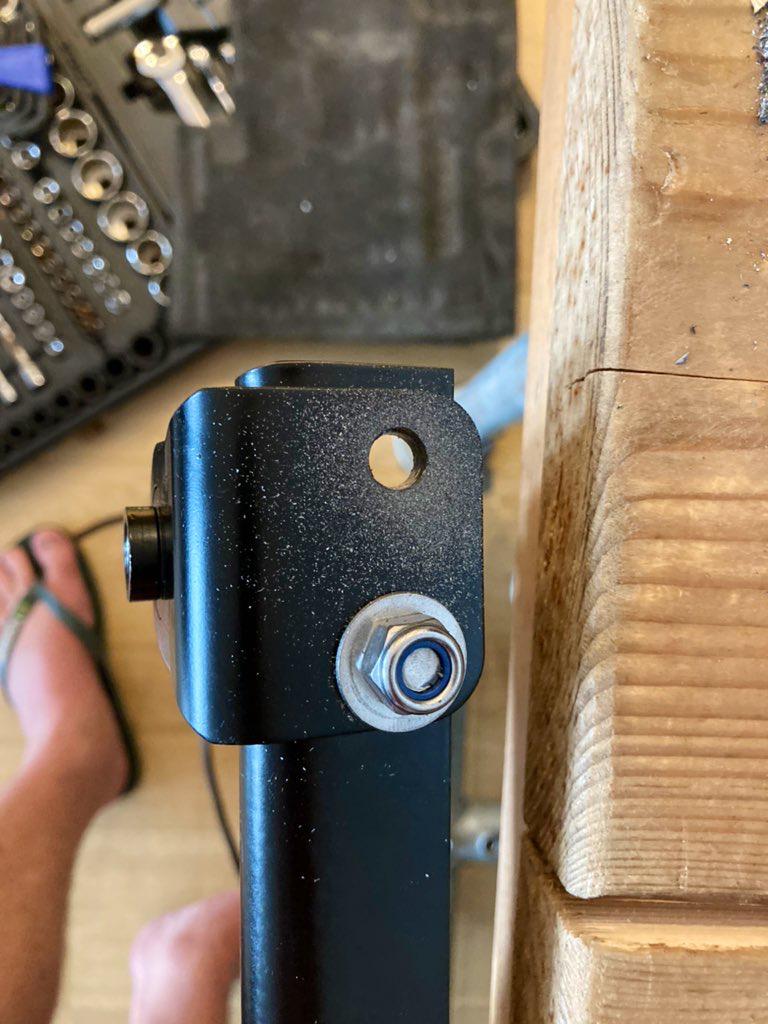
..the life I save may be my own..
I used official Recaro Side Mounts and Rails for this; I needed FIA assured testing and quality. Pricey true, but as mentioned above, this was not an area to cut Costs on. I did peel those awful RECARO decals from the Side Mounts however.
Bolt it all together, using a Spirit Level to assess that the Upper Seat Back is vertical.


Don’t for get, of course, that you need to bolt the Seat Belt Socket bracket to Left of the Driveside Seat and the Right of the Passenger Seat.
Insert Ridiculous Price Here
This is where Porsche Tax is at its best / most bonkers. The piece of thin Foam that is affixed to the inside of the Recaro Shell onto which the dorsal, lumbar, bottom and thigh cushions attach to had seen better days. In fact, they weren’t going to see any more days. Browsing the Rose Passion emporium for replacement parts revealed an eye-watering £213.69 a piece, before VAT, before shipping, I spat a mouthful of 1990 Chateau Petrus Pomerol all over the laptop Screen. I needed to get creative, scouring Ebay successfully for a rather large [approx. 2m by 2m] “roll of black sticky backed neoprene foam backing sponge stickyback 1mm” [sic] foam going on Ebay for £1.20. Purchasing a roll of Velcro, the total saving was somewhere north of £400. Not. Bad. I poured myself another Glass.
..the total saving was somewhere north of £400.
Foam Call
I used to work in Angel Islington in London for a couple of years, and, commuting to work by Bike, I would sometimes pick a route that would see me cranking up the Pentonville Road, past Pentonville Foam & Rubber. You can imagine [or not] my excitement at discovering I needed to go to this Shop to source replacement Foam for the Recaros; it was almost a Dream come true. Or perhaps a second thought. Either way, taking a sample to the Shop, and then having a piece cut large enough to cover all the individual pieces required, cost a bargainous £16.
Whilst the old Foam had pretty much requested asylum in the back room, it was shot also, and with a marker pen [not costed] and a pair of Kitchen Scissors light work was made of the newbies.

I used a specialist 3M Foam Fast Adhesive Product to affix the Foam to the Buckets; I didn’t want regular Contact Adhesive to soak into the Foam; this stuff is perfect as it sits on the Foam surface.
Public Health Warning Ensure the area you are working in is Very Well Ventilated. Doors open, Windows open, Electric Fan on, for a through-flow of Fresh Air.
Give the Foam Piece a comprehensive coating; this stuff doesn’t need to be removed again.
I referred to old Photos I had taken of the Foam positioning to get it right, important pieces cut from new Foam like these Kidney Punchers.
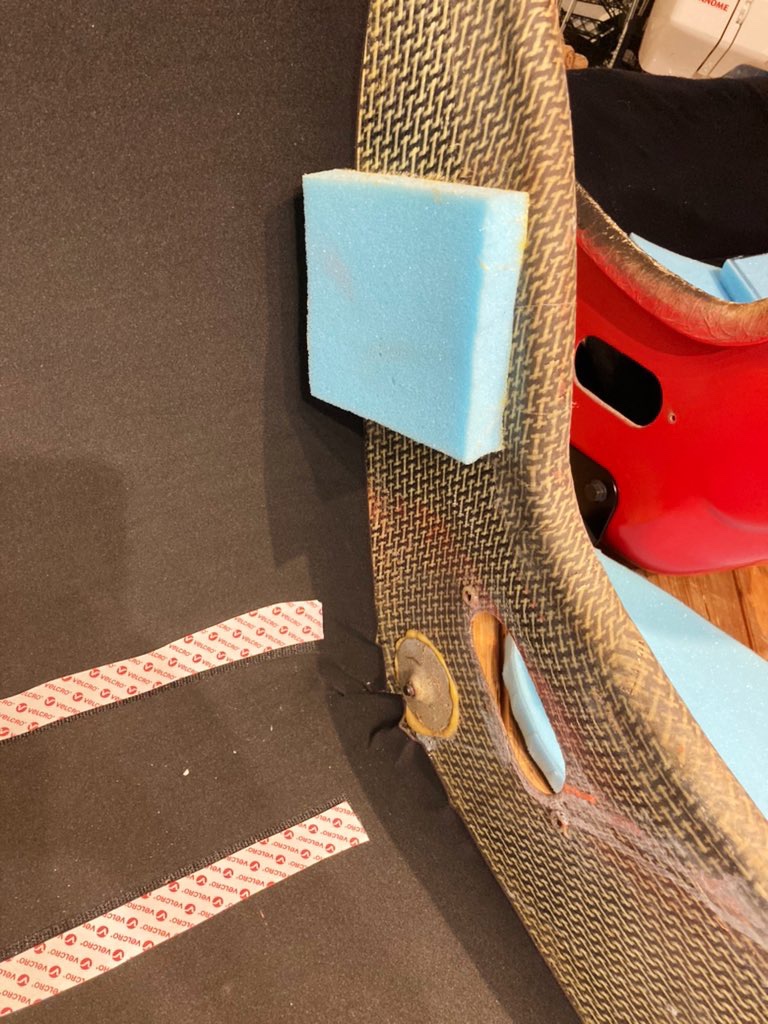


Tackling one Bucket at a time, and laying out the Foam pieces required, made it easy to not get it wrong and spray the wrong side of the Foam piece!
172,800 Minutes Later..
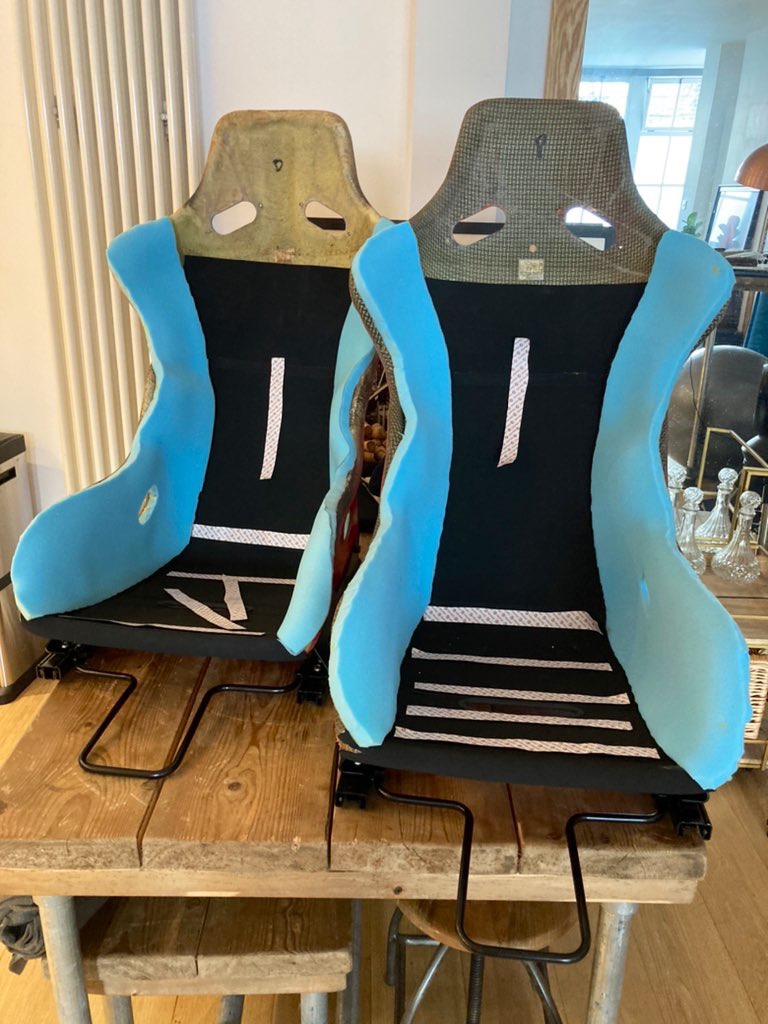
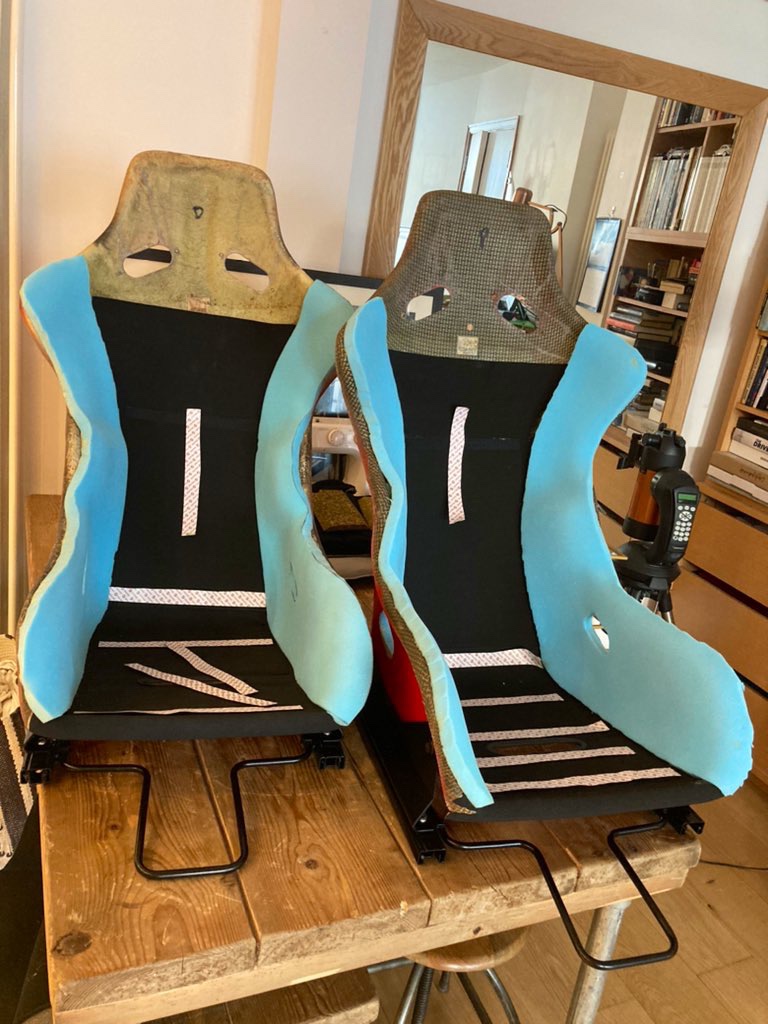
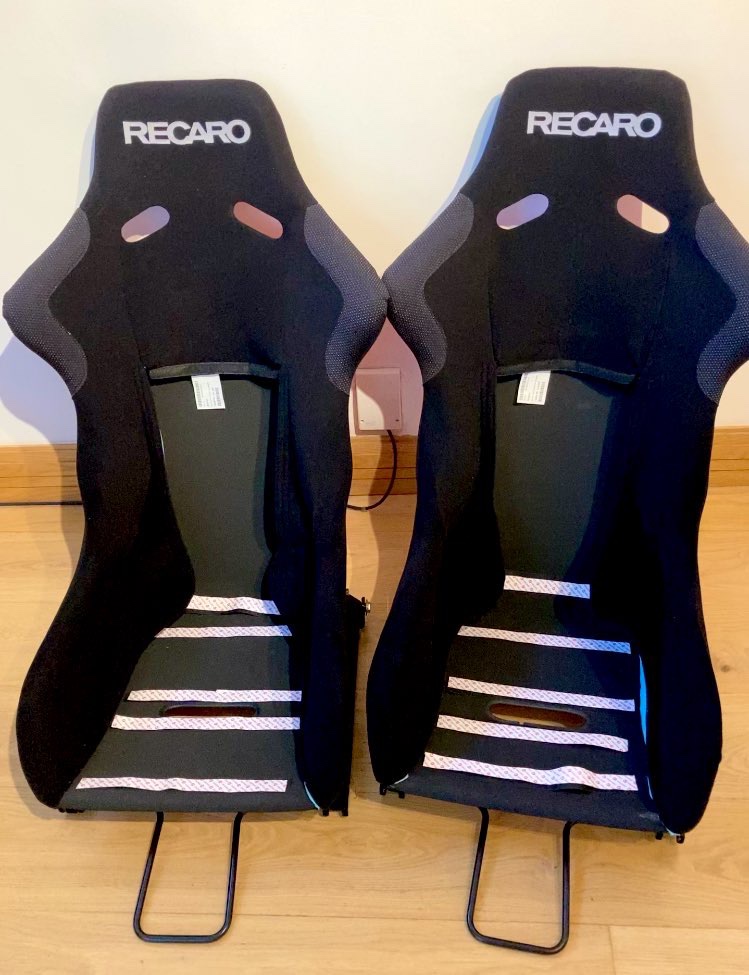
I don’t like moaning, nobody likes a moaner, but boy did this make me moan.. Coronavirus Strikes; again. The Recaro Factory in Germany shut down all production, which meant that despite ordering them on June 9, the new Recaro Nomax / Perlon Seat Covers didn’t arrive until October 7; 172,800 minutes later. Bonkers.

Anyways, when they arrived on an October morning, I felt as though Christmas had come early.
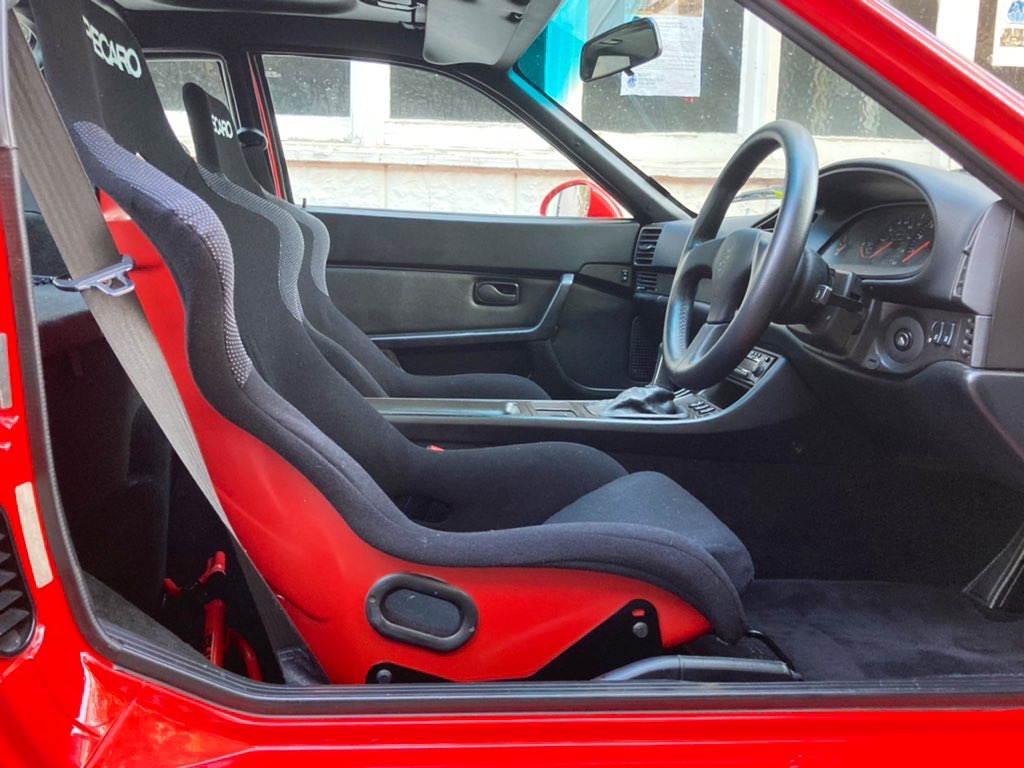
I have never covered Recaro Seats before, but I knew that I would face a battle when it came to the tension wire that needs seating in the channel around the edge of the shell. Where to start..? What to do first..? Well, I decided that the Harness holes would be the first thing to tackle since they needed be fitted without being under tension.

Place the Cover over the Head of the Shell, and pull firmly into shape and place. This cannot be removed once you have completed the Harness hole fixing. Gluing the pieces of material [that are used to keep the Covers in place by the plastic Donuts] to the outside of the Shell was a tricky job. I wore some Surgical Gloves to maintain important microns from becoming one with the Shell and Cover, then bolting the Donuts in place.
Next, pull the Cover over the Shoulders, and into place as much as possible, ensuring that the Wire has equal lengths protruding from the end of the Cover at its exit holes. Once you have put as much of the Wired Cover in its Gutter, but still are able to connect the two ends with the tension Spring, do so.
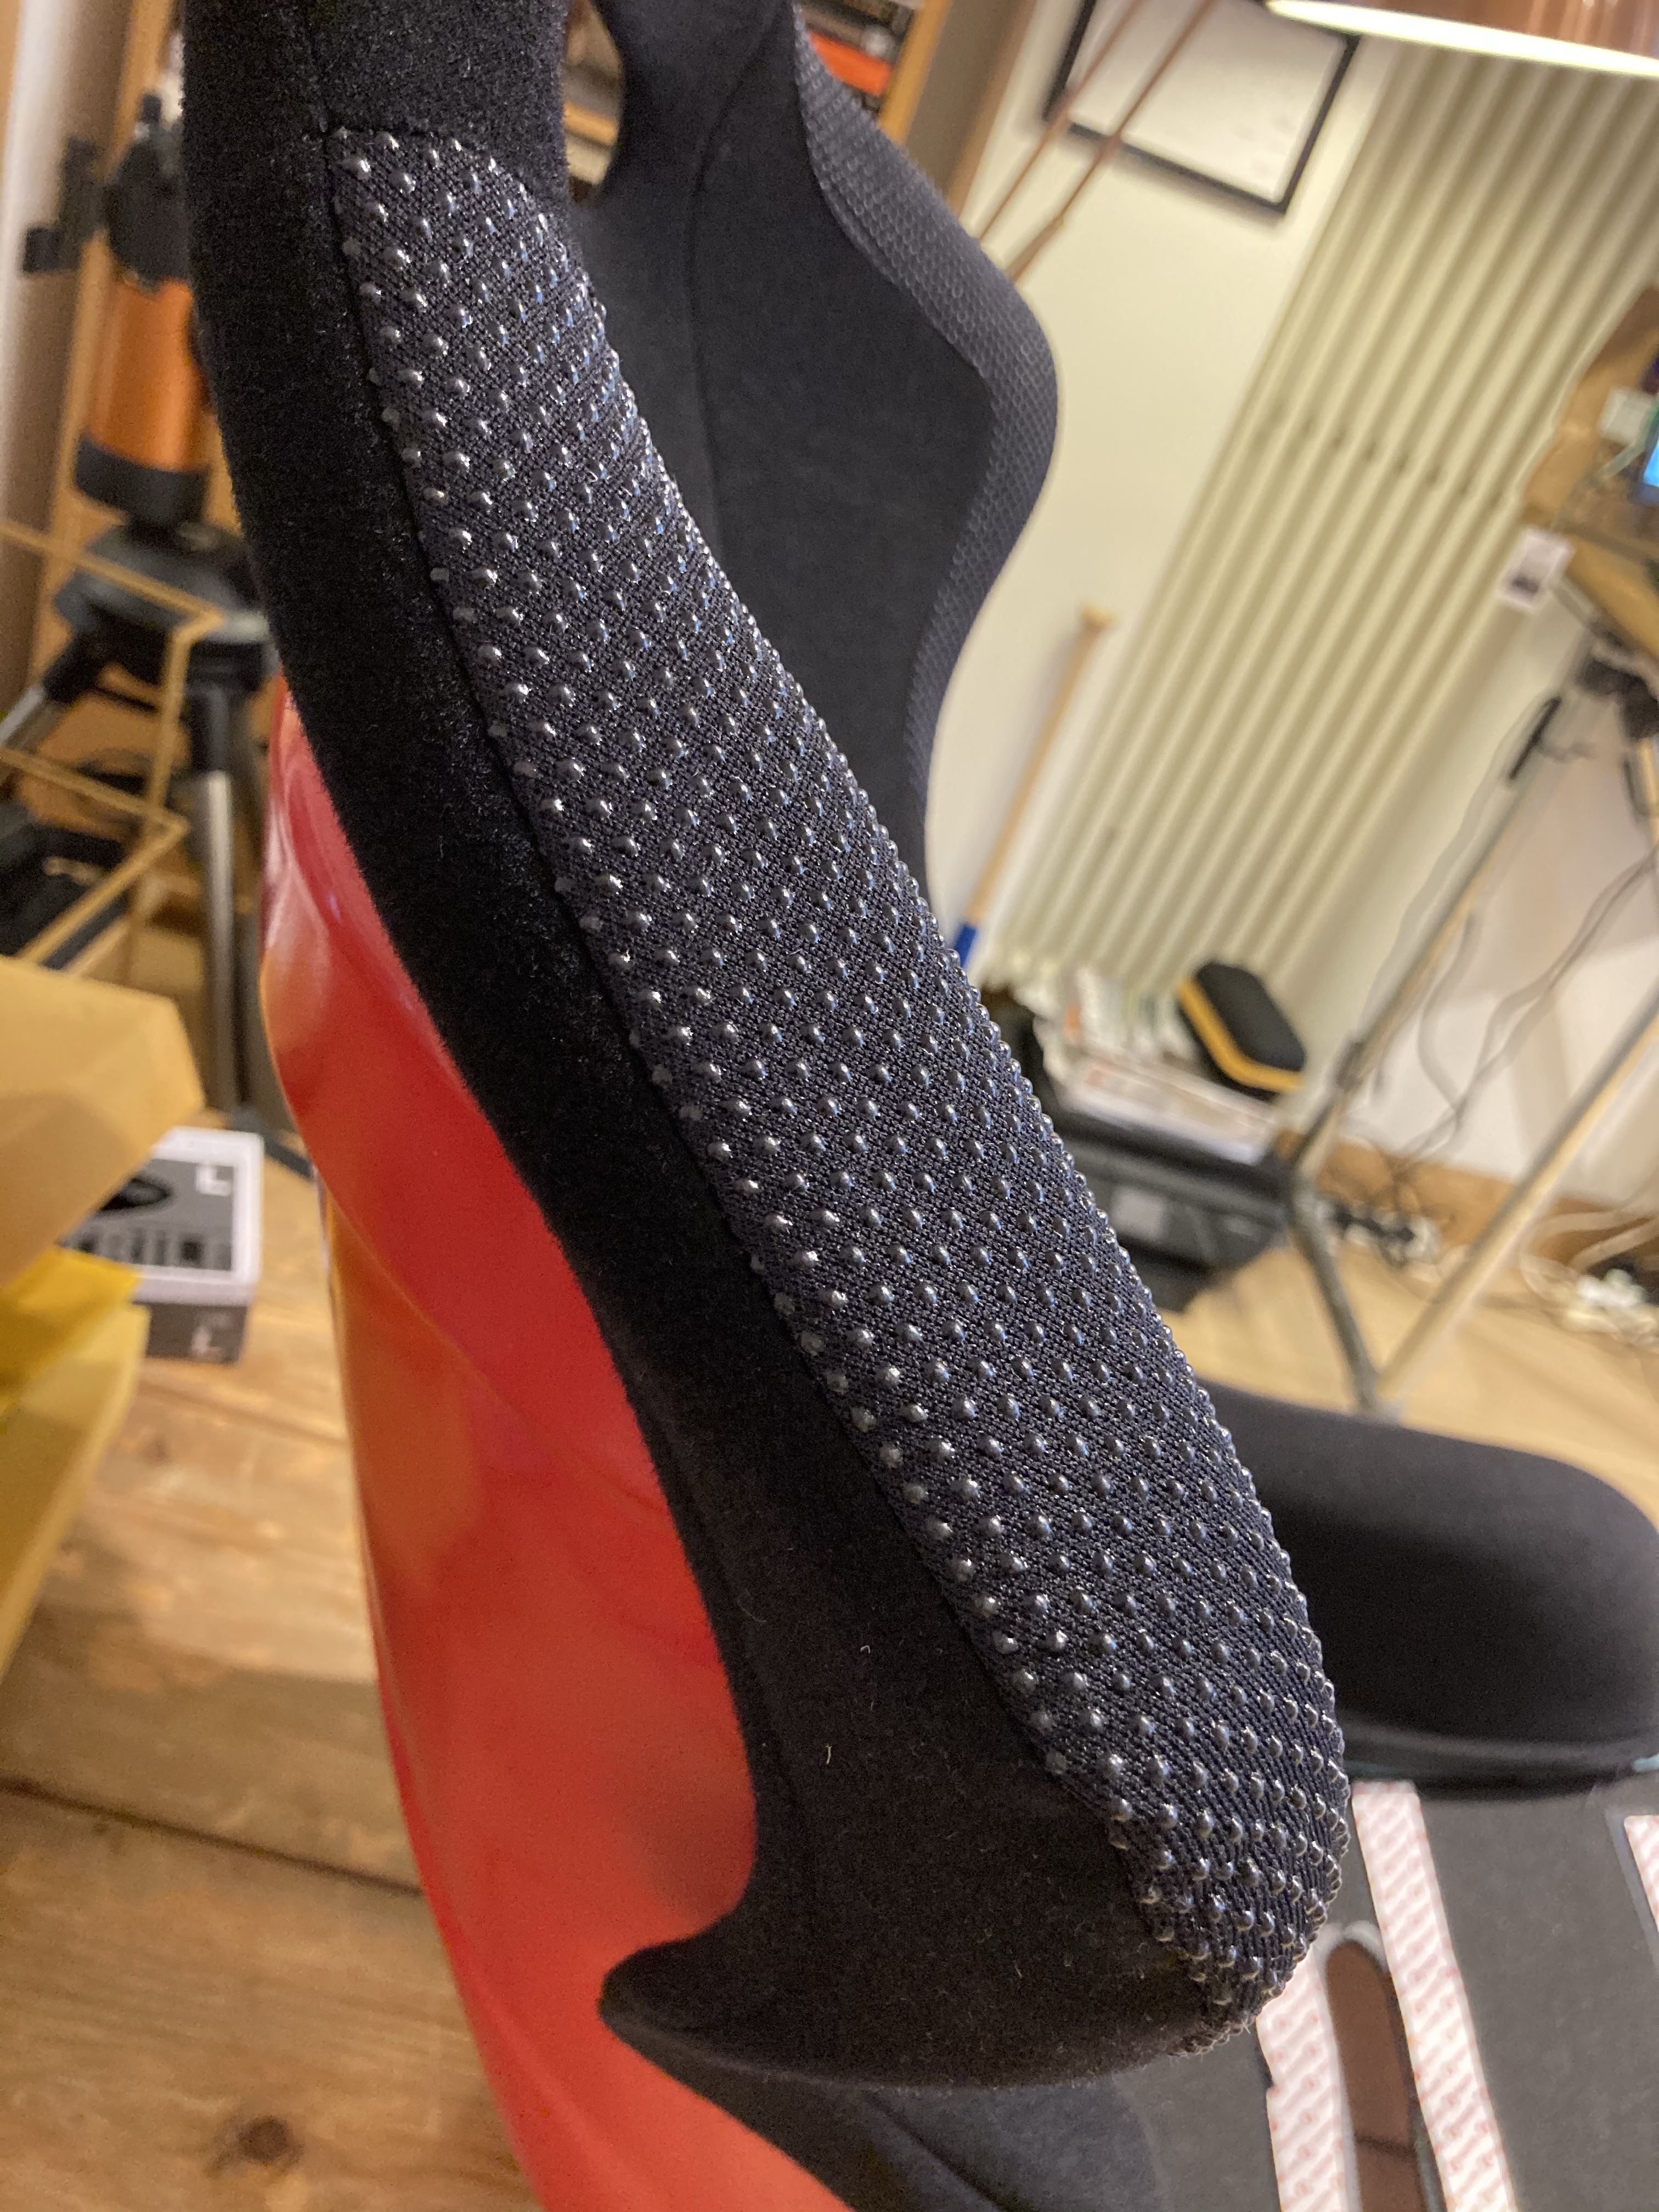

Then it is a case of pulling the Wired Cover into the Shell Gutter, against the Spring’s tension. Not easy, but not impossible, and definitely not Finger Friendly. Keep a Swear Jar on hand so you can treat yourself to a Beer using its contents afterwards.

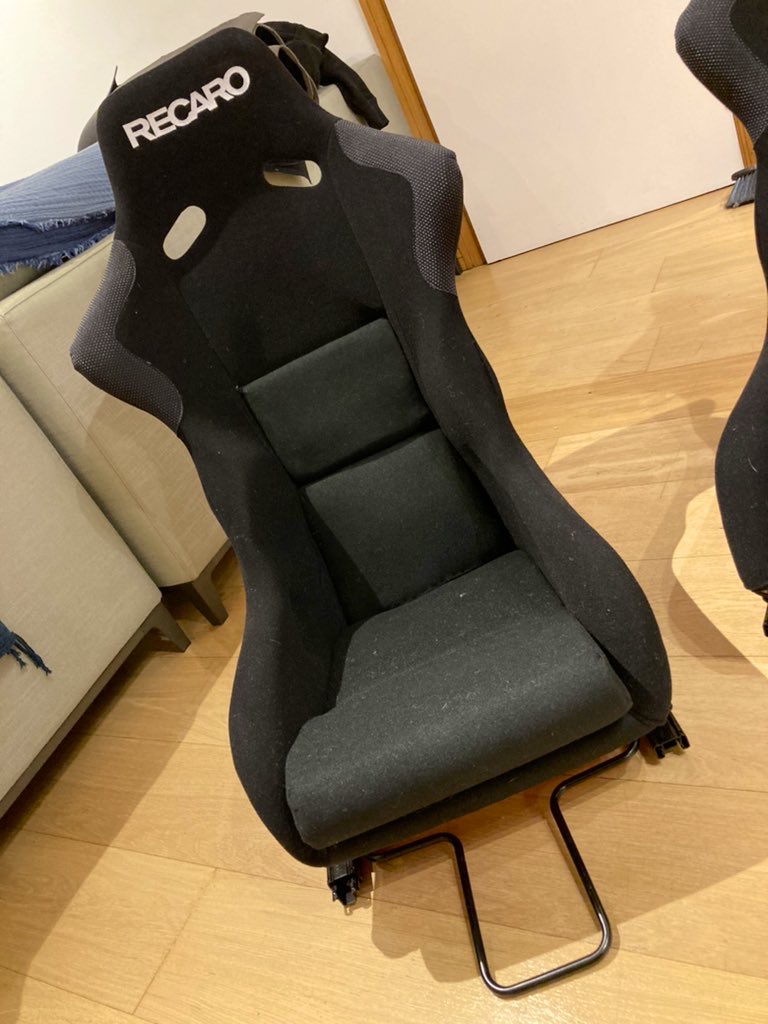
The transformation was Jaw Dropping. They started to finally look like they belonged in a Porsche. Next, Cushions.
Cushioningisation
The formed Cushions were a little worn, but they still had their shape, and it had been the Covers that had taken and showed the most wear. New Cushions and Covers can set you back another ~£250 or so for the two Seats, and since I was keeping one eye on the Bottom Line on these, decided that making my own Covers was the way forward.
When I say “making my own” what I actually mean is asking Hollie to sit down and work some Magic with her Sewing Machine, which she duly did..

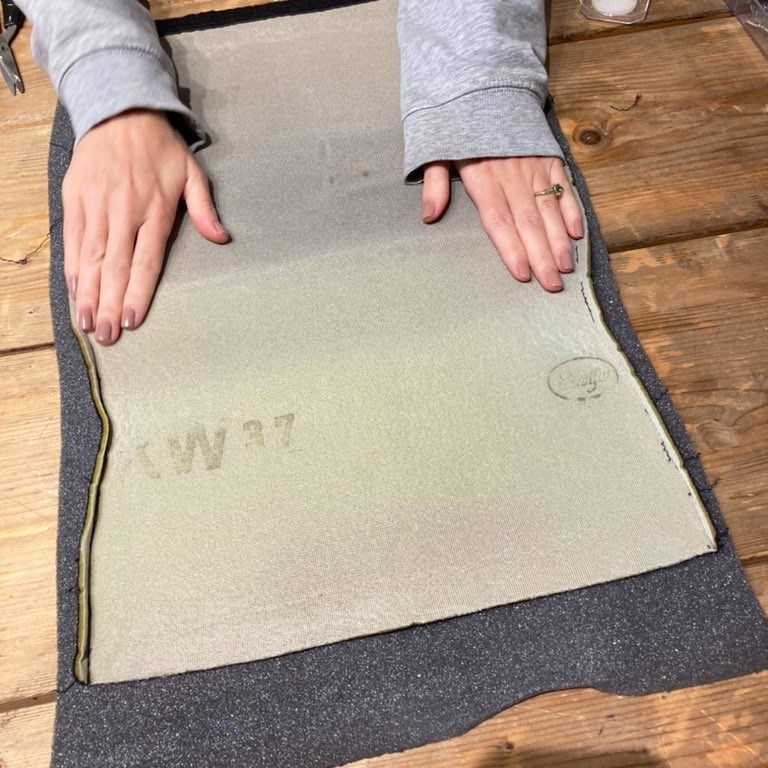
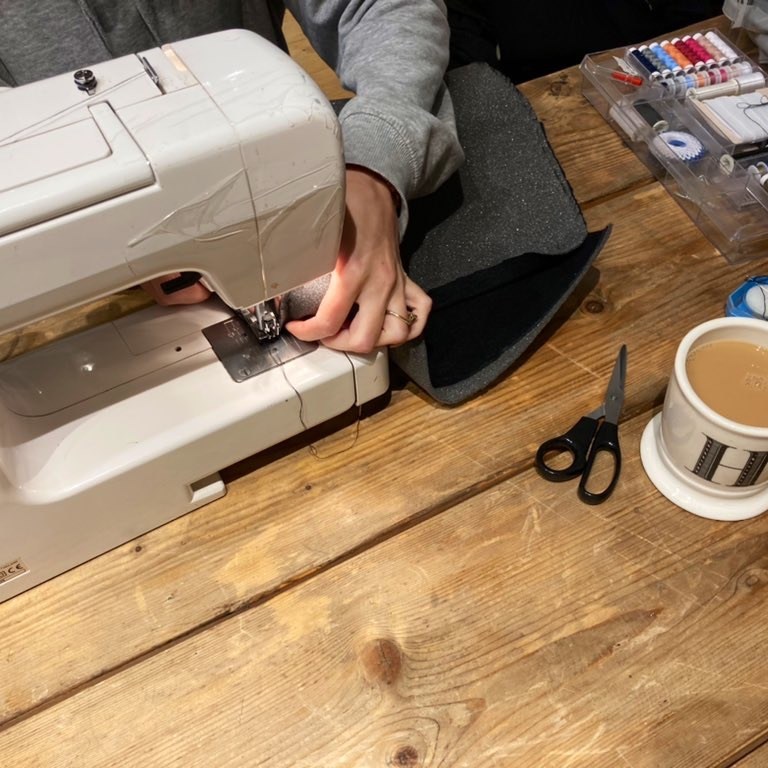
Some Magic later..

I used a Perlon style Fire Retardant material, which is very similar to the genuine Recaro shell cover in texture and quality; but a snip at £10.88 for a 1M x 2M plentiful piece.
Touche Eclat
Remember those Recaro Decals that let me know they were genuine..? Well, obviously I had to remove them to prepare for Paint, but a company called Car Bone [you may have heard of them] offer customised replacements, so I snagged a couple; with the correct details of course..
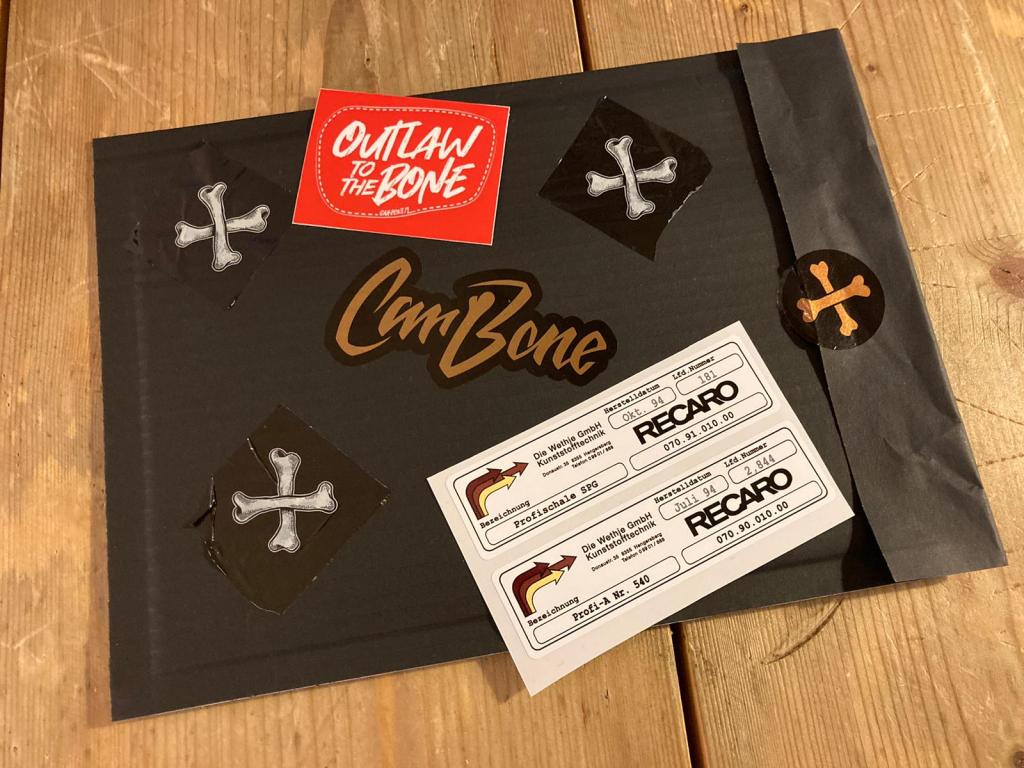
At £80+ they hit the Wallet a bit, and it is true that they are not readily visible [they are on the underside of the seat], but it was the right thing to do; and I know they are there.
Wait..!
Almost forgot, the Weight..
Out: Porsche Big Bolster, 27.9Kg..
In: Recaro SPG 10.2Kg..
Boom..! That’s a bit of a Ballast Saving at ~18Kg per complete seat assembly..
Quanto..?
How much..? Well, take a seat and I’ll list out the costing..
- Recaro SPG [L] £127
- Recaro SPG [R] £350
- Foam £16
- Foam Adhesive £14.78
- Cover adhesive £34.99
- Dacron Padding £21.99
- Covers [2] £344
- Cushion Material £10.88
- Slider Rails [2] £189
- Side Mounts [4] £130
- Mounting M8 Torx Bolts, Washers & Lock Nuts [14] £18.88
- Seat Belt Buckle Socket parts £125.52
- Paint £49.52
- Replacement Recaro Spec Decals £80.56
- Primer & Thinners £Bottle of Red
- MOP Rental & Finishing Paste £Pint of Beer
Taking into account the two 10p coins I found under the Porsche Seats when I removed them, the total cost is..
..£1,512.92
Bottom Line
Holy Moley Batman, that’s a lot of Wedge on two Buckets. Worth it..?
I like to think that I have a First Class Honours Degree in Budget Busting Project Creep, but by the time it came to fitting the Recaros in the 968, I realised that I had more or less stuck to the Script on this one. Looking around for pairs of Recaros along the way, it became apparent that a shade over One and a Half Bags for an essentially custom set of Buckets is not bad.
I saw a listing on Ebay for a mismatched [colour-wise] pair of used seats from a known Seller for £3000. And another similar set for £2K. They do appear online for sale, but I’d feel the need to do all the work above to justify slotting them into my 968.
But I digress, the aim of this was to Race to the Finish Line spending as little money as possible. It was [as with many things I do to a Porsche] driven by a Self Imposed Challenge, and I think I won. Against myself. Whatever..

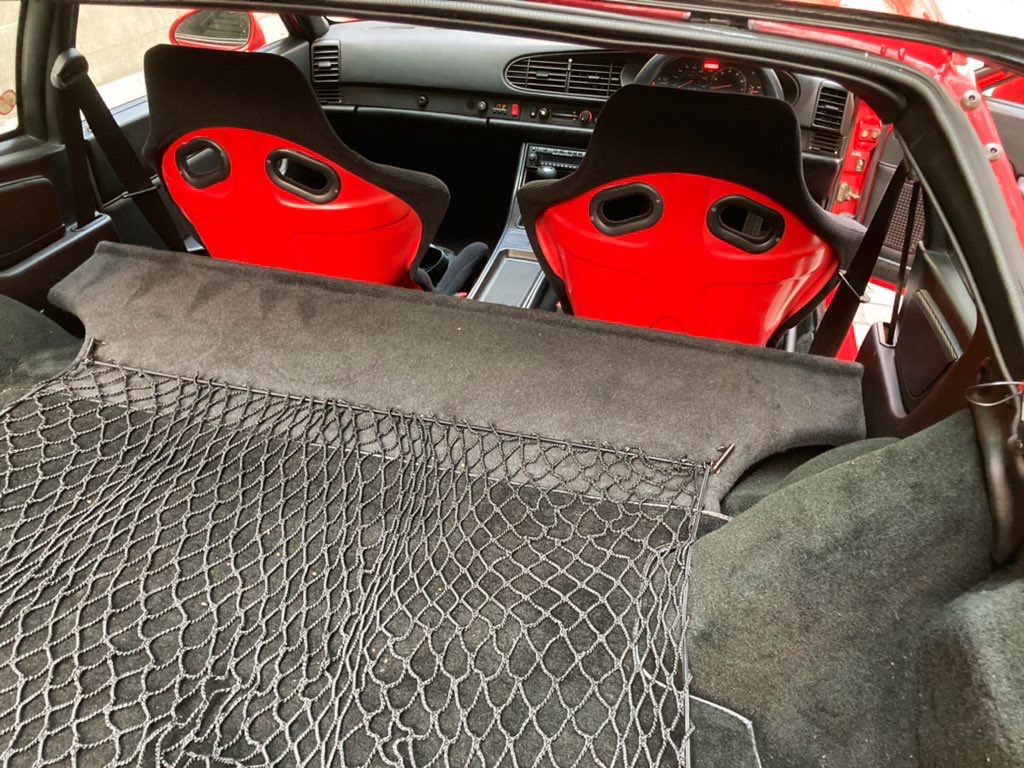
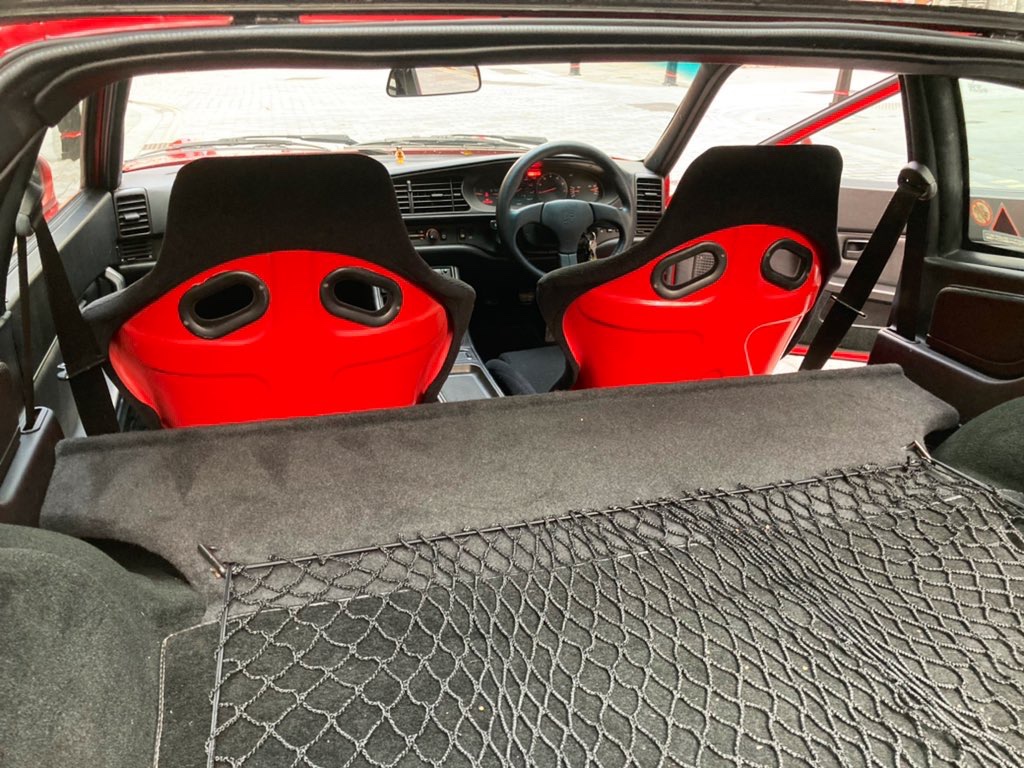
Are they comfortable..? Yes. They hug you, holding you in place, meaning you are not rolling in the Seat, facilitating greater control of the Car. True Story. We drove around Europe in a set of Pole Positions with no complaint.
They have transformed the feel of the 968, and coupled with the recent Suspension reparations, make it feel so unified and taut; it honestly feels like a Porsche should feel, and reminded me of my 993.
If you would like to read about installation of the Buckets, have a read here..
Categories
Attitude, BadAss, Cosmetics, Done By Roon, HotRod, Lightweighting, Porsche 968, Porsche Life

3 thoughts on “Buck It” Leave a comment ›