Beast Restoration: Chassis

I couldn’t help feeling like I had been here before, and yet, this felt different; the comparatively agricultural construction of the 4Runner made rebuilding the Chassis feel like a less expensive enterprise all round. There was no sense in trying to refurbish any parts that I could replace for less than that cost, and it didn’t feel wasteful either.
The Scrap Yard always wants your Rusty Metal, and so Recycling was the name of the Replacement game here. I thought that there might be some parts I could clean myself and stick on Ebay for someone with a Driveway Project on their hands, but really, everything on the 4Runner’s Chassis was shot.
Front Suspension
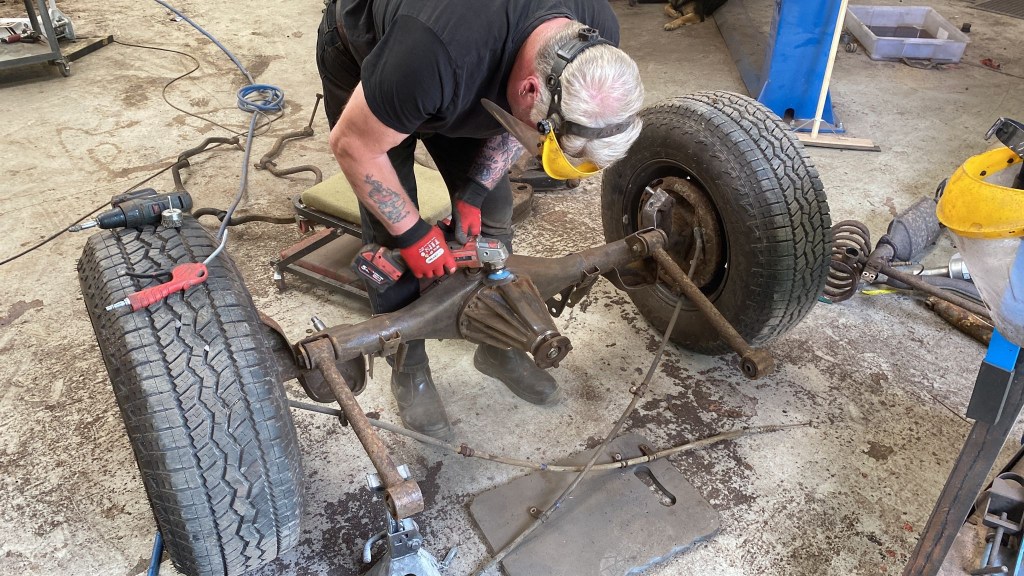
Everything was to be replaced here; the years of the existing Suspension setup keeping the 4Runner from a rough ride were long gone. All that could be salvaged were the Carriers and Driveshafts, the latter getting new CV Boots. New Uppers, Lowers, Dampers, Torsion Bars, Anti Roll [a.k.a. Sway] Bars and Bump Stops. Some of the old Components were less than willing to be separated from the Chassis; cue the Angle Grinder.


Parts List:
- Pedders 45mm Suspension Lift Kit
- Torsion Bar Adjust Nut & Bolt [2]
- Front Upper Wishbone [L]
- Front Upper Wishbone [R]
- Front Lower Wishbone [L]
- Front Lower Wishbone [R]
- Bumps Stops [2]
- Lower Camber Bolts [2]
- Addco Performance Anti-Sway Bar Kit

Steering
Hellbent: “Can you get new Steering Damper..? Just gonna clean up and paint the rest of it, the ball joints are in good nick.”
Me: “No need, I have new Everything in that Photo.”
Hellbent: “Happy Days. More for the Scrap Bin then.”
This is a flavour of the messaging with Hellbent, and made the managing of this Work so easy. During this Chassis work, I was receiving messages almost hourly and able to reply as good as immediately; it felt very coordinated.
Parts List:
- Steering Track Tie Rod End Kits [2]
- Steering Damper
- Steering Idler
- Steering Relay Centre Rod
- Steering Idler Fitting Bolt Kit
- Steering Pitman Arm


Front Brakes
Whilst attention was focused on the Front Wheels, a completely new Brake Setup was installed. I had, some time ago, sent the OEM Callipers to Goldburn Finishers for a brightening, and yes perhaps they won’t be that visible sat behind the Tuff Torques, but it felt a good opportunity to add some personalisation.
New Disks, Brakes Lines & Hoses rounded off the Work, and all bolted together looked absolutely fantastic.

Rear Axle
Mechanically, the LSD was still as smooth and functional as it had been the day it rolled out of Burnaston, but the Live Axle housing needed some cosmetic attention. The surface rust was pretty furry, but was light work [I say this although I didn’t do it] for a Wire Wheel. One coating of 2K later, and it was as good as Gold, but Black.


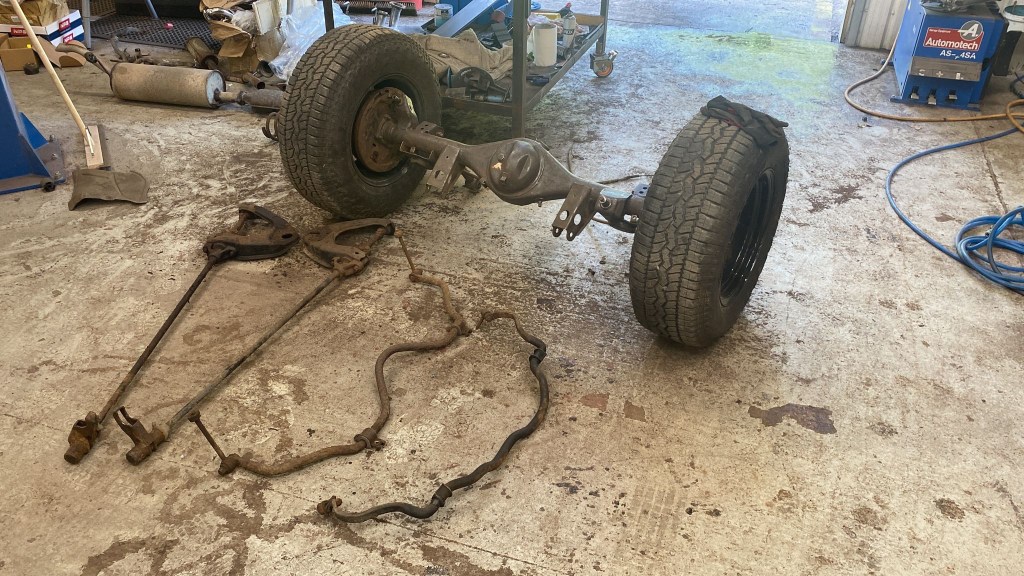

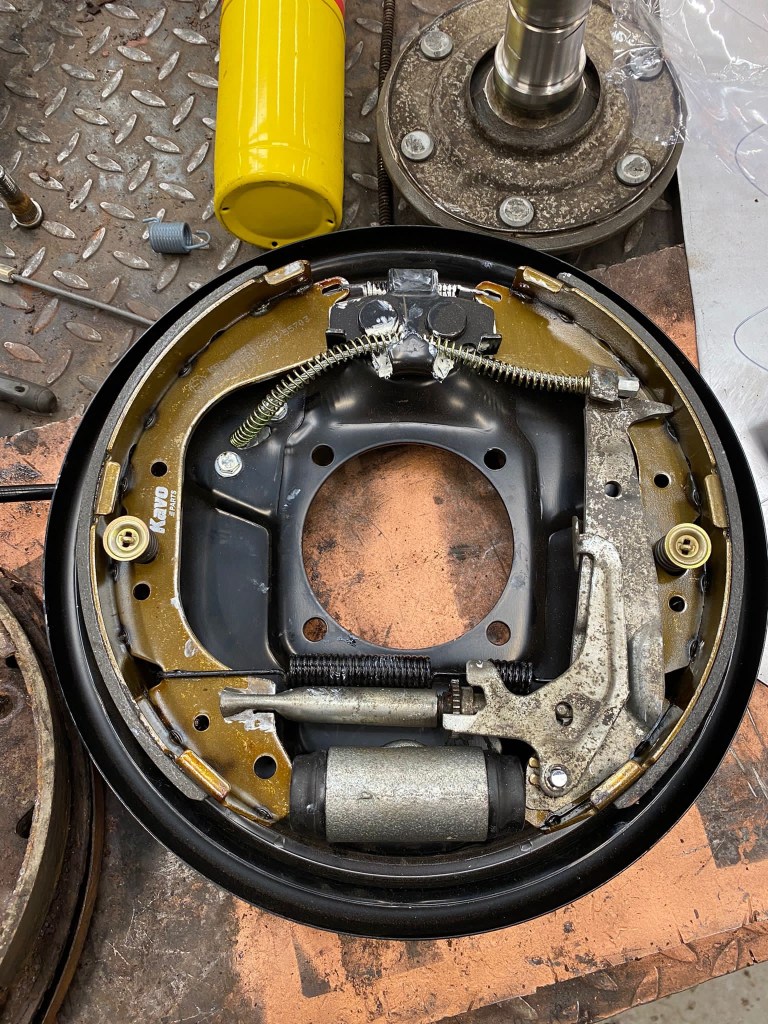
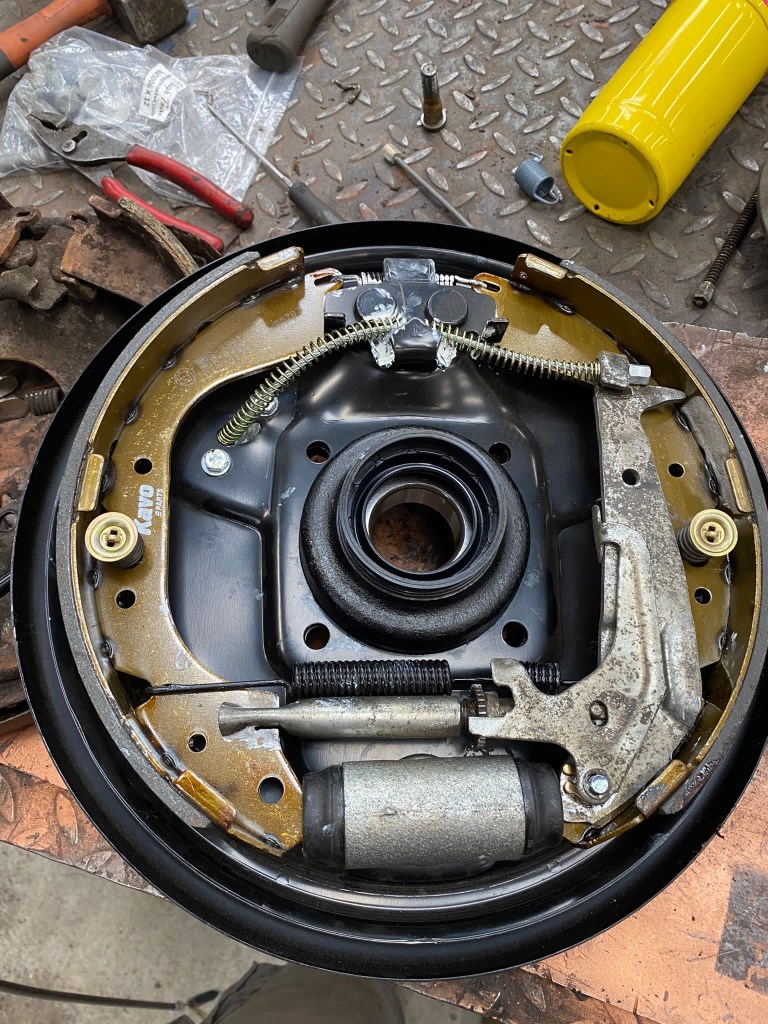
Rear Brakes
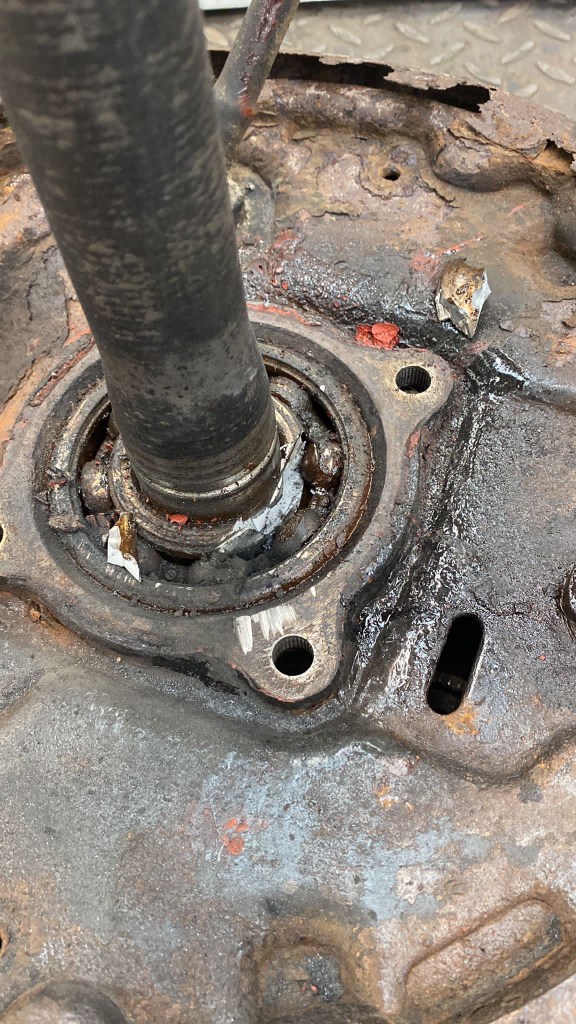
If the LSD hadn’t seen daylight since Burnaston, then it can be said with absolutely certainty that the Rear Axles hadn’t either. Replacing the Rear Wheel Bearings was a logical decision, but proved to be a stubborn undertaking. Grinding & Torching as the old assembly finally relinquished the corrosive grip, eventually. New Drums, Pads, Cylinders, Springs, basically the whole Rear Brake Assembly including new Handbrake Cables from the Lever rearwards. The front section from the Handbrake to the Lever was only a few months old, so was good to use.
- Rear Brake Backing Plates
- Rear Brake Drum
- Rear Brake Drum Shoe Set
- Rear Brake Drum Shoe Retainer Kit
- Rear Brake Drum Cylinder
- Rear Axle Brake Pipe Set
- Rear Brake Hose
- Handbrake Cables L & R
- Load Balancing Valve


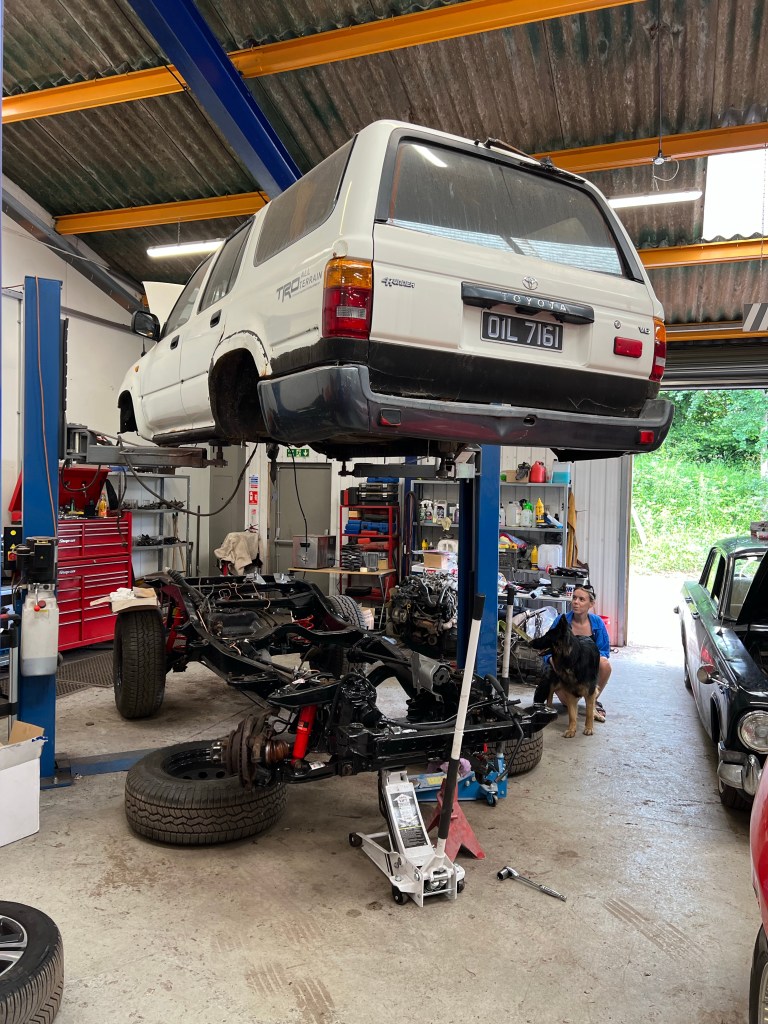
At a point during the Chassis Work, I had a few boxes of Parts that needed delivering to the Somerset Garage and rather than send them via the Post, I decided to head down and hand deliver.
I was so excited to see the Chassis and the work that had been completed so far. This was a Project a year in the making that had false started a couple of times, and so to see the Beast in a state of repair was quite a relief.
Motor Mount Molehill
One thing I had had concerns about, some months ago when the idea to replace the Chassis had been initially considered, was whether the V6 Chassis would vary in Motor Mount specification from the Diesel Chassis. Since the V6 4Runner was less common by some way, the Chassis used as a Donor would invariably be from a Diesel 4Runner [or HiLux Surf].
I posted on a US based Forum [where the majority of the 4Runners are ironically V6s] to ask if anyone had performed a Chassis Swap with from a Diesel 4Runner, but no joy; it seems I was to be the first.
This was one of those Fail Fast scenarios, where the Answer to the Question presents itself almost without having to ask the Question. No big deal fortunately, just a case of Cut, Adjust & Weld back in place.

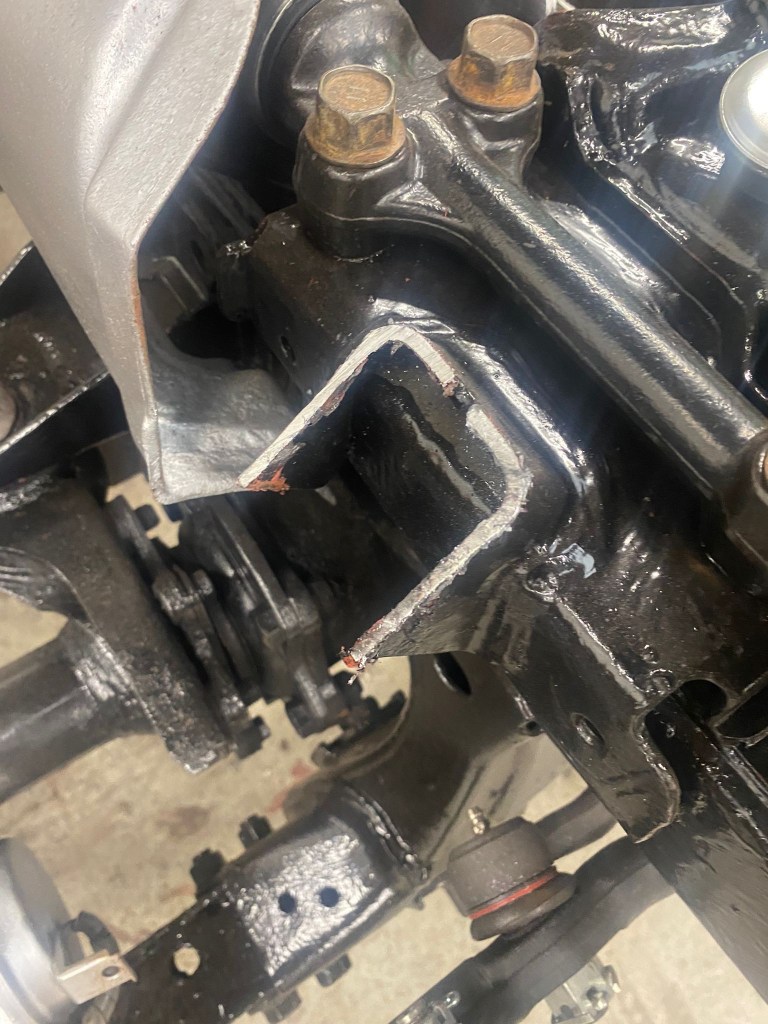

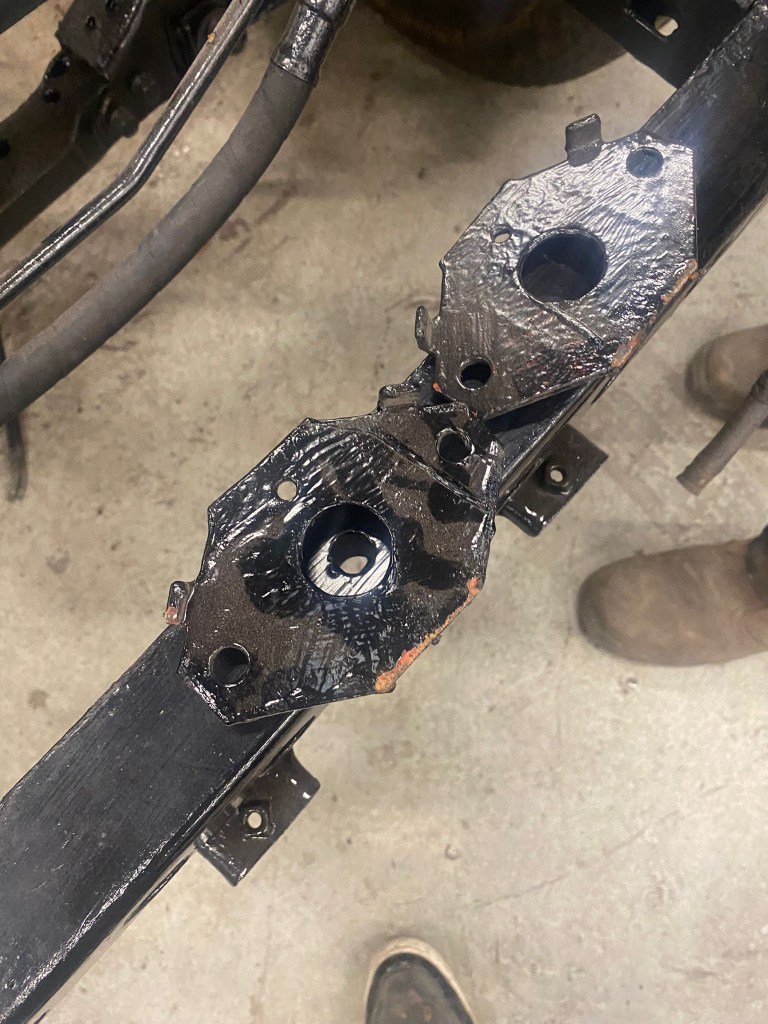


And just in case you’re thinking “What about using he Using the old Motor Mounts from the original Chassis”, this just wasn’t an option unfortunately; they were beyond saving.
Rolling Stock
As the Work on the Chassis ended, I felt a real sense of anticipation that the Beast would be back with me sooner than “never”. That the work was in progress was an immense relief, and rather than an undefined date sometime in the future, I could tell myself that I would be driving it before the Summer was done; hopefully with a little bit of the Summer to enjoy it with..!

Next on the List is the Beating Heart of the Beast, its 150,000+ Mile V6..

Categories

One thought on “Beast Restoration: Chassis” Leave a comment ›