Beast Restoration: Body

When I started this Restoration Journey [technically over a year ago, as I type] I anticipated that the most extensive/expensive Piece of Work would be the Body. The Rear Arches had revealed their magnificently corroded Truths in the preceding weeks to dropping the 4Runner down to Brighton, and I worried that the Work would be overwhelming. Remember these photos..?
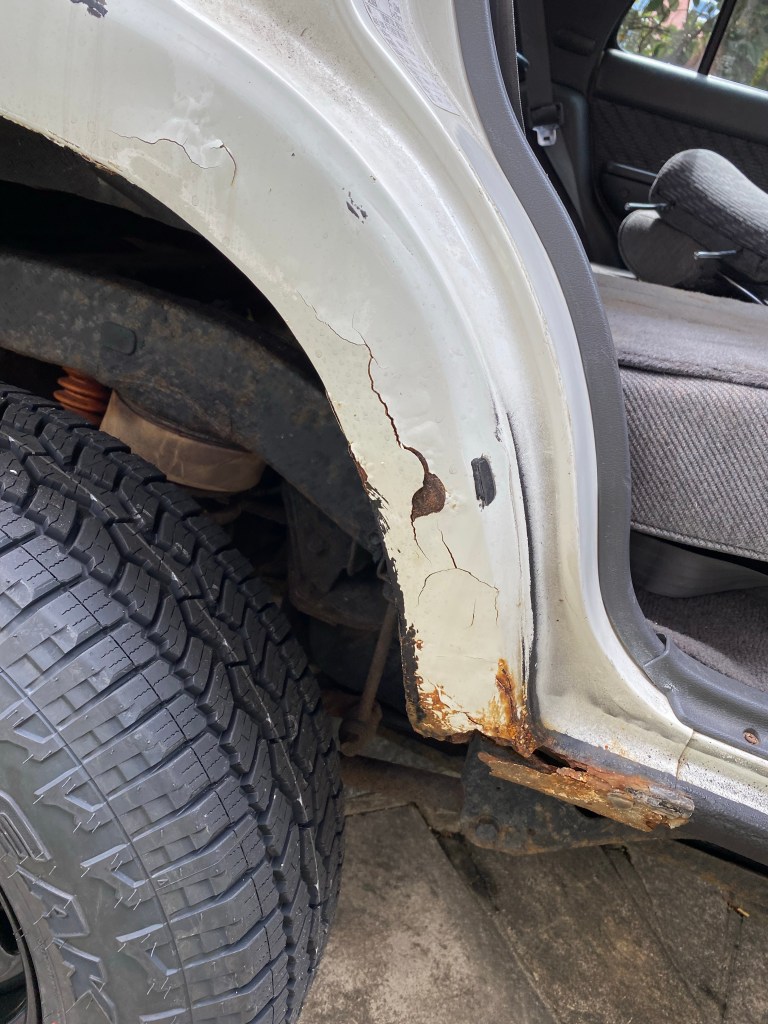

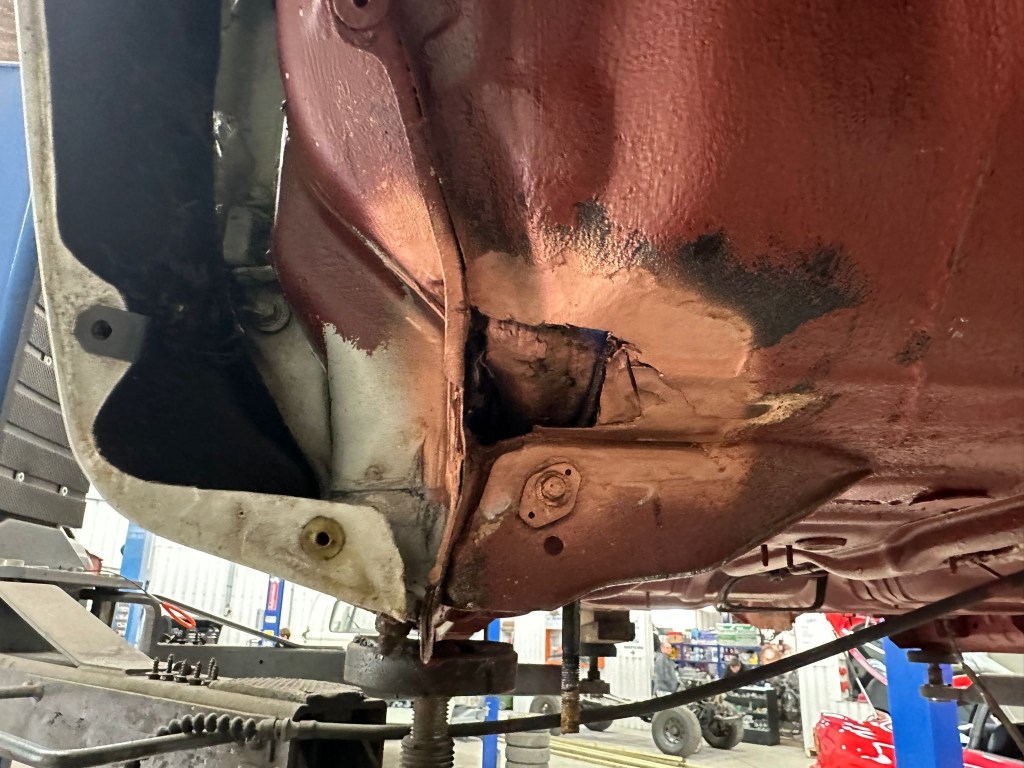
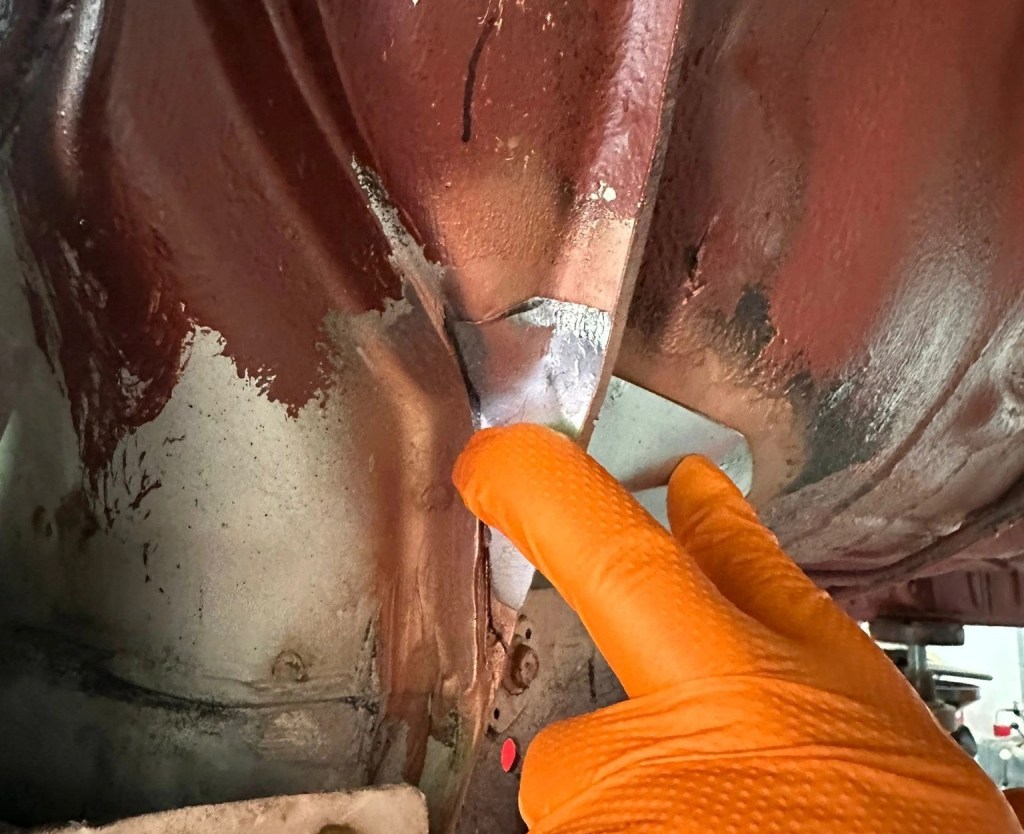
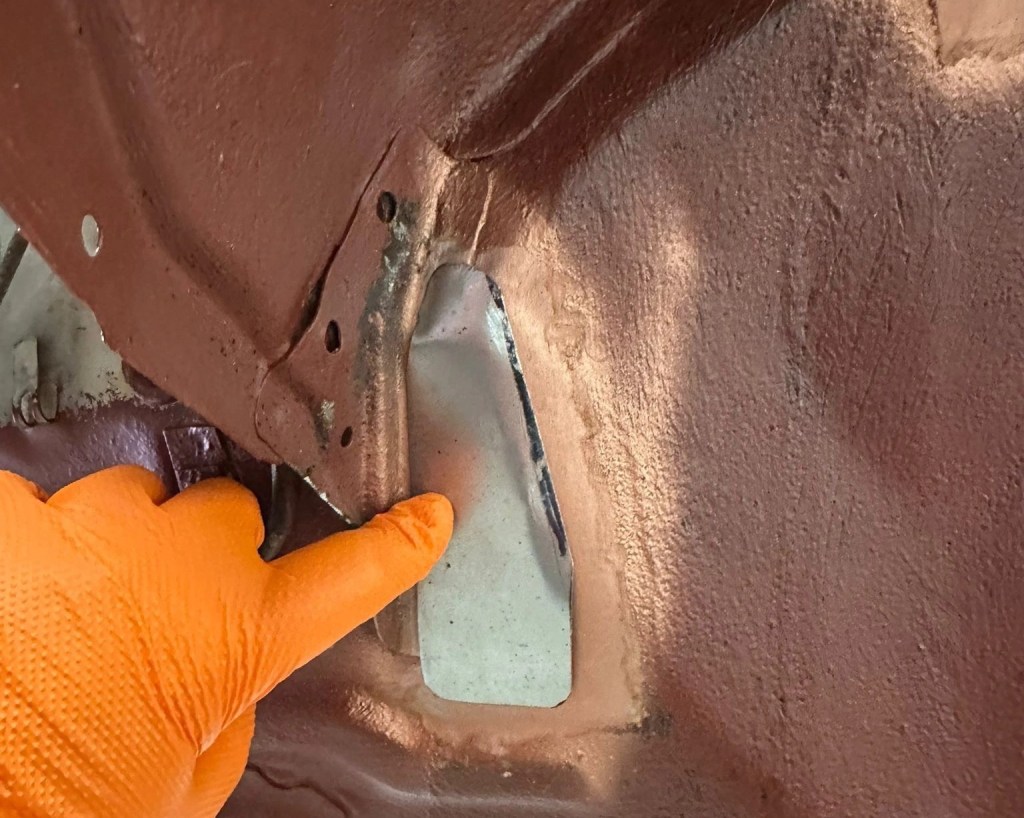
I could push my Finger into the Bodywork, through the Paint, through the Rust, into the Space between the panels; it was a little terrifying. I had no idea how multi layered the Sills were, in fact I can admit that I really didn’t know how instrumental the Sills were in the Body’s rigidity and strength. Neither did I know that I was about to find out the expensive way.
I could push my Finger into the Bodywork, through the Paint, through the Rust, into the Space between the panels; it was a little terrifying
Holey Moley
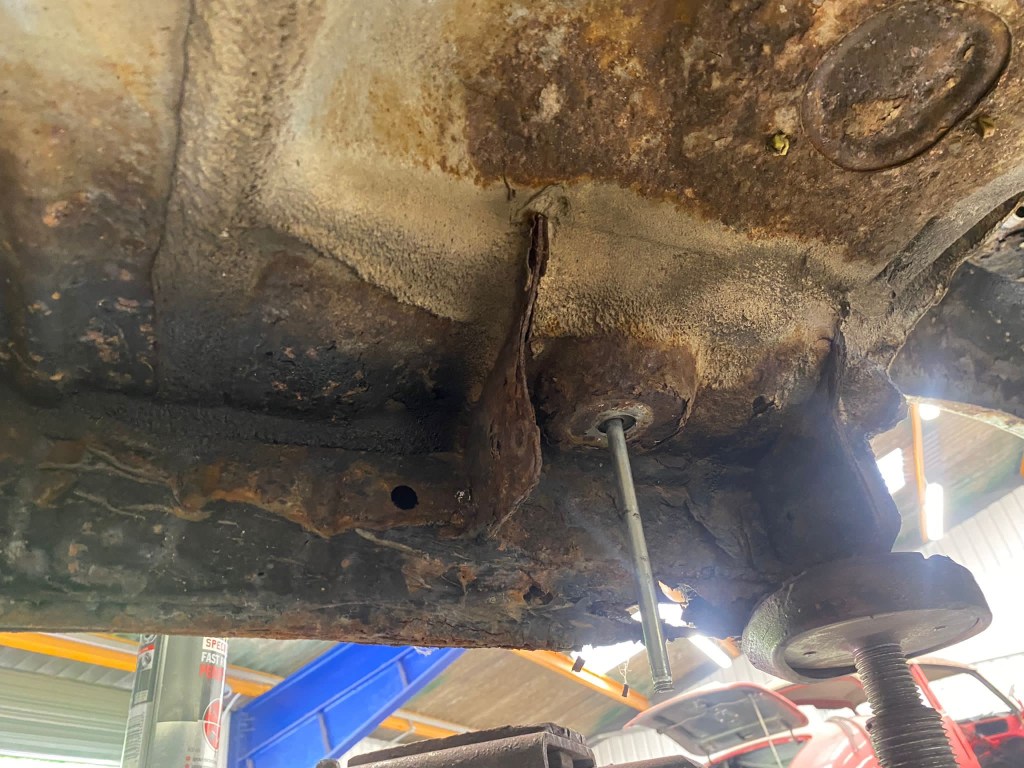
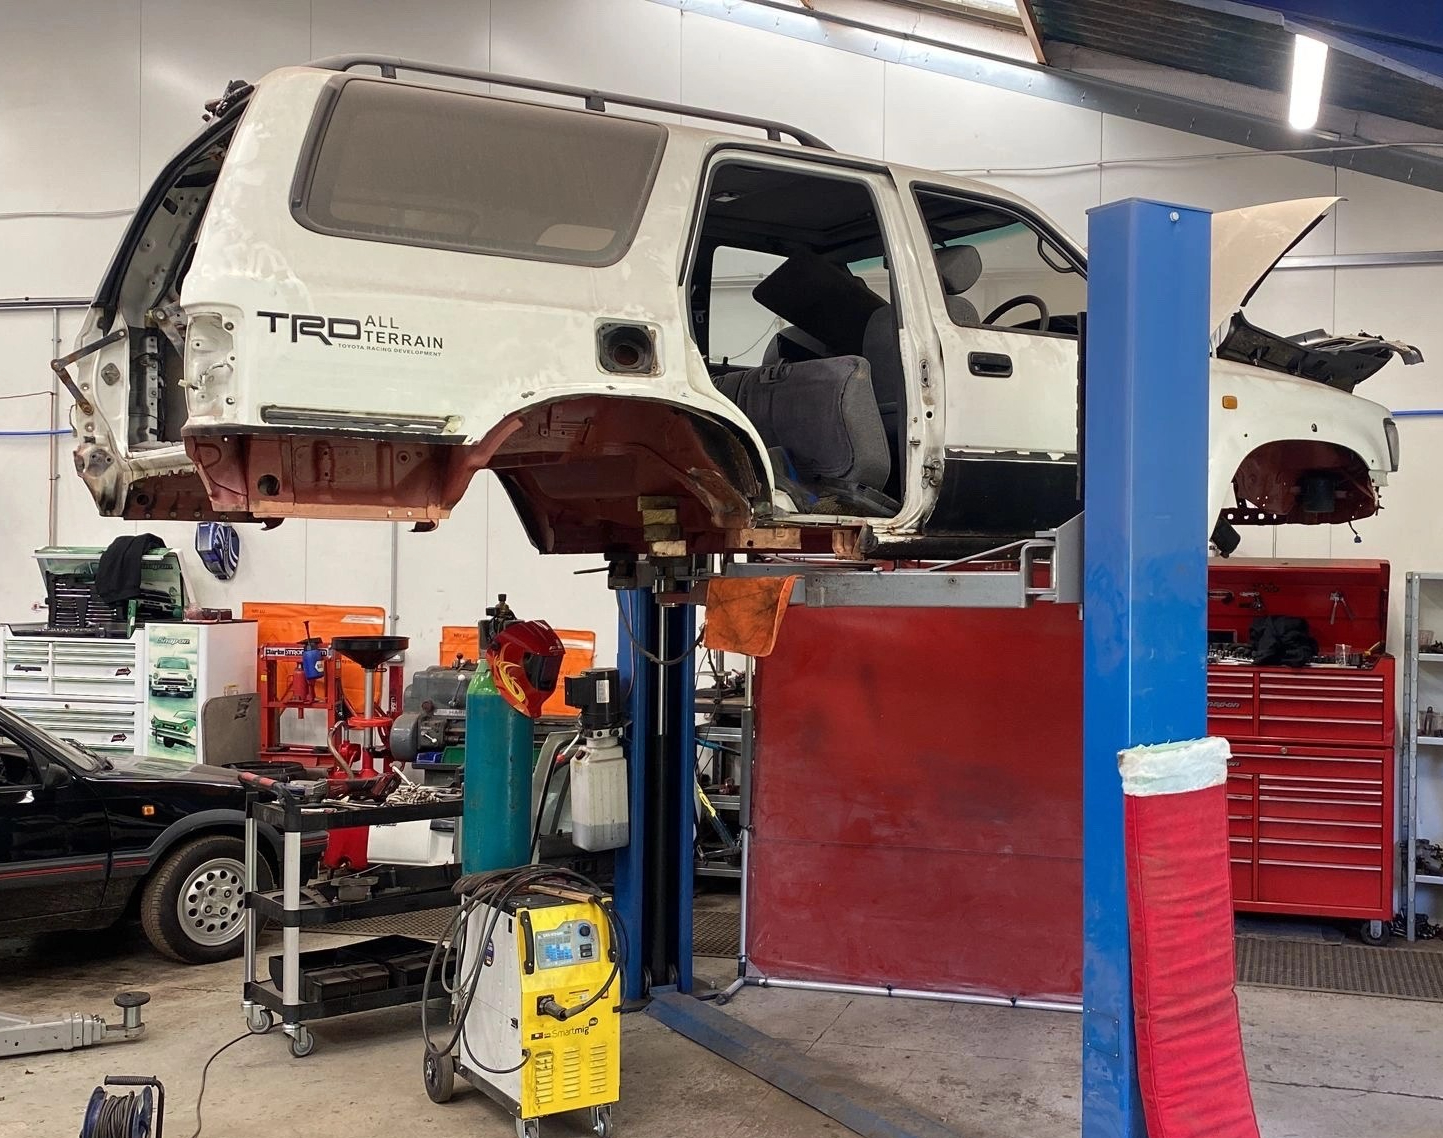
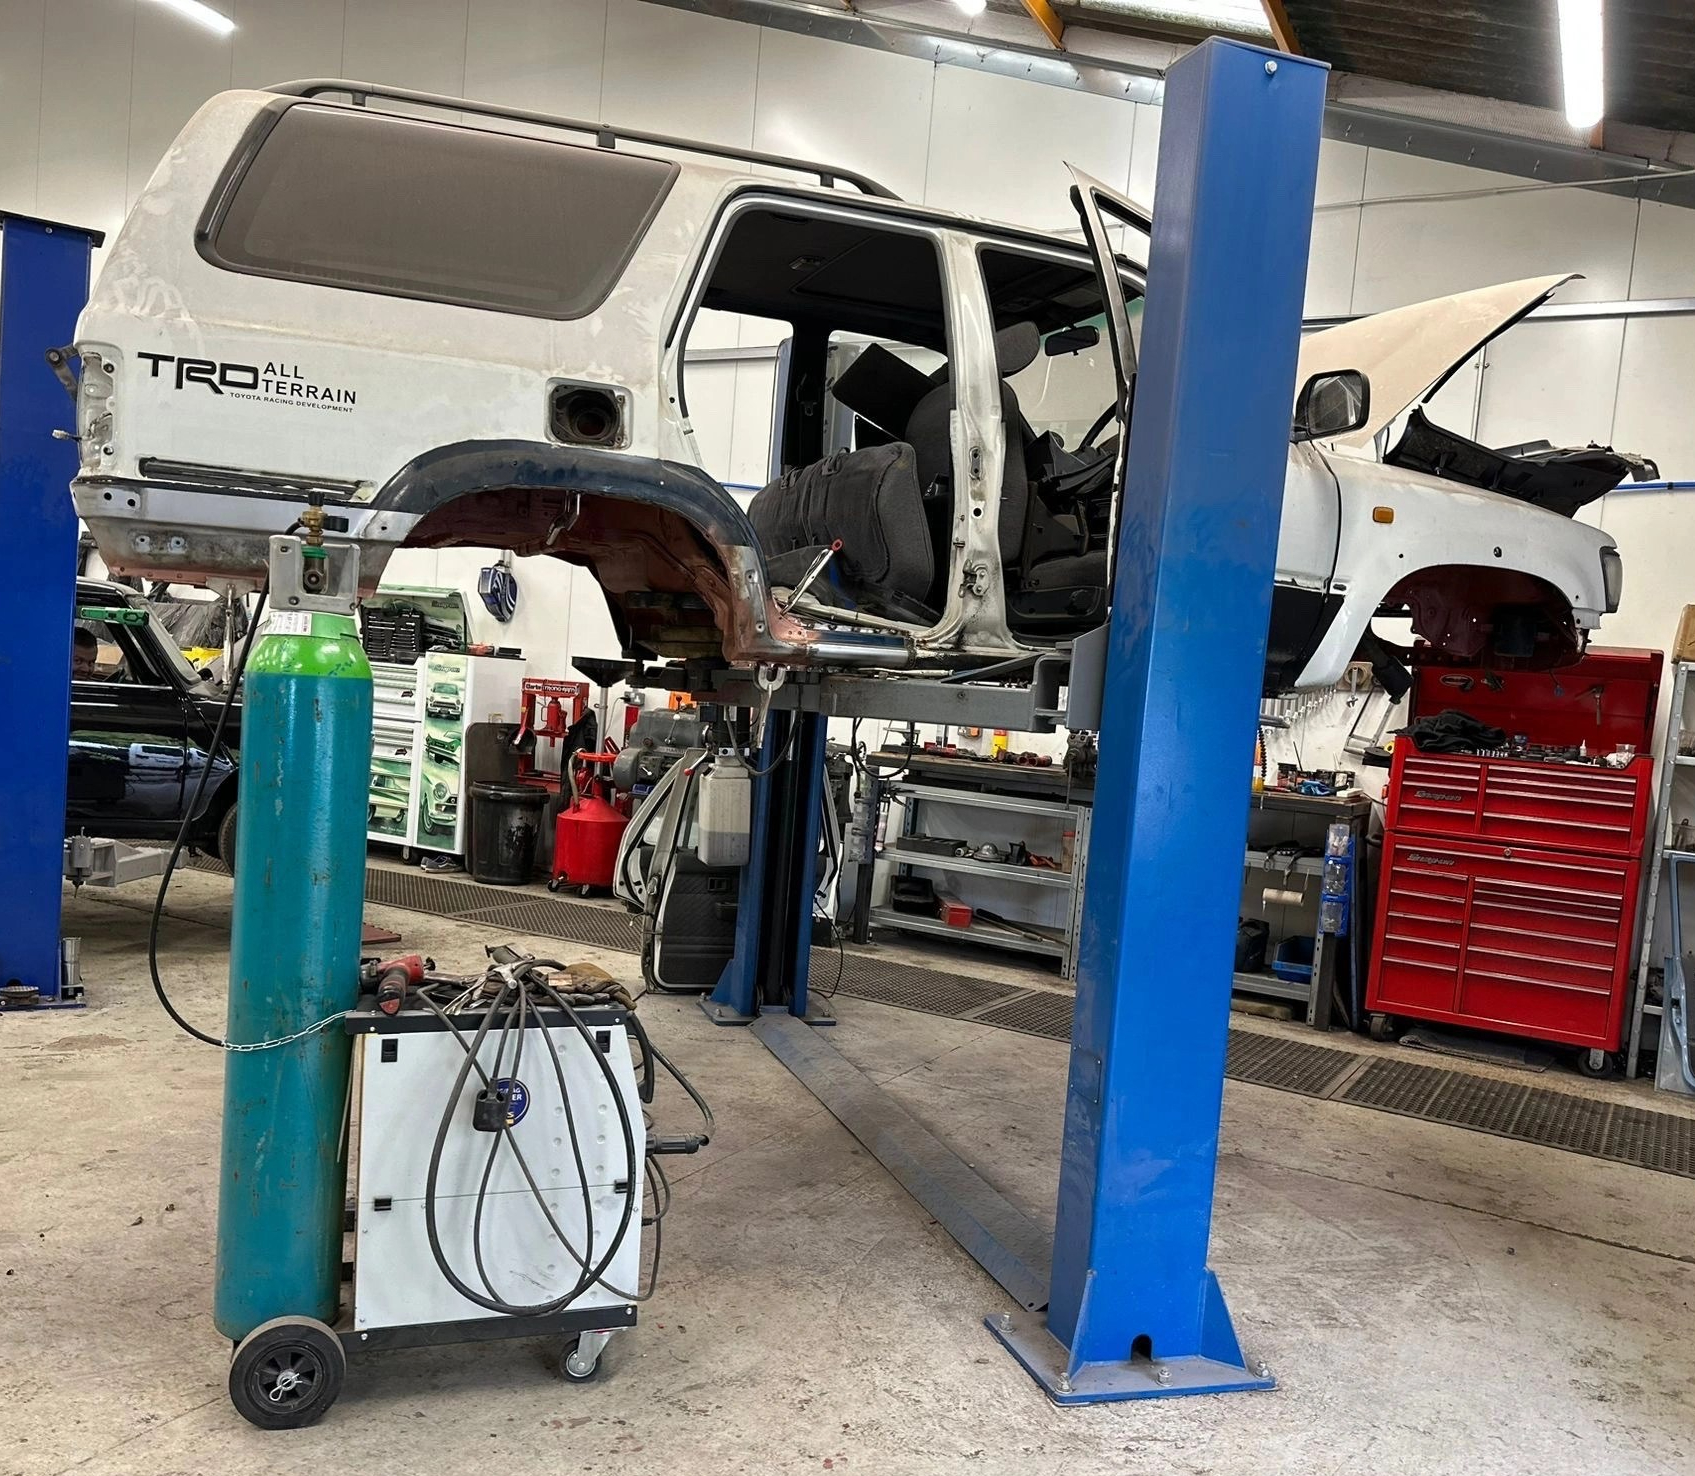
When the Body and Chassis where separated, Hellbent sent me photos of the under-Body Mount sections, and the rear-most on both sides were the ones that needed some thought; could they be salvaged..?
“No” was the Short Answer; the Long Answer involved Arches, Sills, Body Mounts and Rear Apron. Eesh..

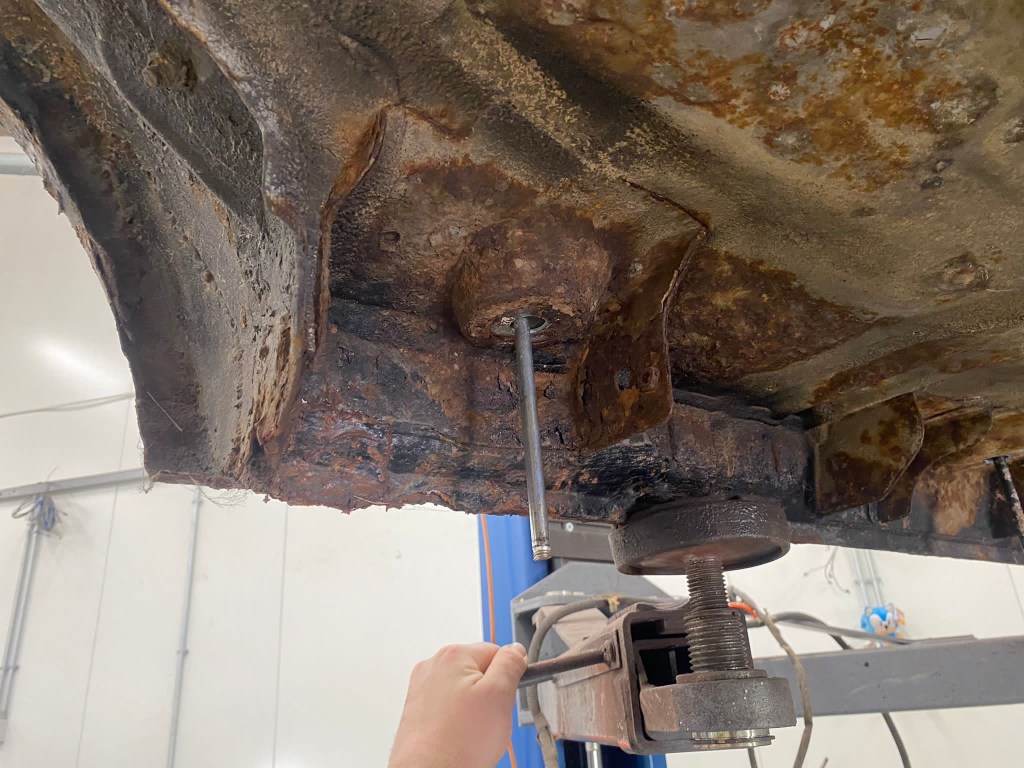
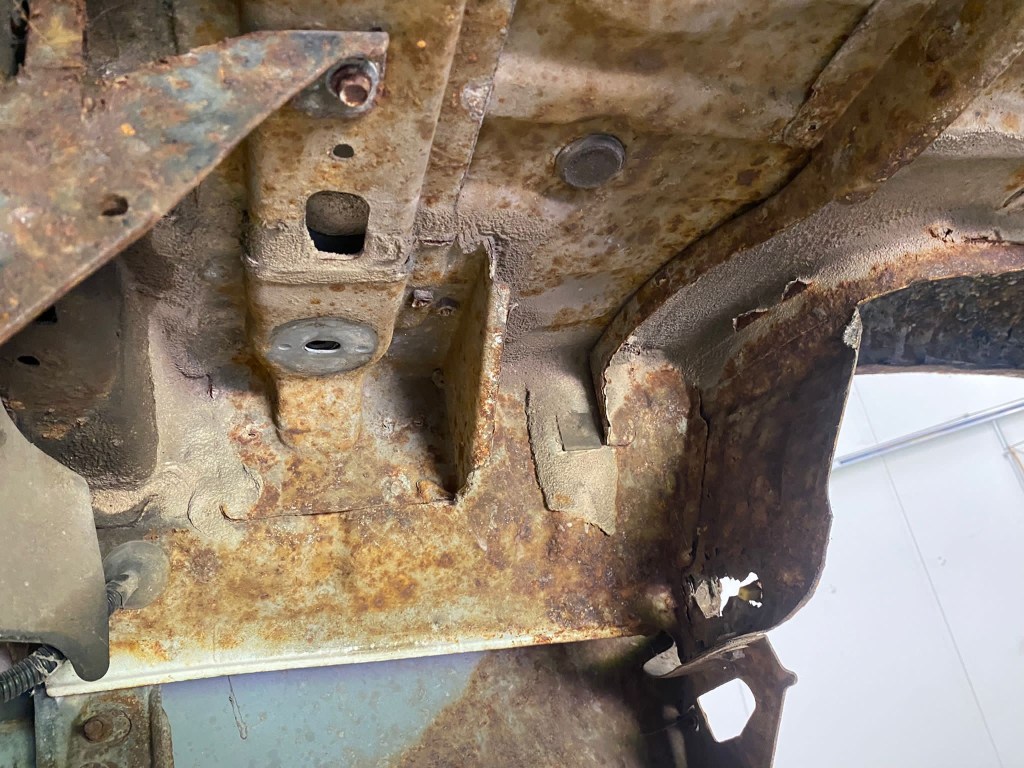
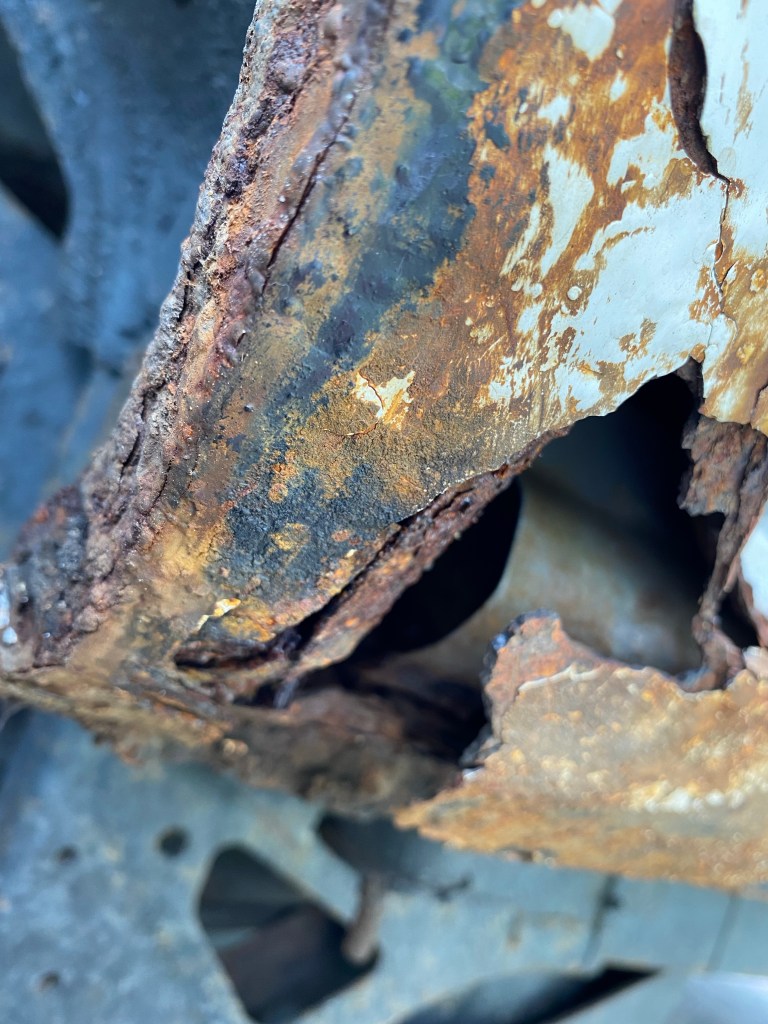
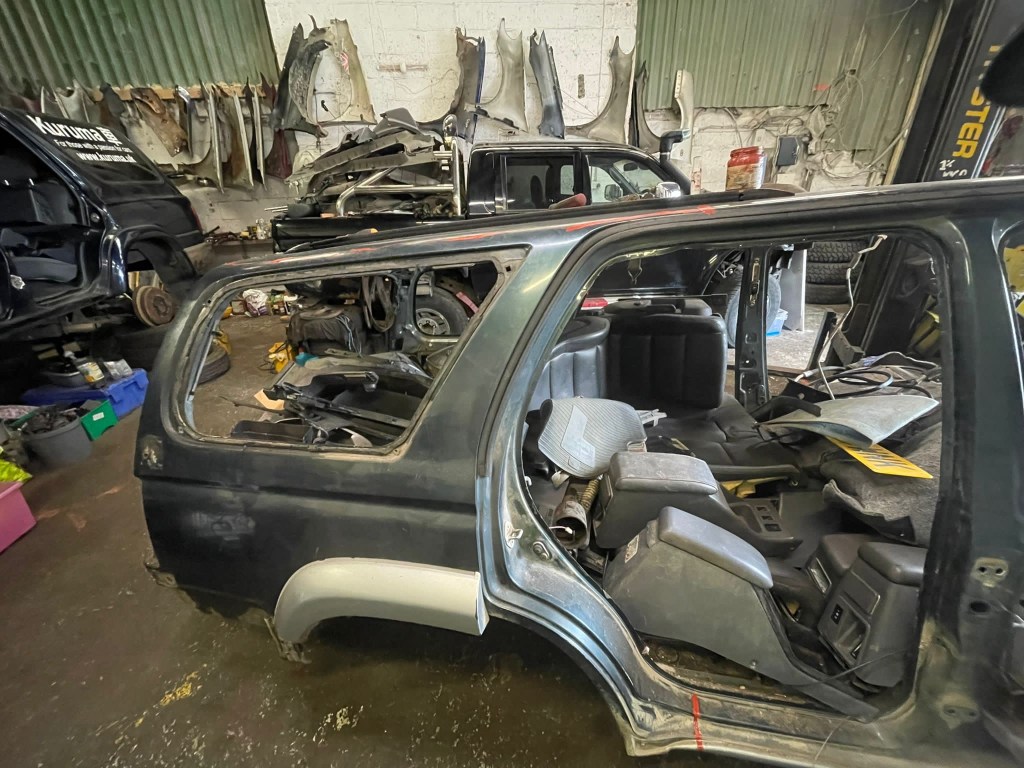
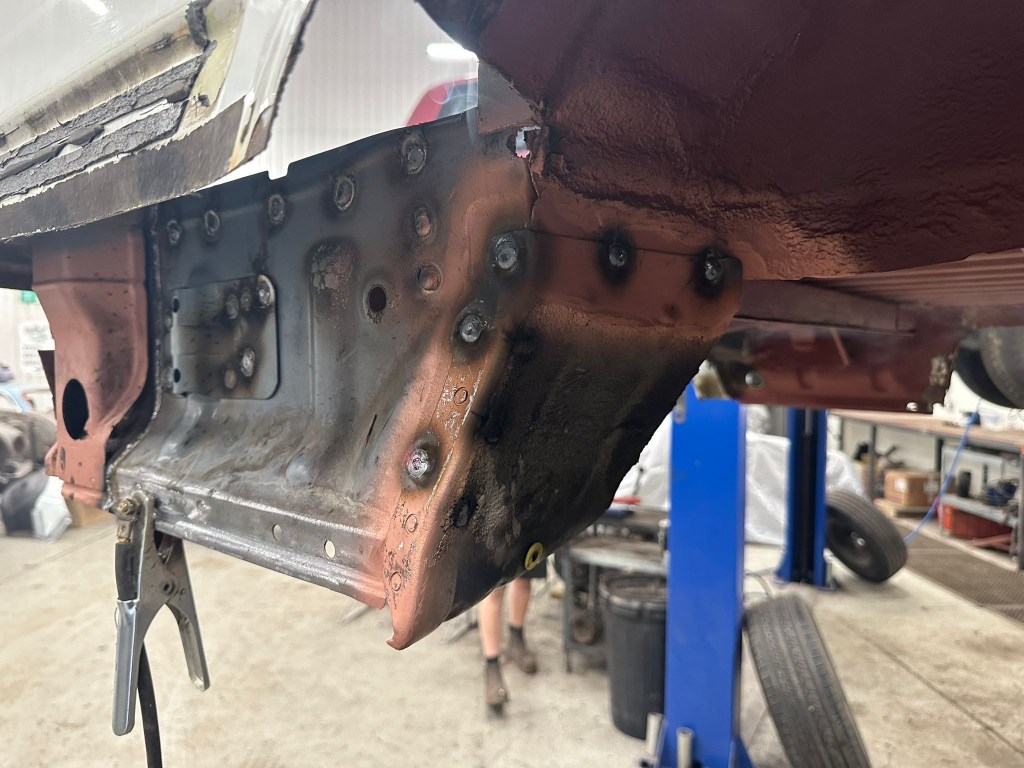
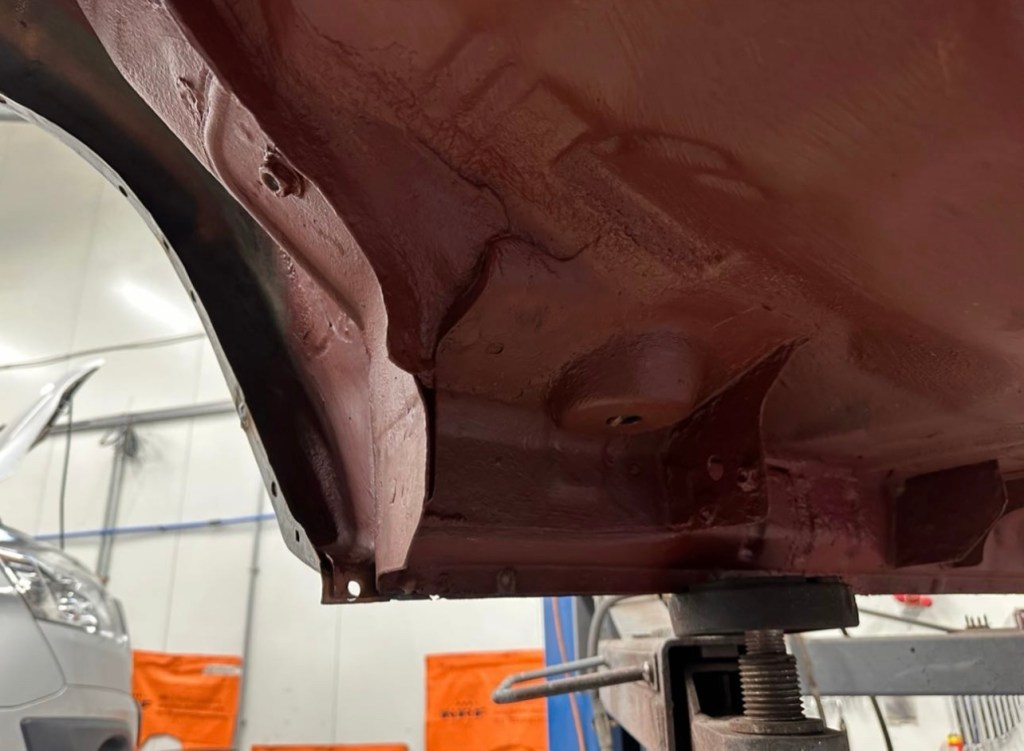
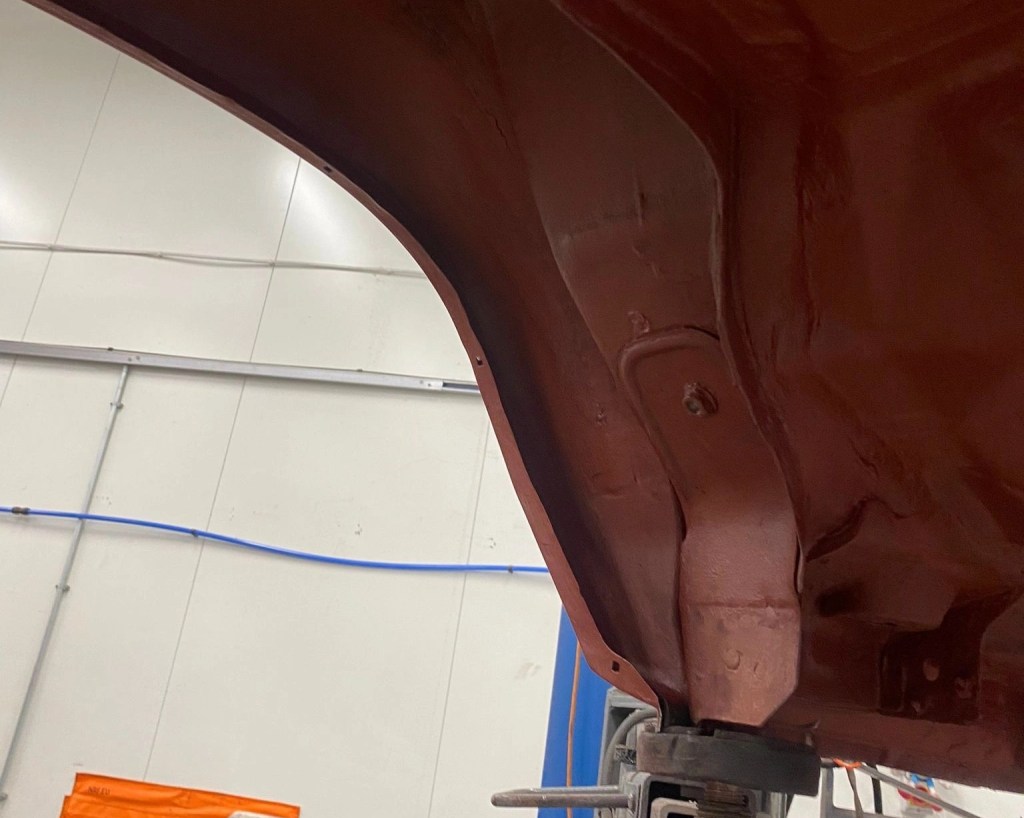
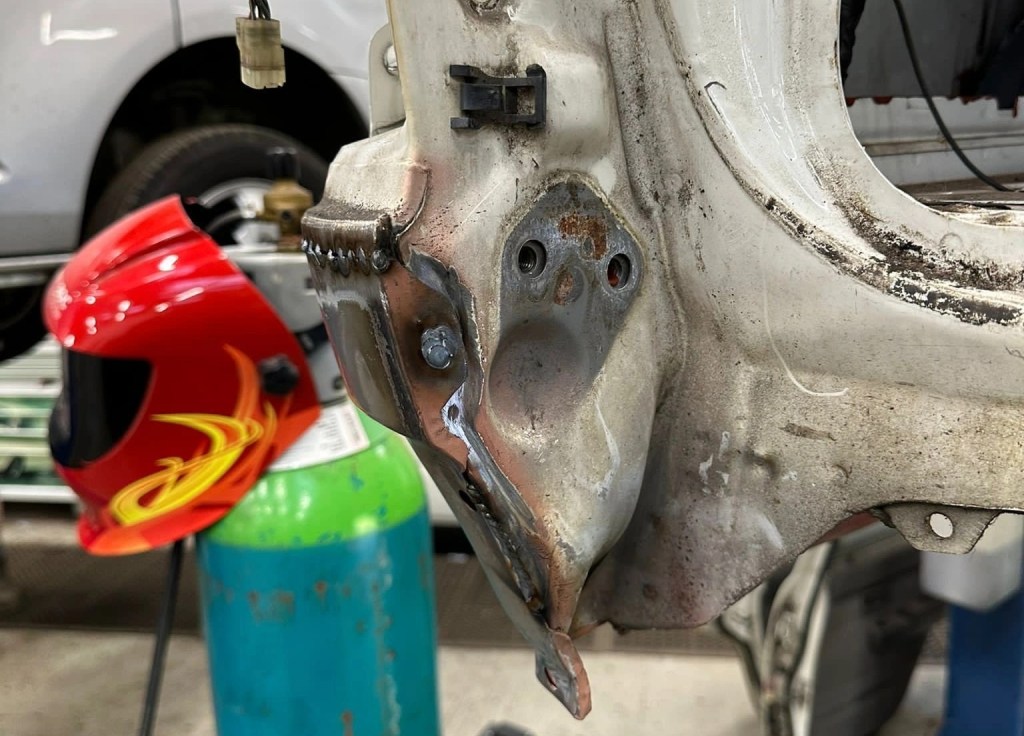
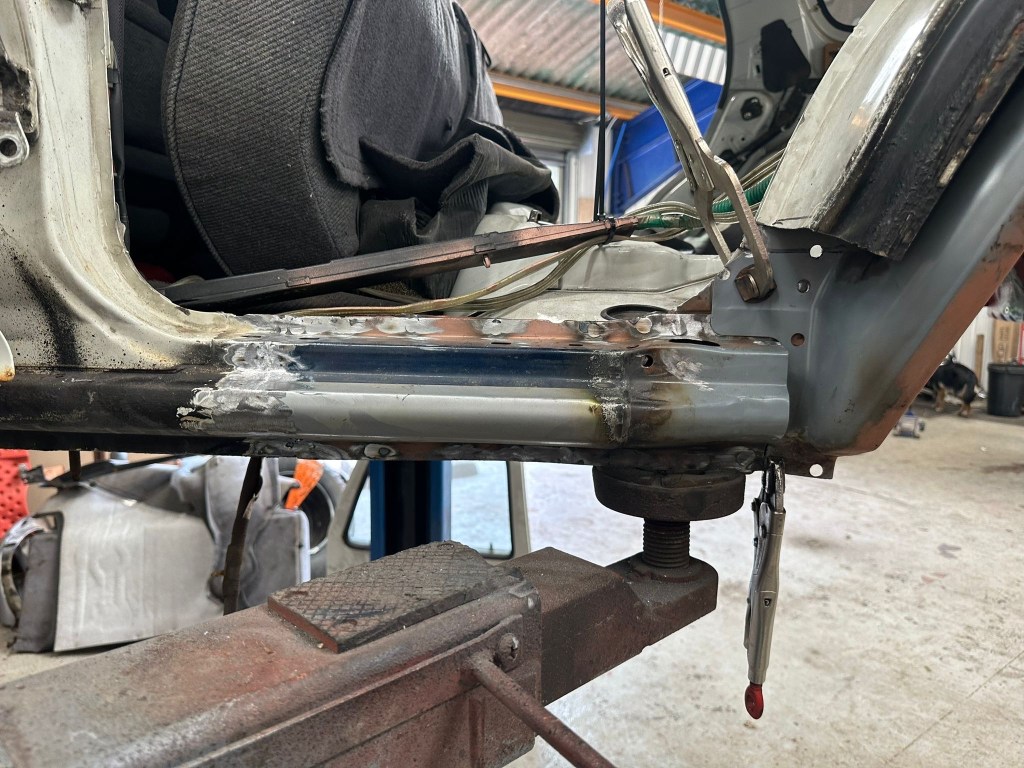
The underside of the Body received Wire Wheel work, grinding back to Good Metal that was Red Oxide sealed ready for a Body Colour finish. Problem areas discovered during this phase were the Inner Rear Arches, Inner and Outer Sills and the section from Inner Arch to Body Mount just forward of the Rear Wheel. The latter marked with a Finger Hole.
The OS Inner Rear Arch had a Quilt of Repair Patches, documenting several MOT Fail-become-Pass events, and the Outer Wheel Arches had been repaired prior to my ownership in a very rudimentary fashion; there was a photo in the File when I bought the 4Runner:
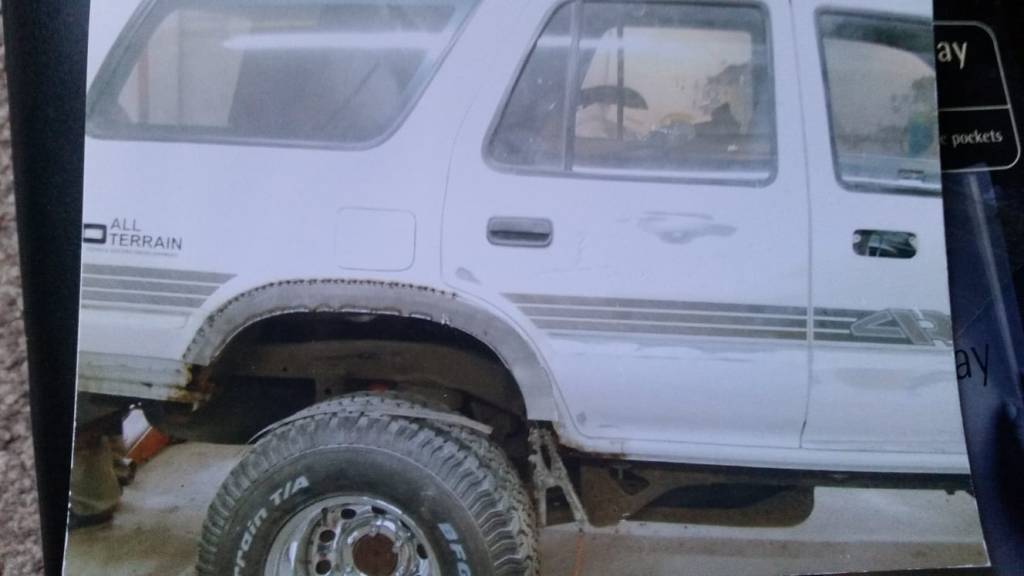
I wasn’t expecting the Outer Wheel Arches to be reparable, certainly not economically, and so I set about finding replacement Panels; this was easier said than done.
Independent Panel
Pattern Part and Panel availability for 4Runners seems to start from the Generation 3 Model, released in 1996. Generations prior to that [i.e. my 4Runner] are not really catered for that well. There are Hi Lux Pick-Up panels available for the common years [and chassis type], but nothing for the SUV Body. Generally speaking, the best place to get replacement Panels is the Breakers Yard, and having owned the 4Runner for a number of years, I keep a select list of Breakers that specialise in Toyota Surfs.
Broadcasting an enquiry Text Message one evening, I received a swift reply from a well known Breakers in Walsall confirming that he had a Second Generation Surf that could be used as a Donor for the Rear Side Sections as requested.
Both sides secured and a price negotiated, they were on a Pallet destined for Somerset and into the skilled hands at Hellbent.
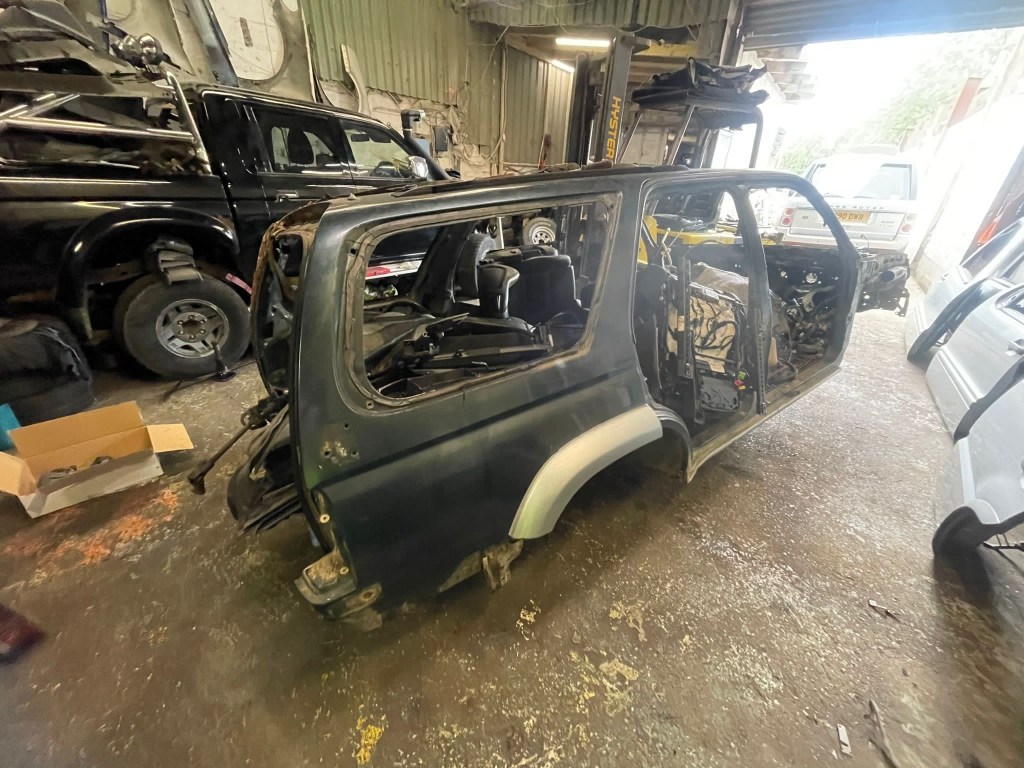
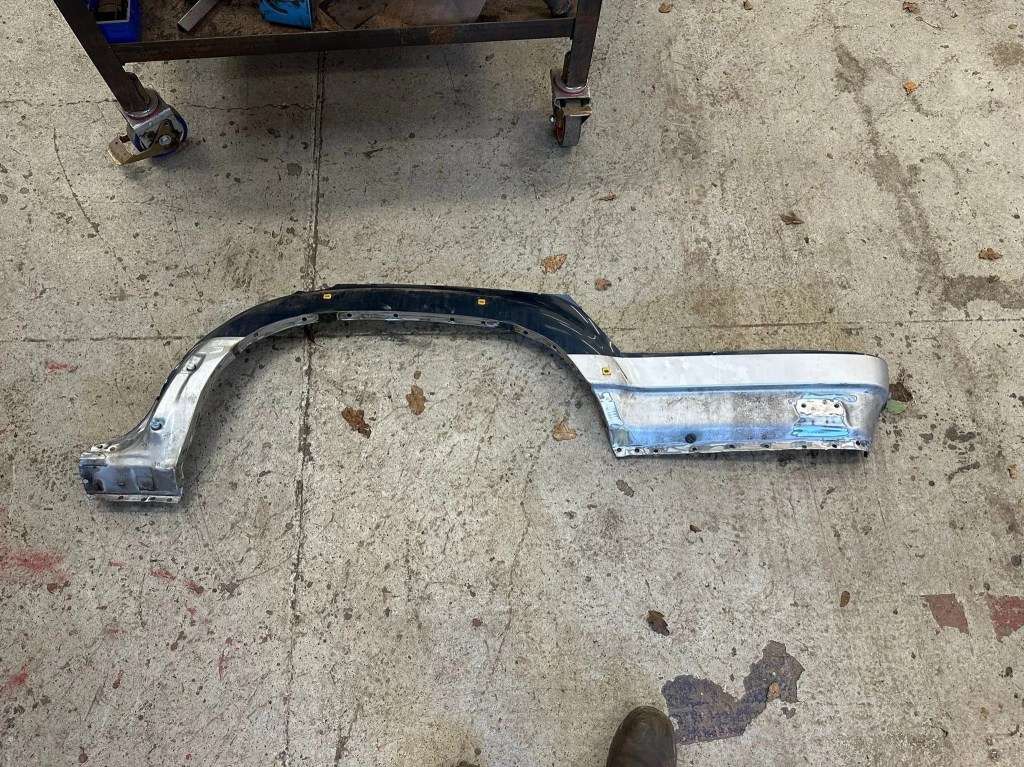
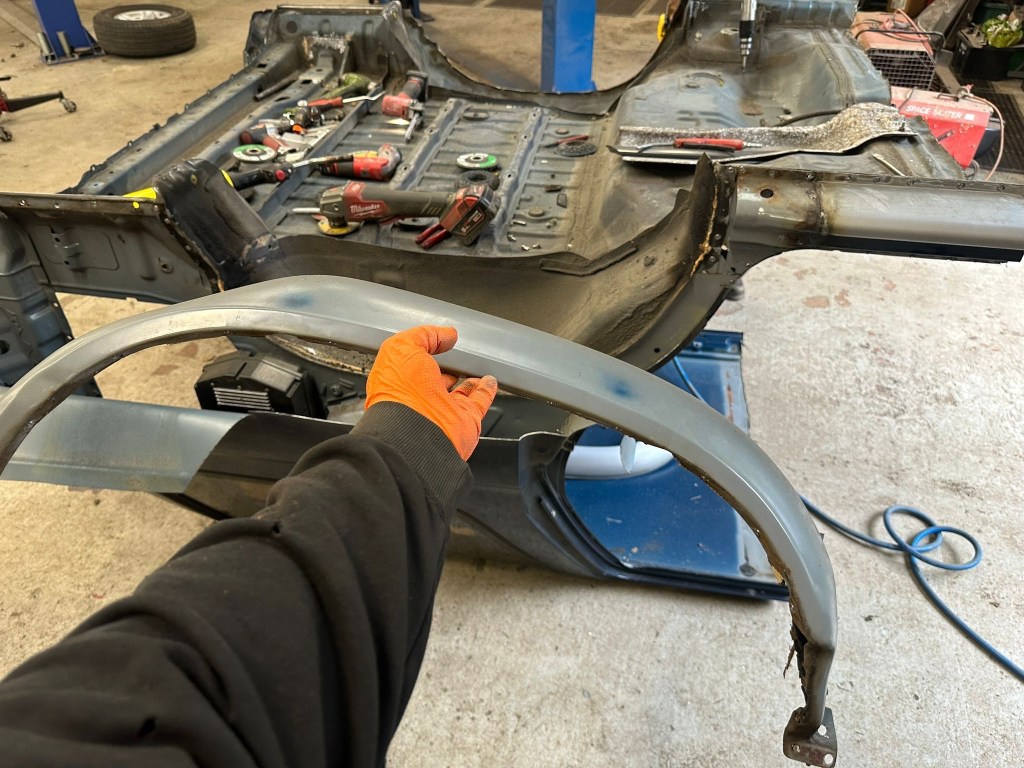
From the Photos above, sent by the Breakers Yard, you would have assumed, as I did, that the Sides were individual sections, however, when confirmed that the delivery was en route, I received this Photo..

..and this one upon delivery..

..which is substantially more than I had bargained for..! Nevertheless, More is generally better than Less when it comes to a Donor; and it’s a good job that Hellbent share that opinion given what arrived on their Doorstep.
That Broom
Remembering a statistic from a previous Post, it will come as no surprise how much of the Donor Body will be used to rebuild the 4Runner’s, and coupled the comprehensive Replacement Program that the Chassis underwent, it is easy to quote the immortal Only Fools & Horses idiom. Of course the truth of the matter is that this happens in most Big Job Restorations so receiving photos from Hellbent during this stage filled me with excitement, witnessing the salvaging of the necessary pieces of Bodywork.


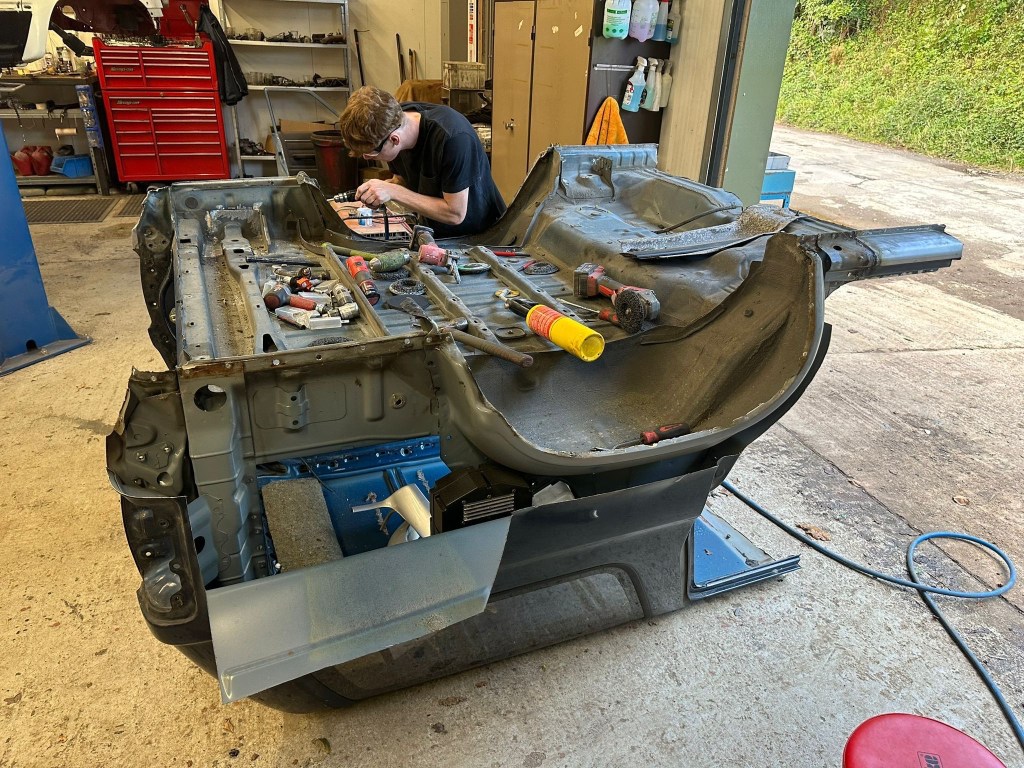

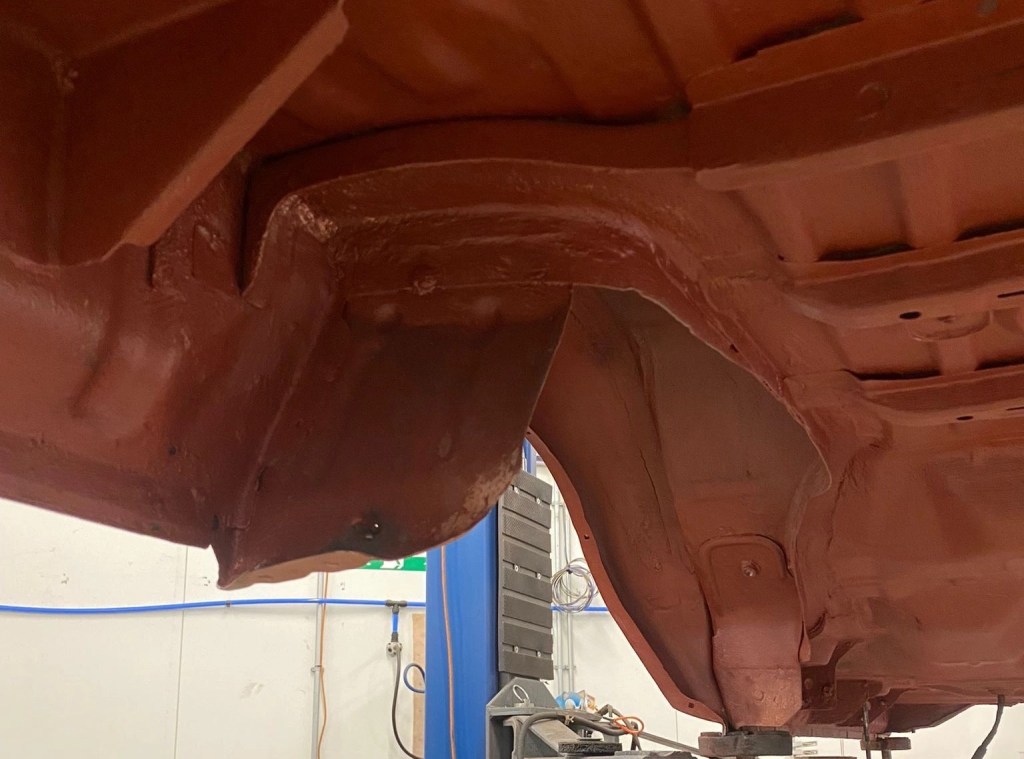
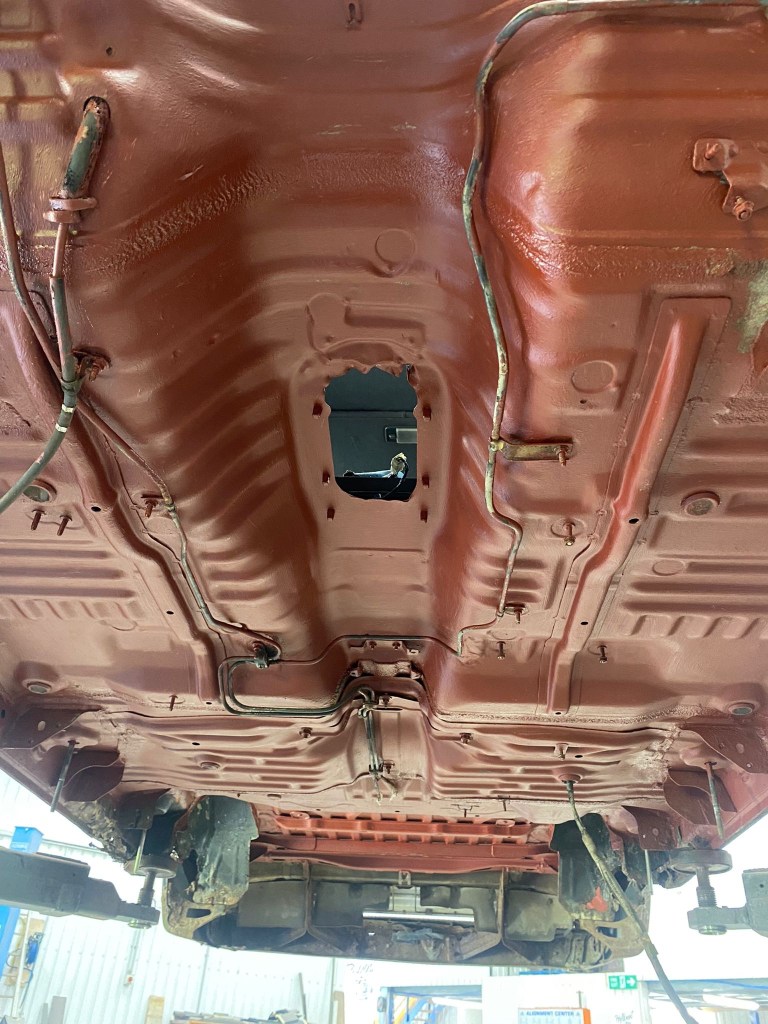
Of course, before cutting into the Donor, there was the need to find out how much of the 4Runner was rotten and needed replacing. These photos came as a pleasant surprise, the cuts not going nearly as far into the Body as expected, or perhaps feared.


Weld Champion
Inner & Outer Lower Rear Quarters
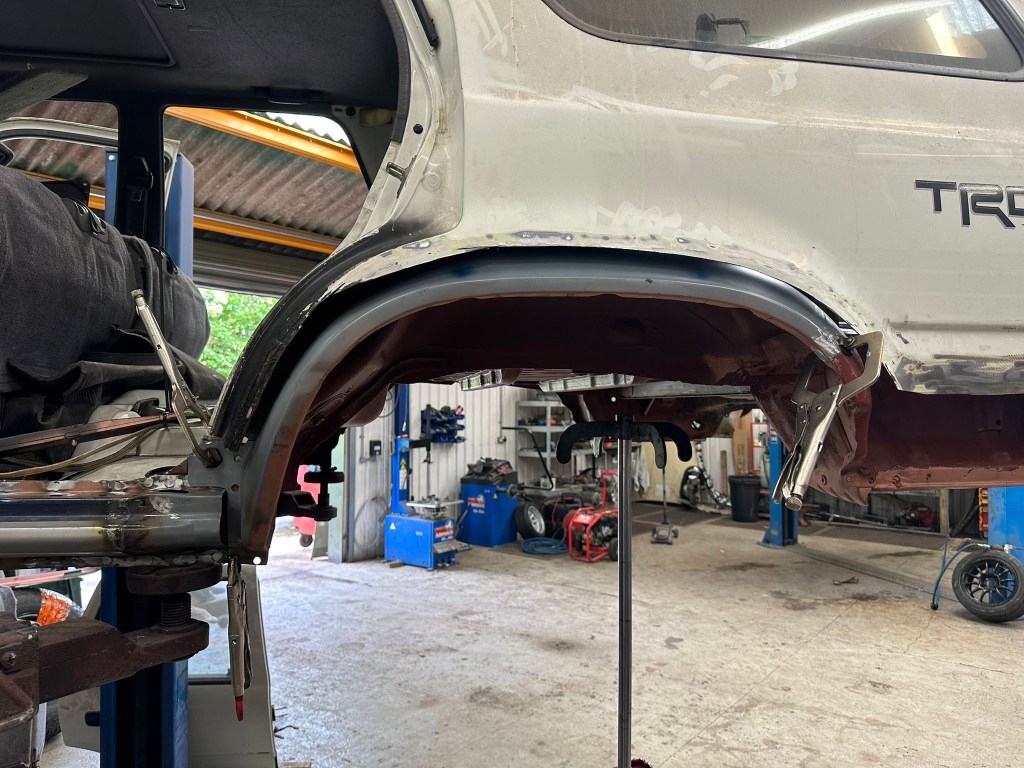
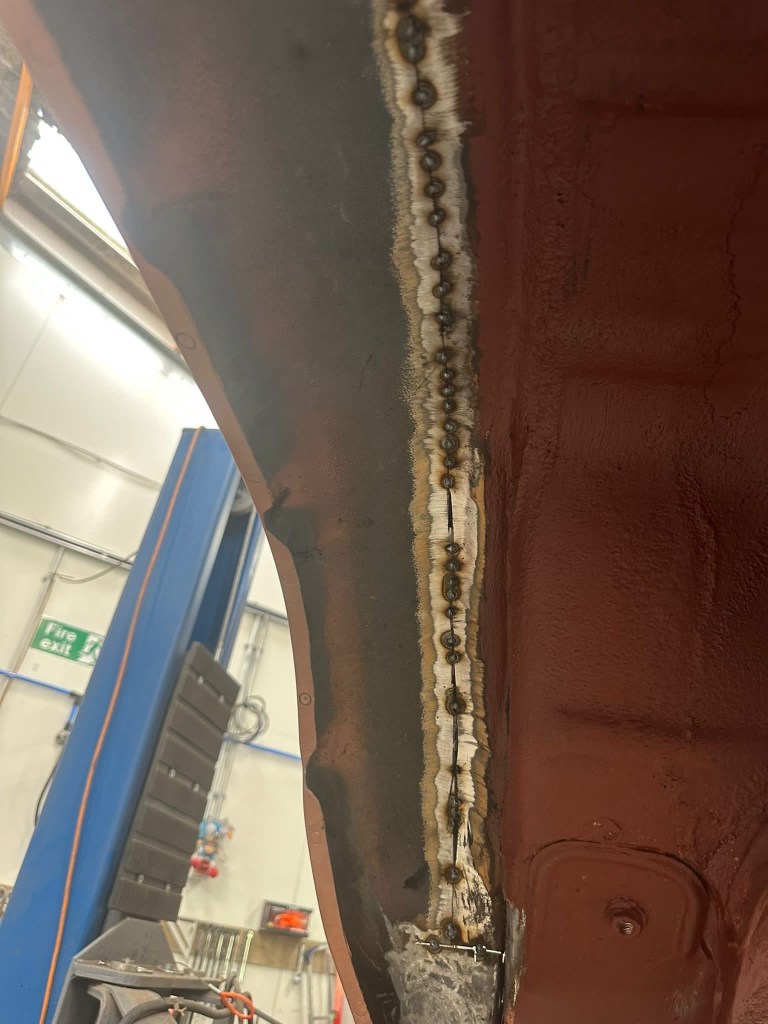
Cutting the Wheel Arches revealed extended corrosion, all the way back to the corners of the Body. Having access to these Panels on the Donor meant replacing them was a no brainer and using the original Factory Spot Weld maintained originality to its construction, and that put a smile on my face.
Original Factory Spot Weld maintained originality to its construction, and that put a smile on my face
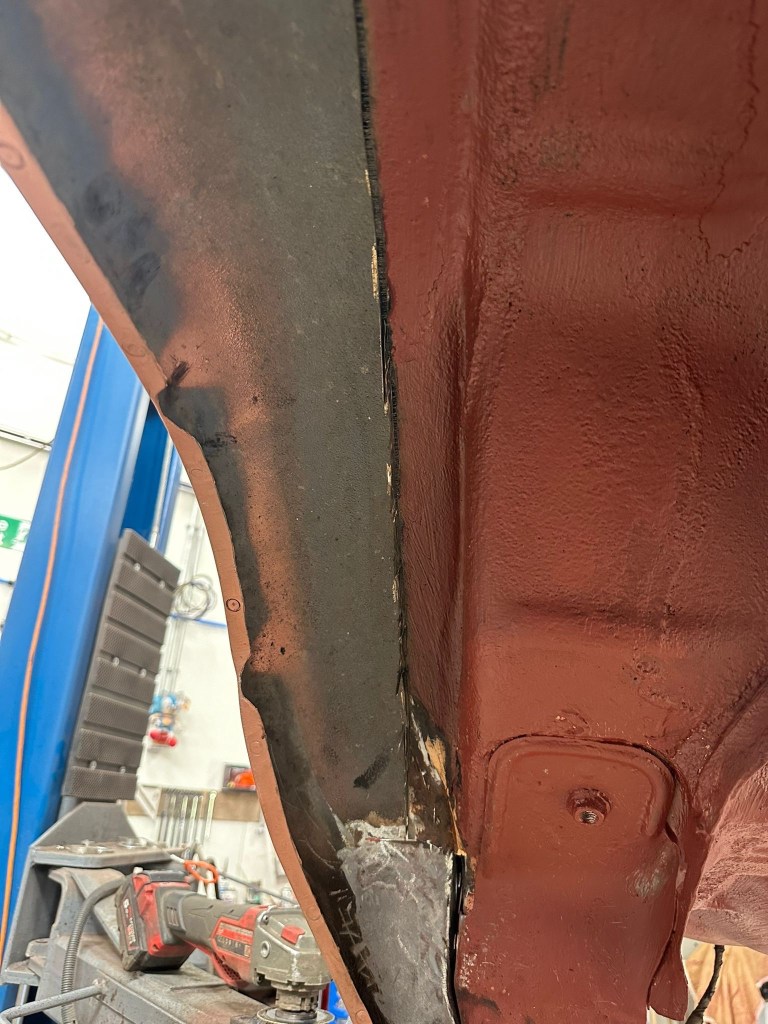
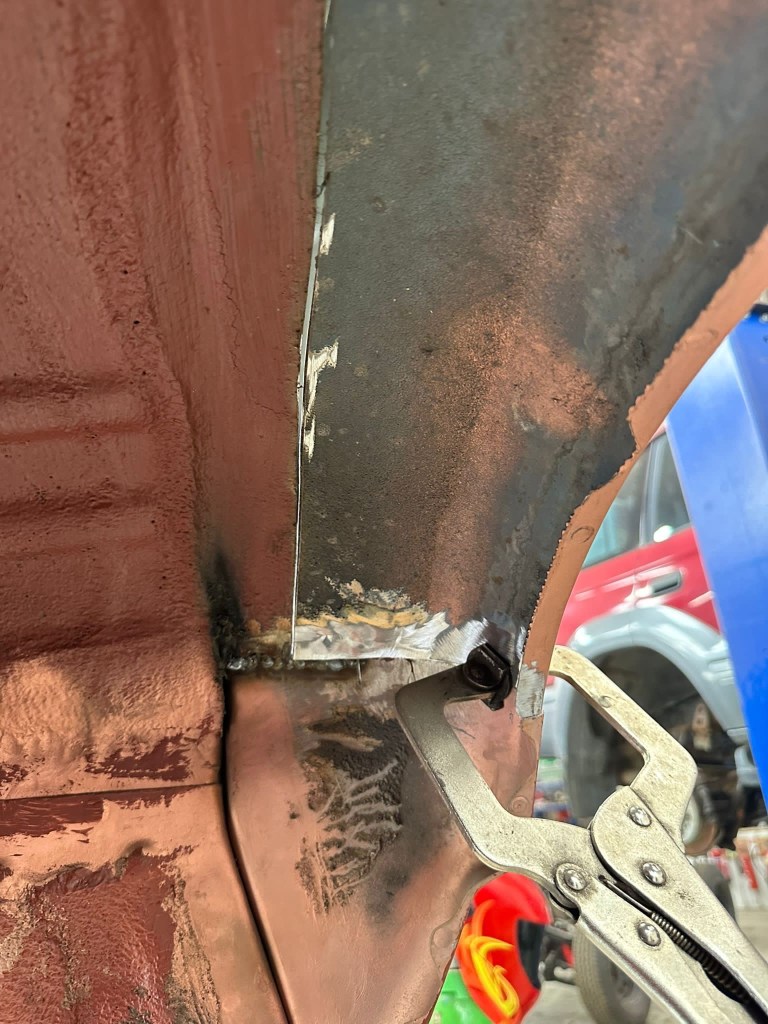
If you are wondering what the Salmon Pink “paint” in the below photos is: “It’s Copper Weld Through Primer. Where you weld, you would put the Primer on both metals as once welded you can’t get behind the Panels or Joins. It’s extra protection.“


Inner & Outer Rear Arches
As mentioned, the Inner Rear Arches really were in a bit of a state, and jigsawing sections from the Donor Body was required. The quality of craftmanship bolstered the decision to take the 4Runner to Hellbent.


The Upper Arch sections of the Inner Arch from the Donor were in great shape, and once the section fore and aft had been secured, tacking in and welding the main piece could be done.


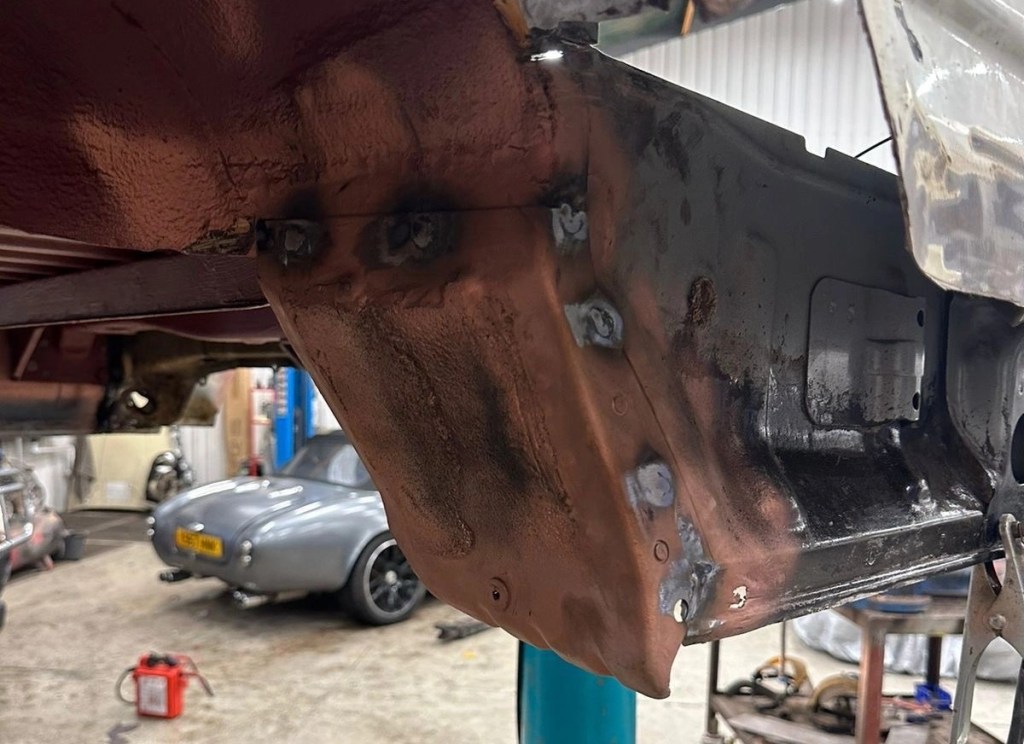
The Outer Arch sections that transition into the Outer Sill needed completely replacing, restoring strength at a critical juncture. Layering of the metal requiring extensive grinding, cutting, welding and treating.
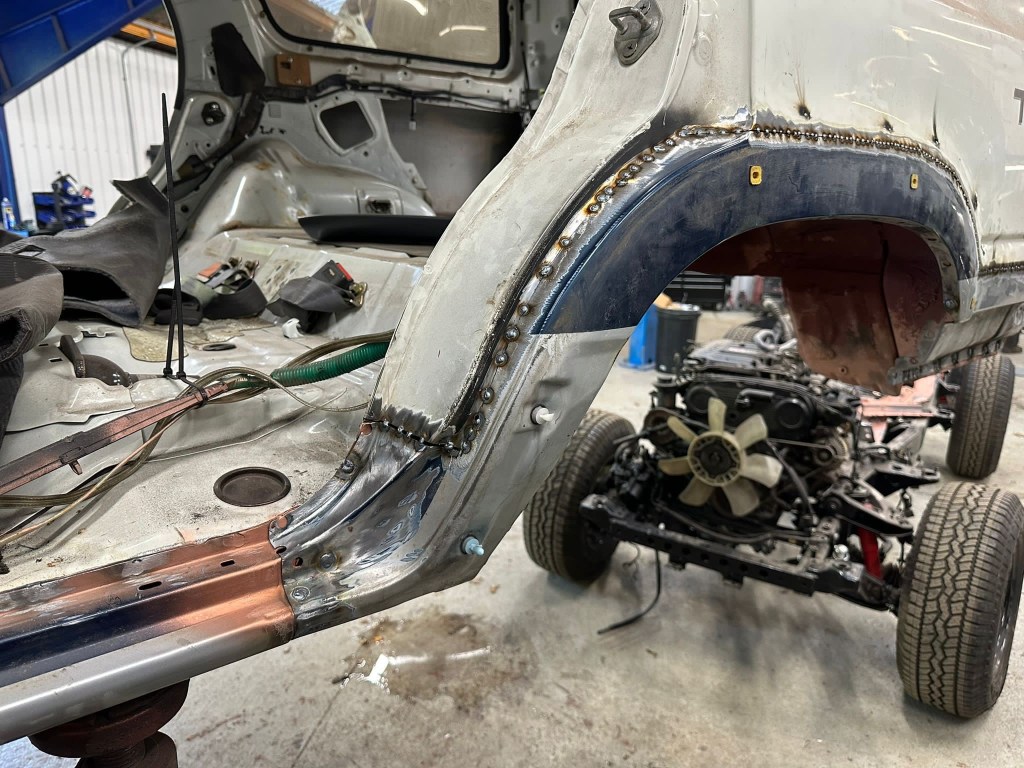
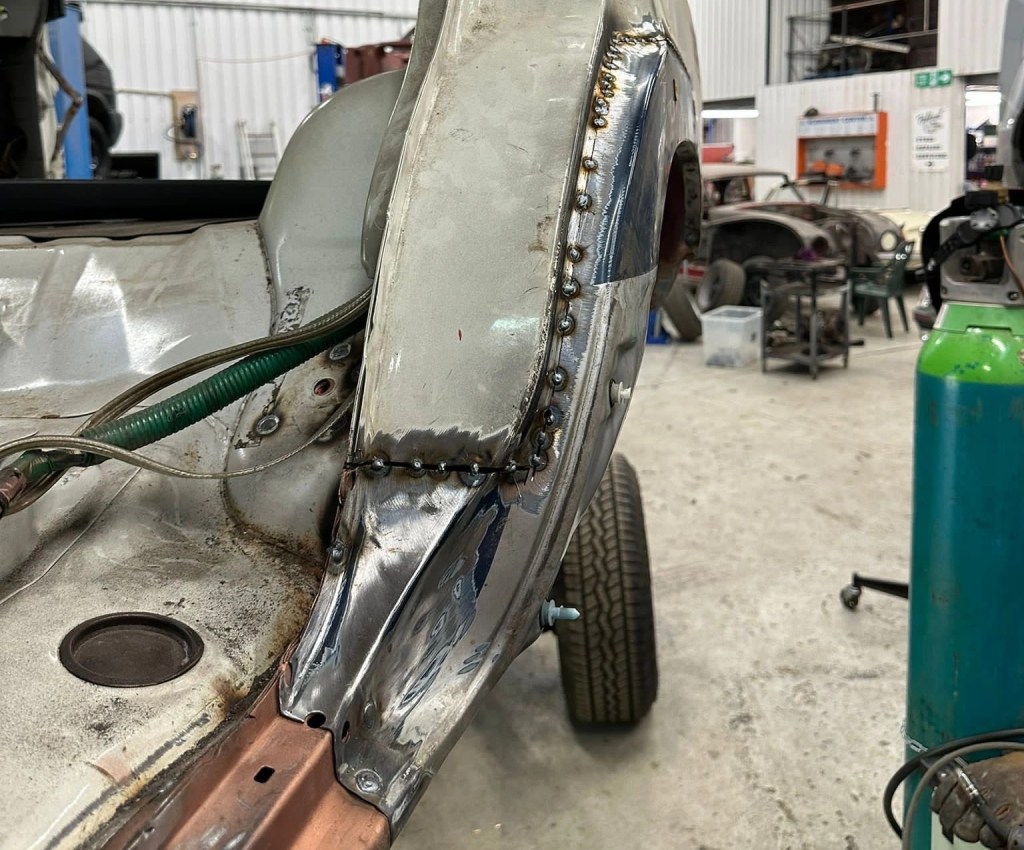

This specialist work really is worth the time, effort and money spent. Passenger side completed, it was time for the Driver’s Side to be addressed.

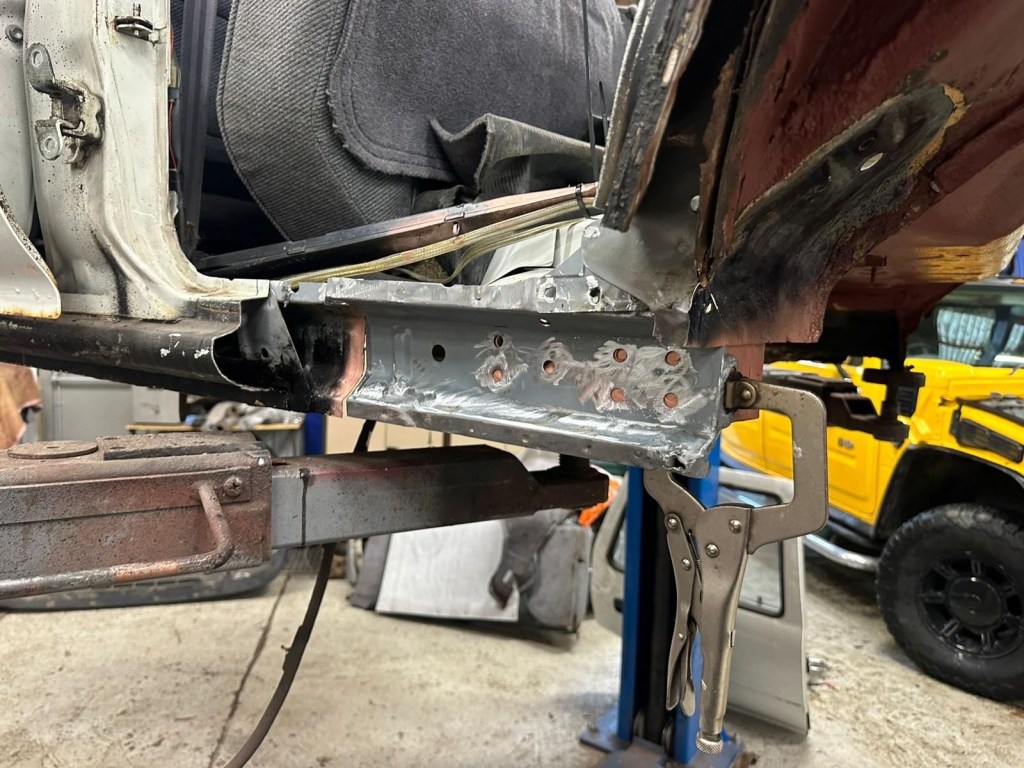
Inner & Outer Sills
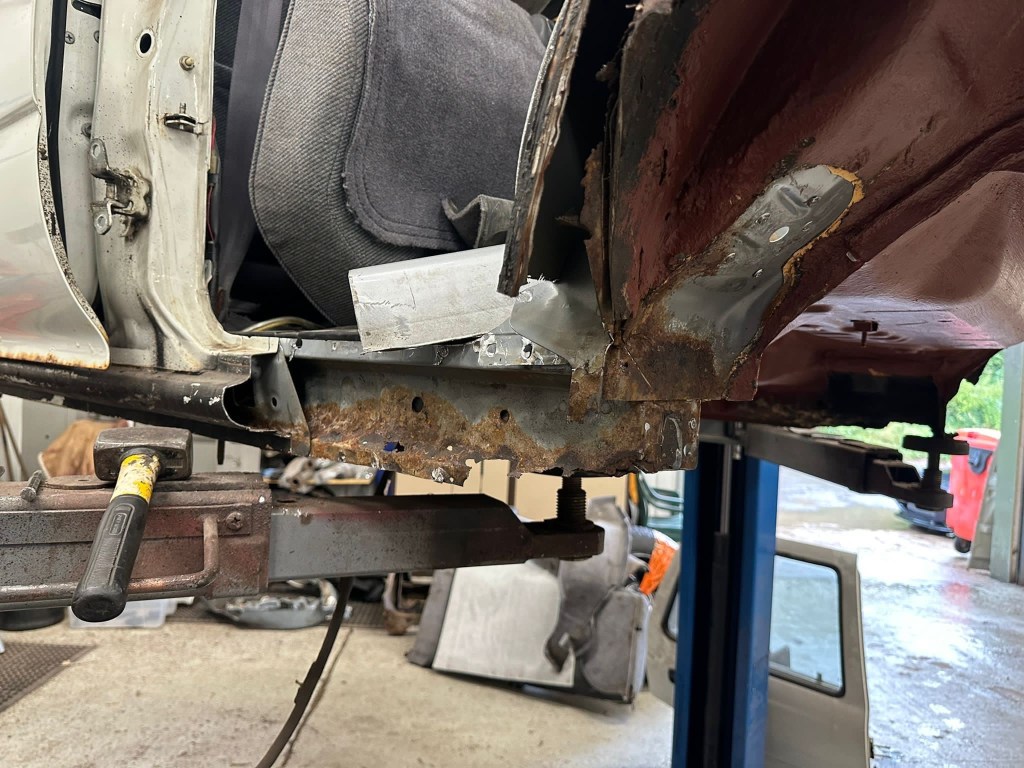
Crikey Moses I thought these would be bad, but hadn’t quite prepared myself for the extent of the corrosion. It half made me wonder how the 4Runner had been staying together as I pelted down a typically British B Road, bouncing in and out of Potholes.
And to add yet more gawp to the revelation, I considered that the Nearside was the better of the two sides, needing less reconstruction perhaps, but as the Photos came through from Hellbent it became obvious that it was only marginal levels of Totally Fucked that separated them.
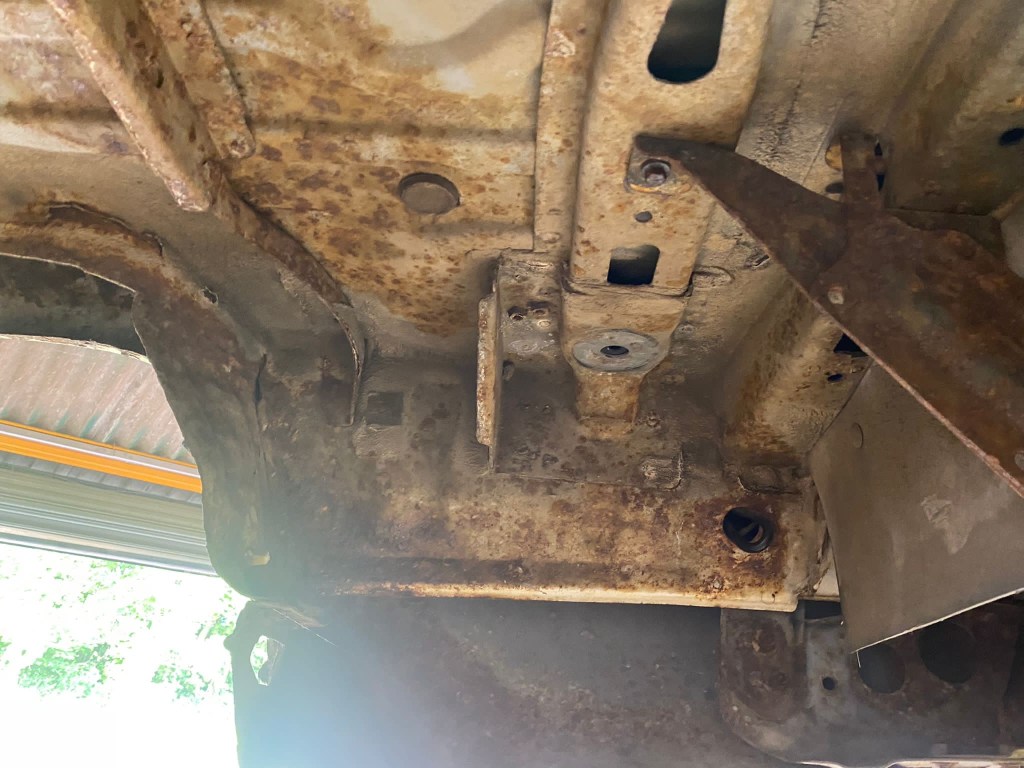
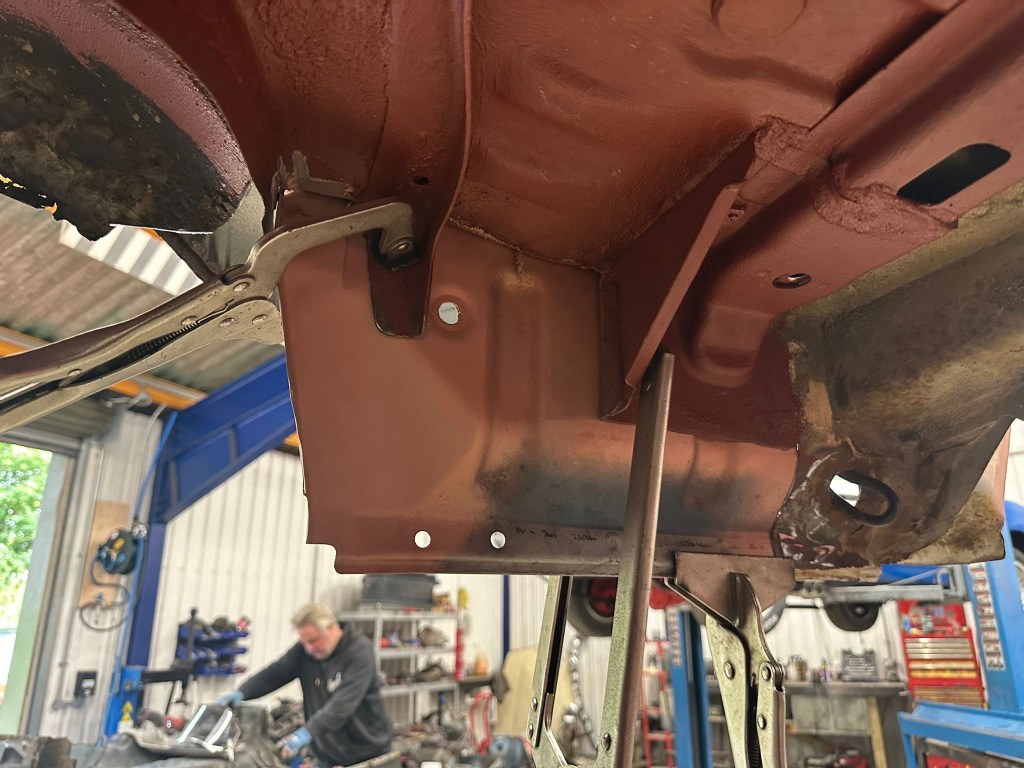
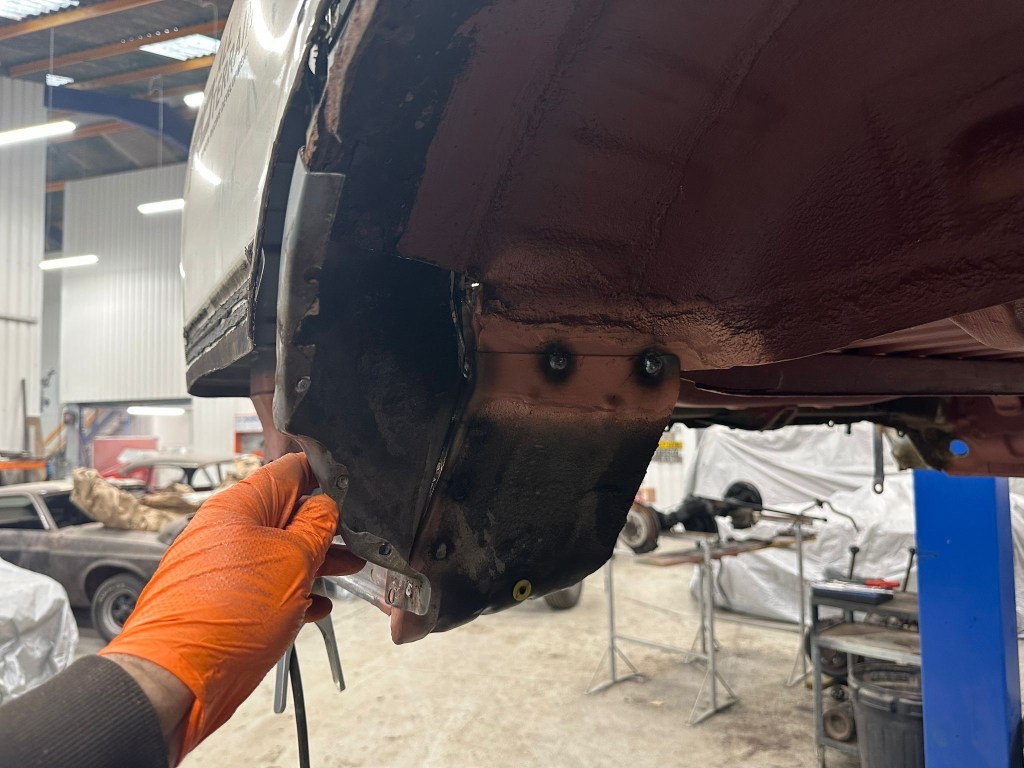
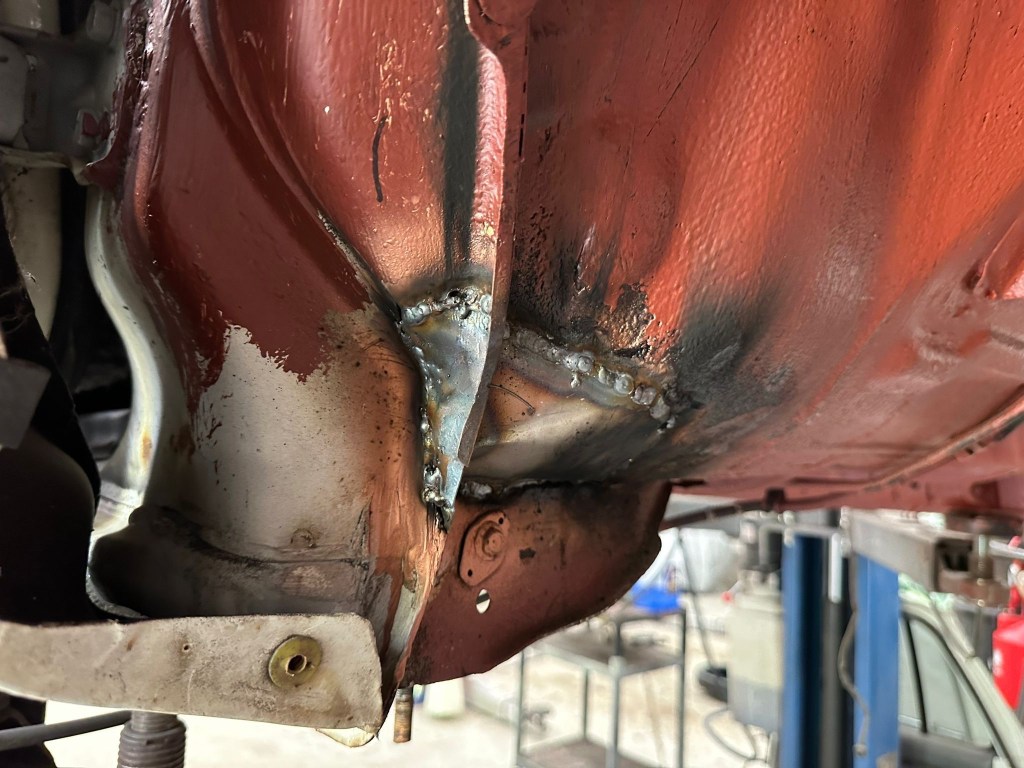
The Nearside Sill and Body Mount section in the photos below was totally shot, requiring removal in its entirety and replacing with good Metal from the Donor. Yes, the Body Mount, where the Body bolts to the Chassis, needed replacing. Gawp.

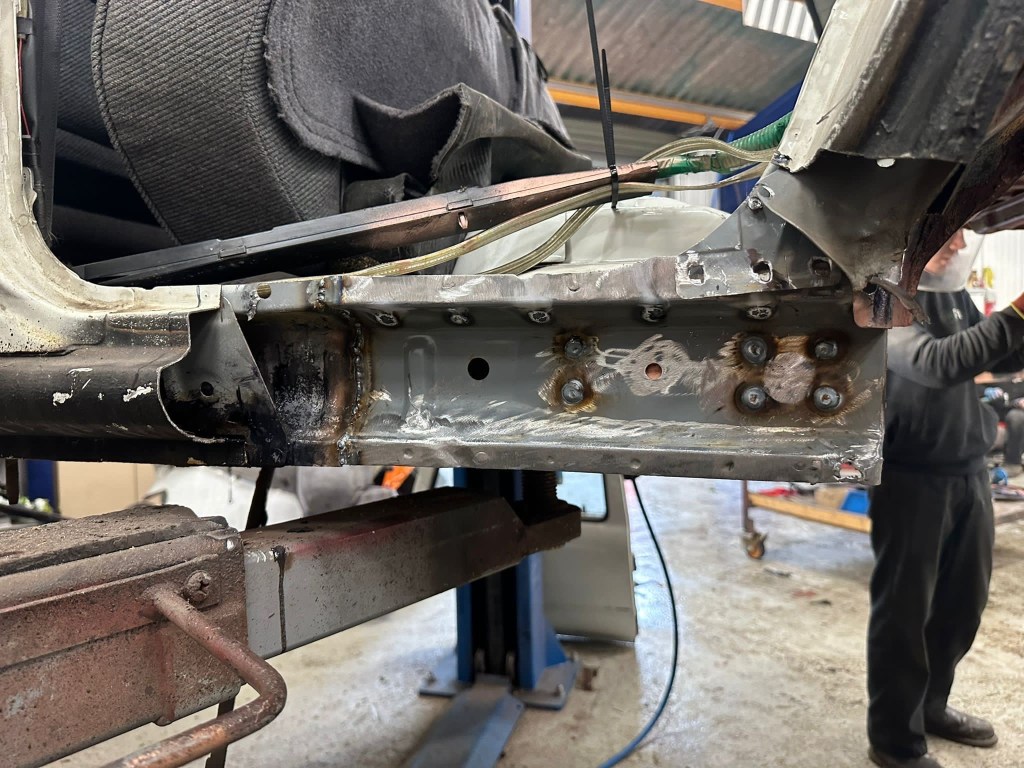


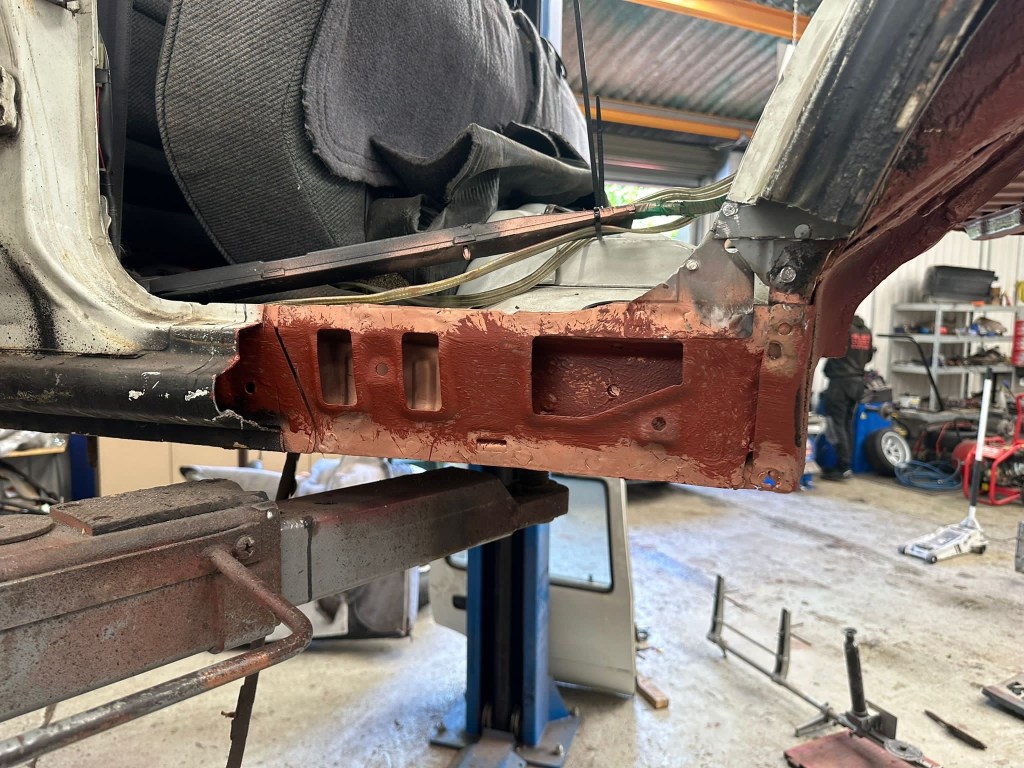
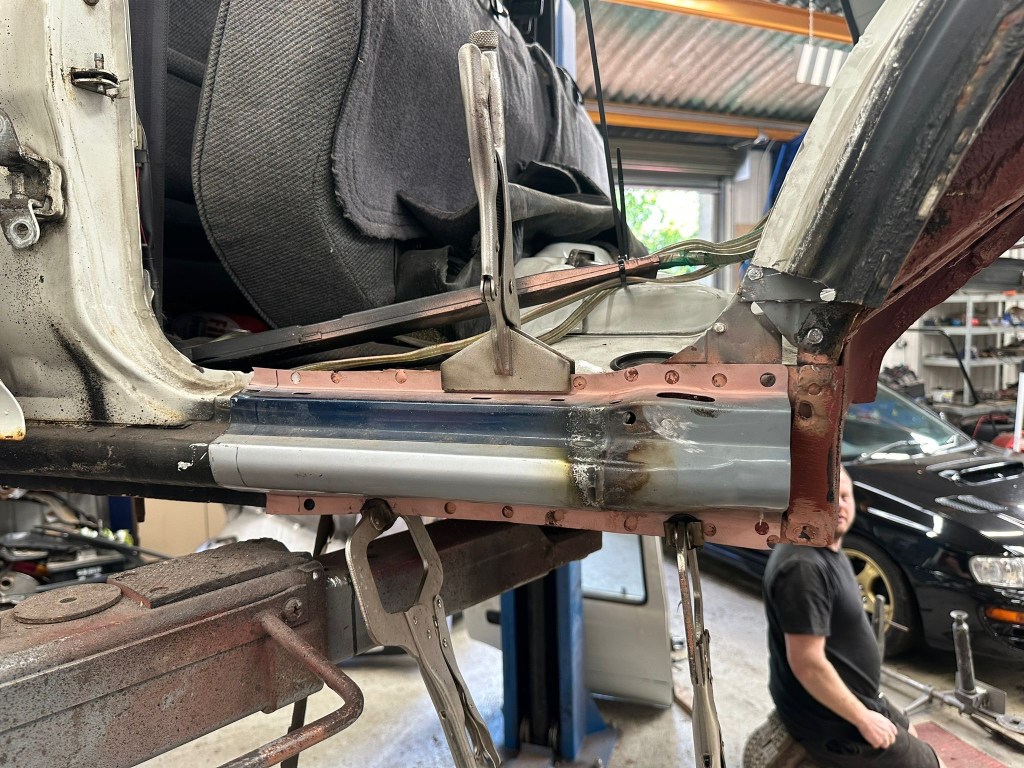
This was Factory Build specification, not patching to get through an MOT. Building up the layers of the Sill using sections from the Donor to create a strong and permanent repair, protected from corrosion for years and years. And yes, I know you are thinking “why not just replace the Body entirely”, which is a valid statement with hindsight, but really carries no weight after the fact.
I don’t want to sound Penny Wise and Pound Foolish, but it could have been a lot worse, but the Donor body section was a financial saviour. If you have embarked on a full restoration, you’ll know that it isn’t really known how much of the Body would need replacing until you start to cut away the Rust. The Rubicon / Point of No Return moment happens a lot sooner than you realise with Bodywork, especially when both sides of a Vehicle need attention. As mentioned earlier, I thought the Nearside would be the better of the two by some way, and it possibly was in a relative sense, but when the condition of the Offside is taken into context, it doesn’t take much to make the Nearside “better”.
Knowing the quality of craft that went into the rebuilding of the Rear sections of the Beast fills me with confidence and cements ownership of the 4Runner for a long long time.
Front Inner Arches
The Wallet was emptying at a rate, and once the Rear had taken its Pound of Flesh, there wasn’t much left for the Front. Since there was no real need to replace the Front Inner Arch, it made sense to repair sections as required. No matter the level of expectation, Hellbent deliver perfection.

Cut, Grind, Fertan, Weld, Red Oxide; the Beast is going to outlive us all..


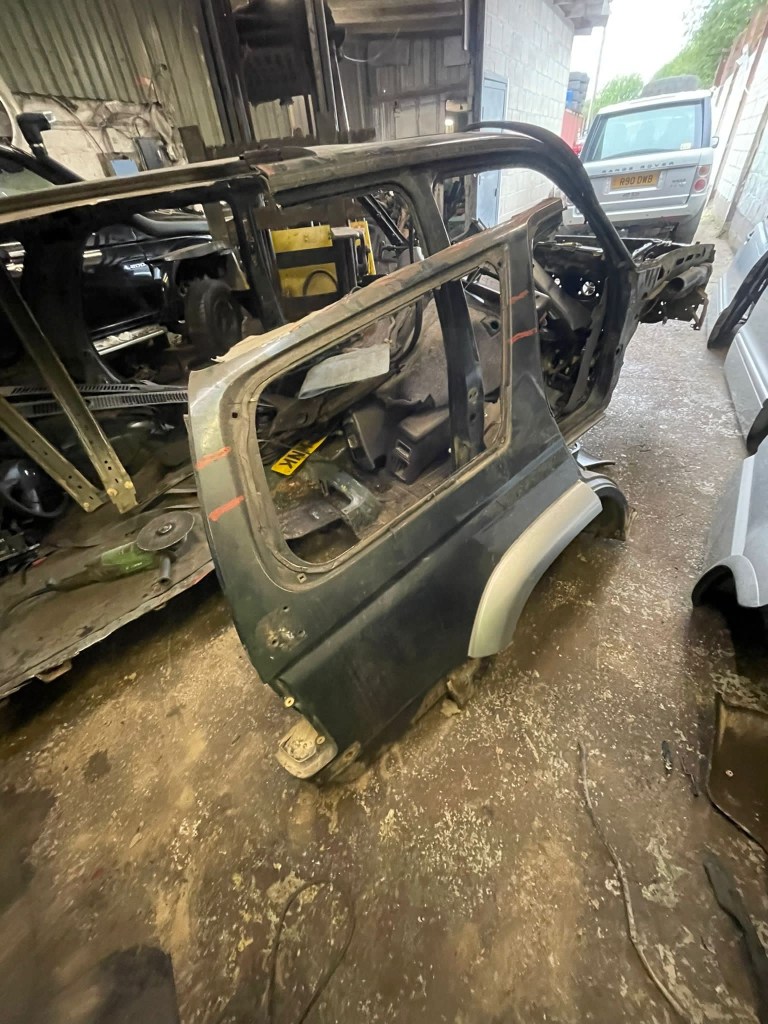
Carrion
As the Welding work draw to a close, the carcass of the Donor sat outside the workshop, thoroughly exhausted of its resource. Money well spent given the extent of the corrosion.

Rapturous
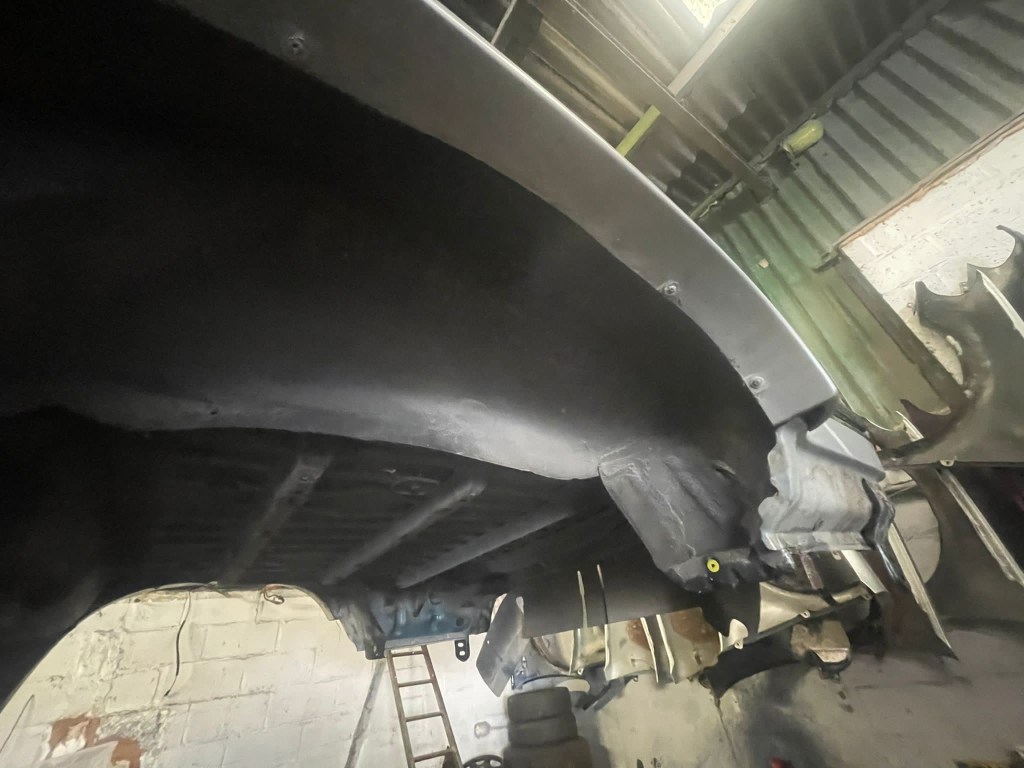
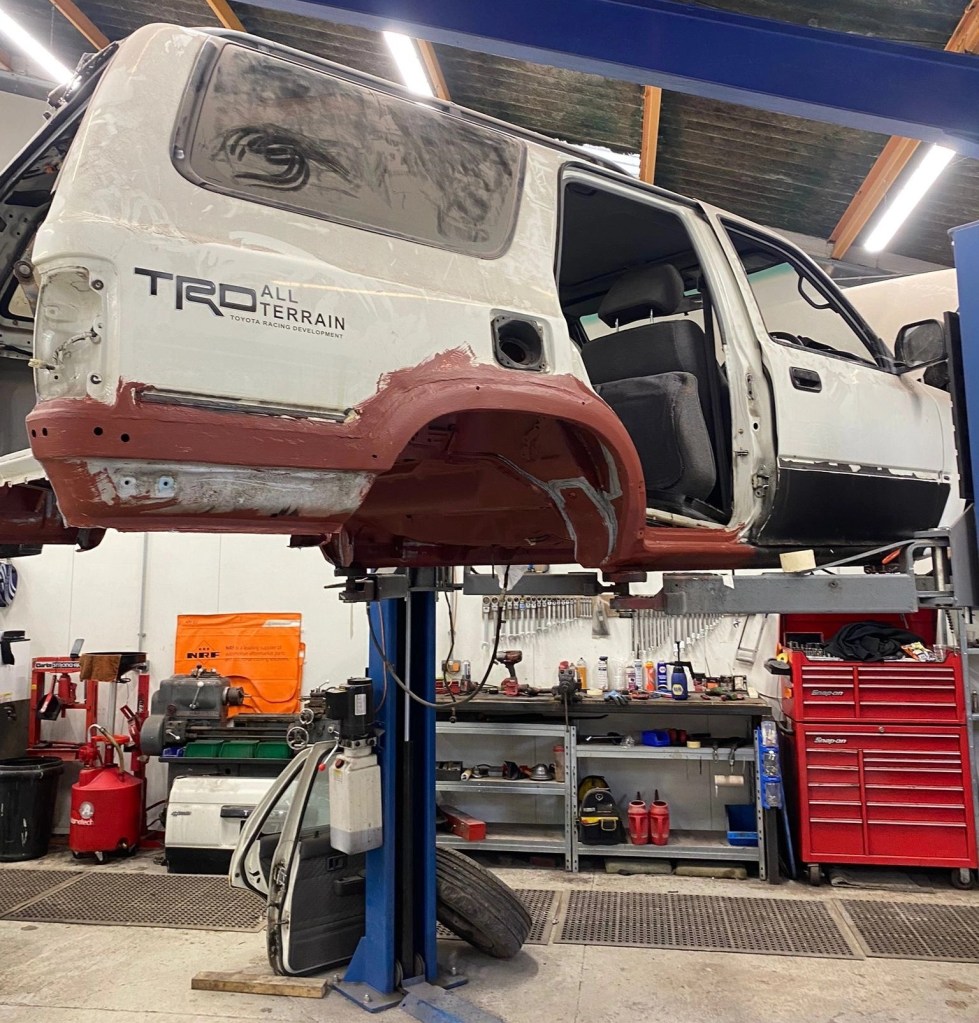
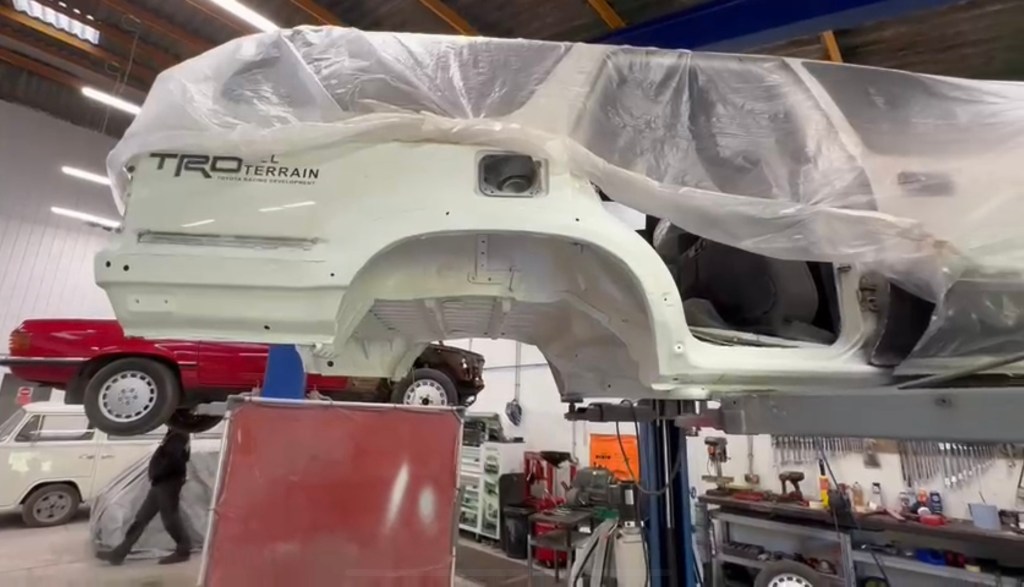
If you have seen the finished look of Raptor Paint, you might have winced a bit at the reading of this section’s title. Let me just allay your Fears – I am not having the Beast completely resprayed in textured Raptor Paint. I am however using its tough and protective characteristics to guardian the underside of the Body.
I am not having the Beast completely resprayed in textured Raptor Paint
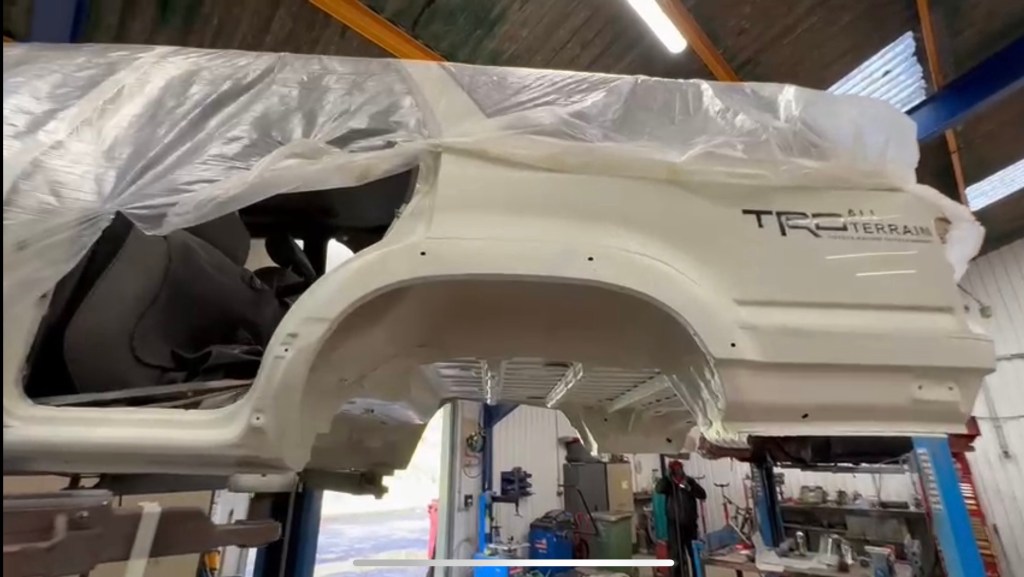
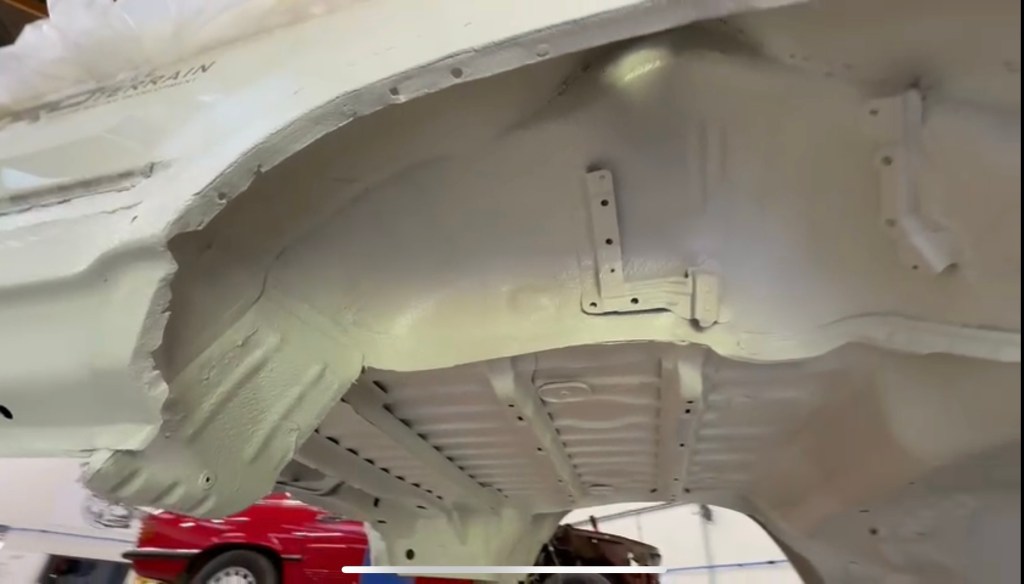
With a particular variant of the raptor range, it is possible to add in a tint and with my Keep It Stock plan in motion, TOY045 Glacier White is the colour of choice. My aim of this restoration all along has been to restore the 4Runner’s stock appearance and painting the underside of the Body will affirm this intention.
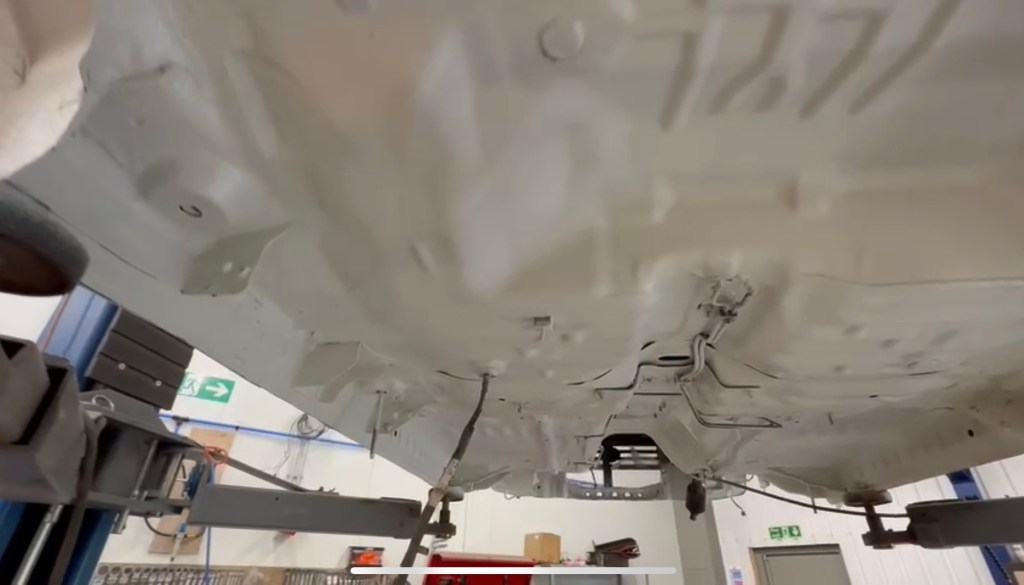
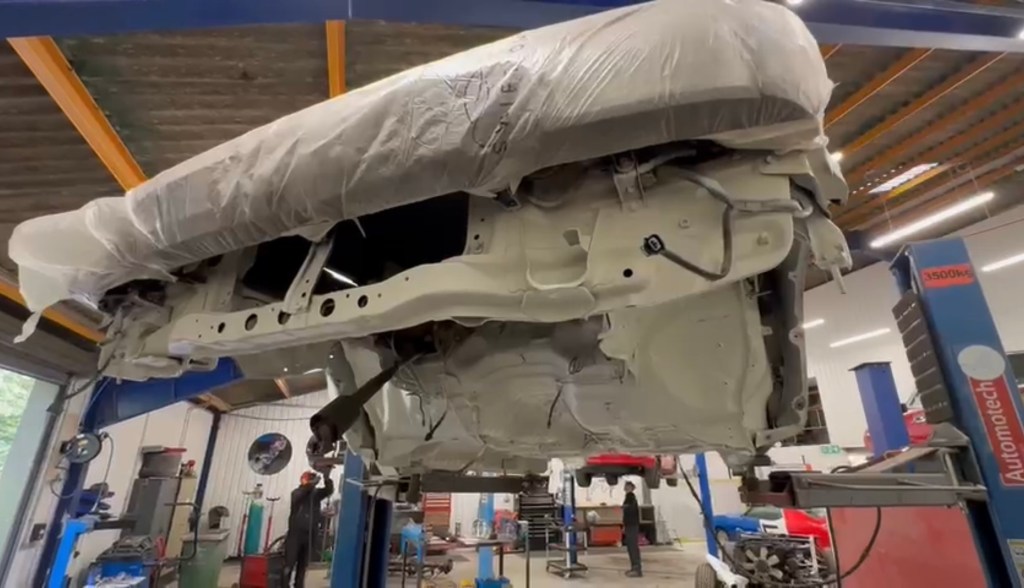
The progress to the Underside had been a laborious one, it is a large section of Metal.


..so when I received this Video from Hellbent I have to admit that I became a bit Emotional. That Light at the End of Tunnels..? It was coming into view..
That Light at the End of Tunnels..? It was coming into view..
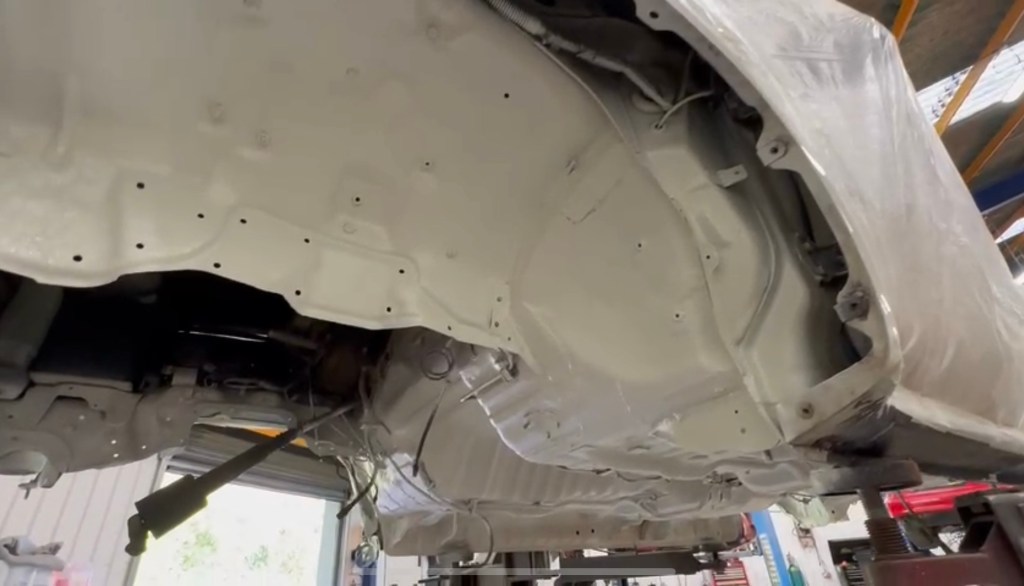
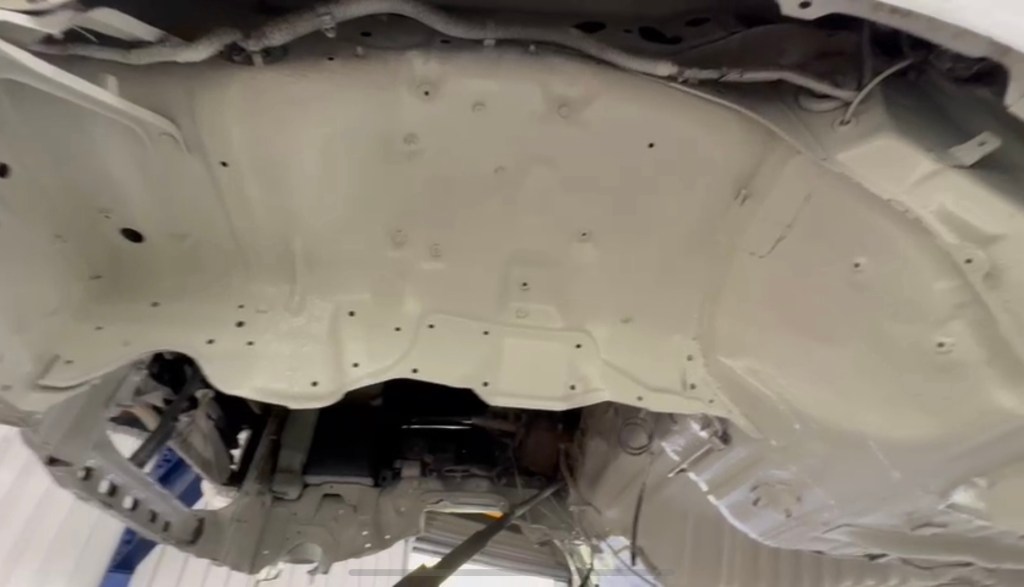
That was it, the Raptor Paint marked the end of the Bodywork to the Beast. Overspray of the Outer Arches meant that whilst I take the Beast back for the next couple of months over the Christmas and New Year period, the Work would be protected and all the Good Work wouldn’t suffer and bleed Rust through the porous Primer.


But there was plenty to do before I could drive it away, a Punch List of Reassembly, Tracking and Snagging; and an MOT to pass.
But for now, next on the Agenda was the reunion of Body and Chassis..
Categories

2 thoughts on “Beast Restoration: Body” Leave a comment ›