Head Gasket Series: The Rebuild

My Train pulled into Brighton early on the Monday morning, ahead of three Very Long Days in the Garage. It was the week after the week after we had torn the Engine down, and the Heads had been with the Machinist for the preceding week so would be ready for collection that morning.
Sometimes, when you walk into a Workplace, you know instantly that it is the right place to do Business with; SPRABuild is one of those places.
The Machines were all set up ready to accept the day’s work,
a gentle hum of Electricity filled the quiet..


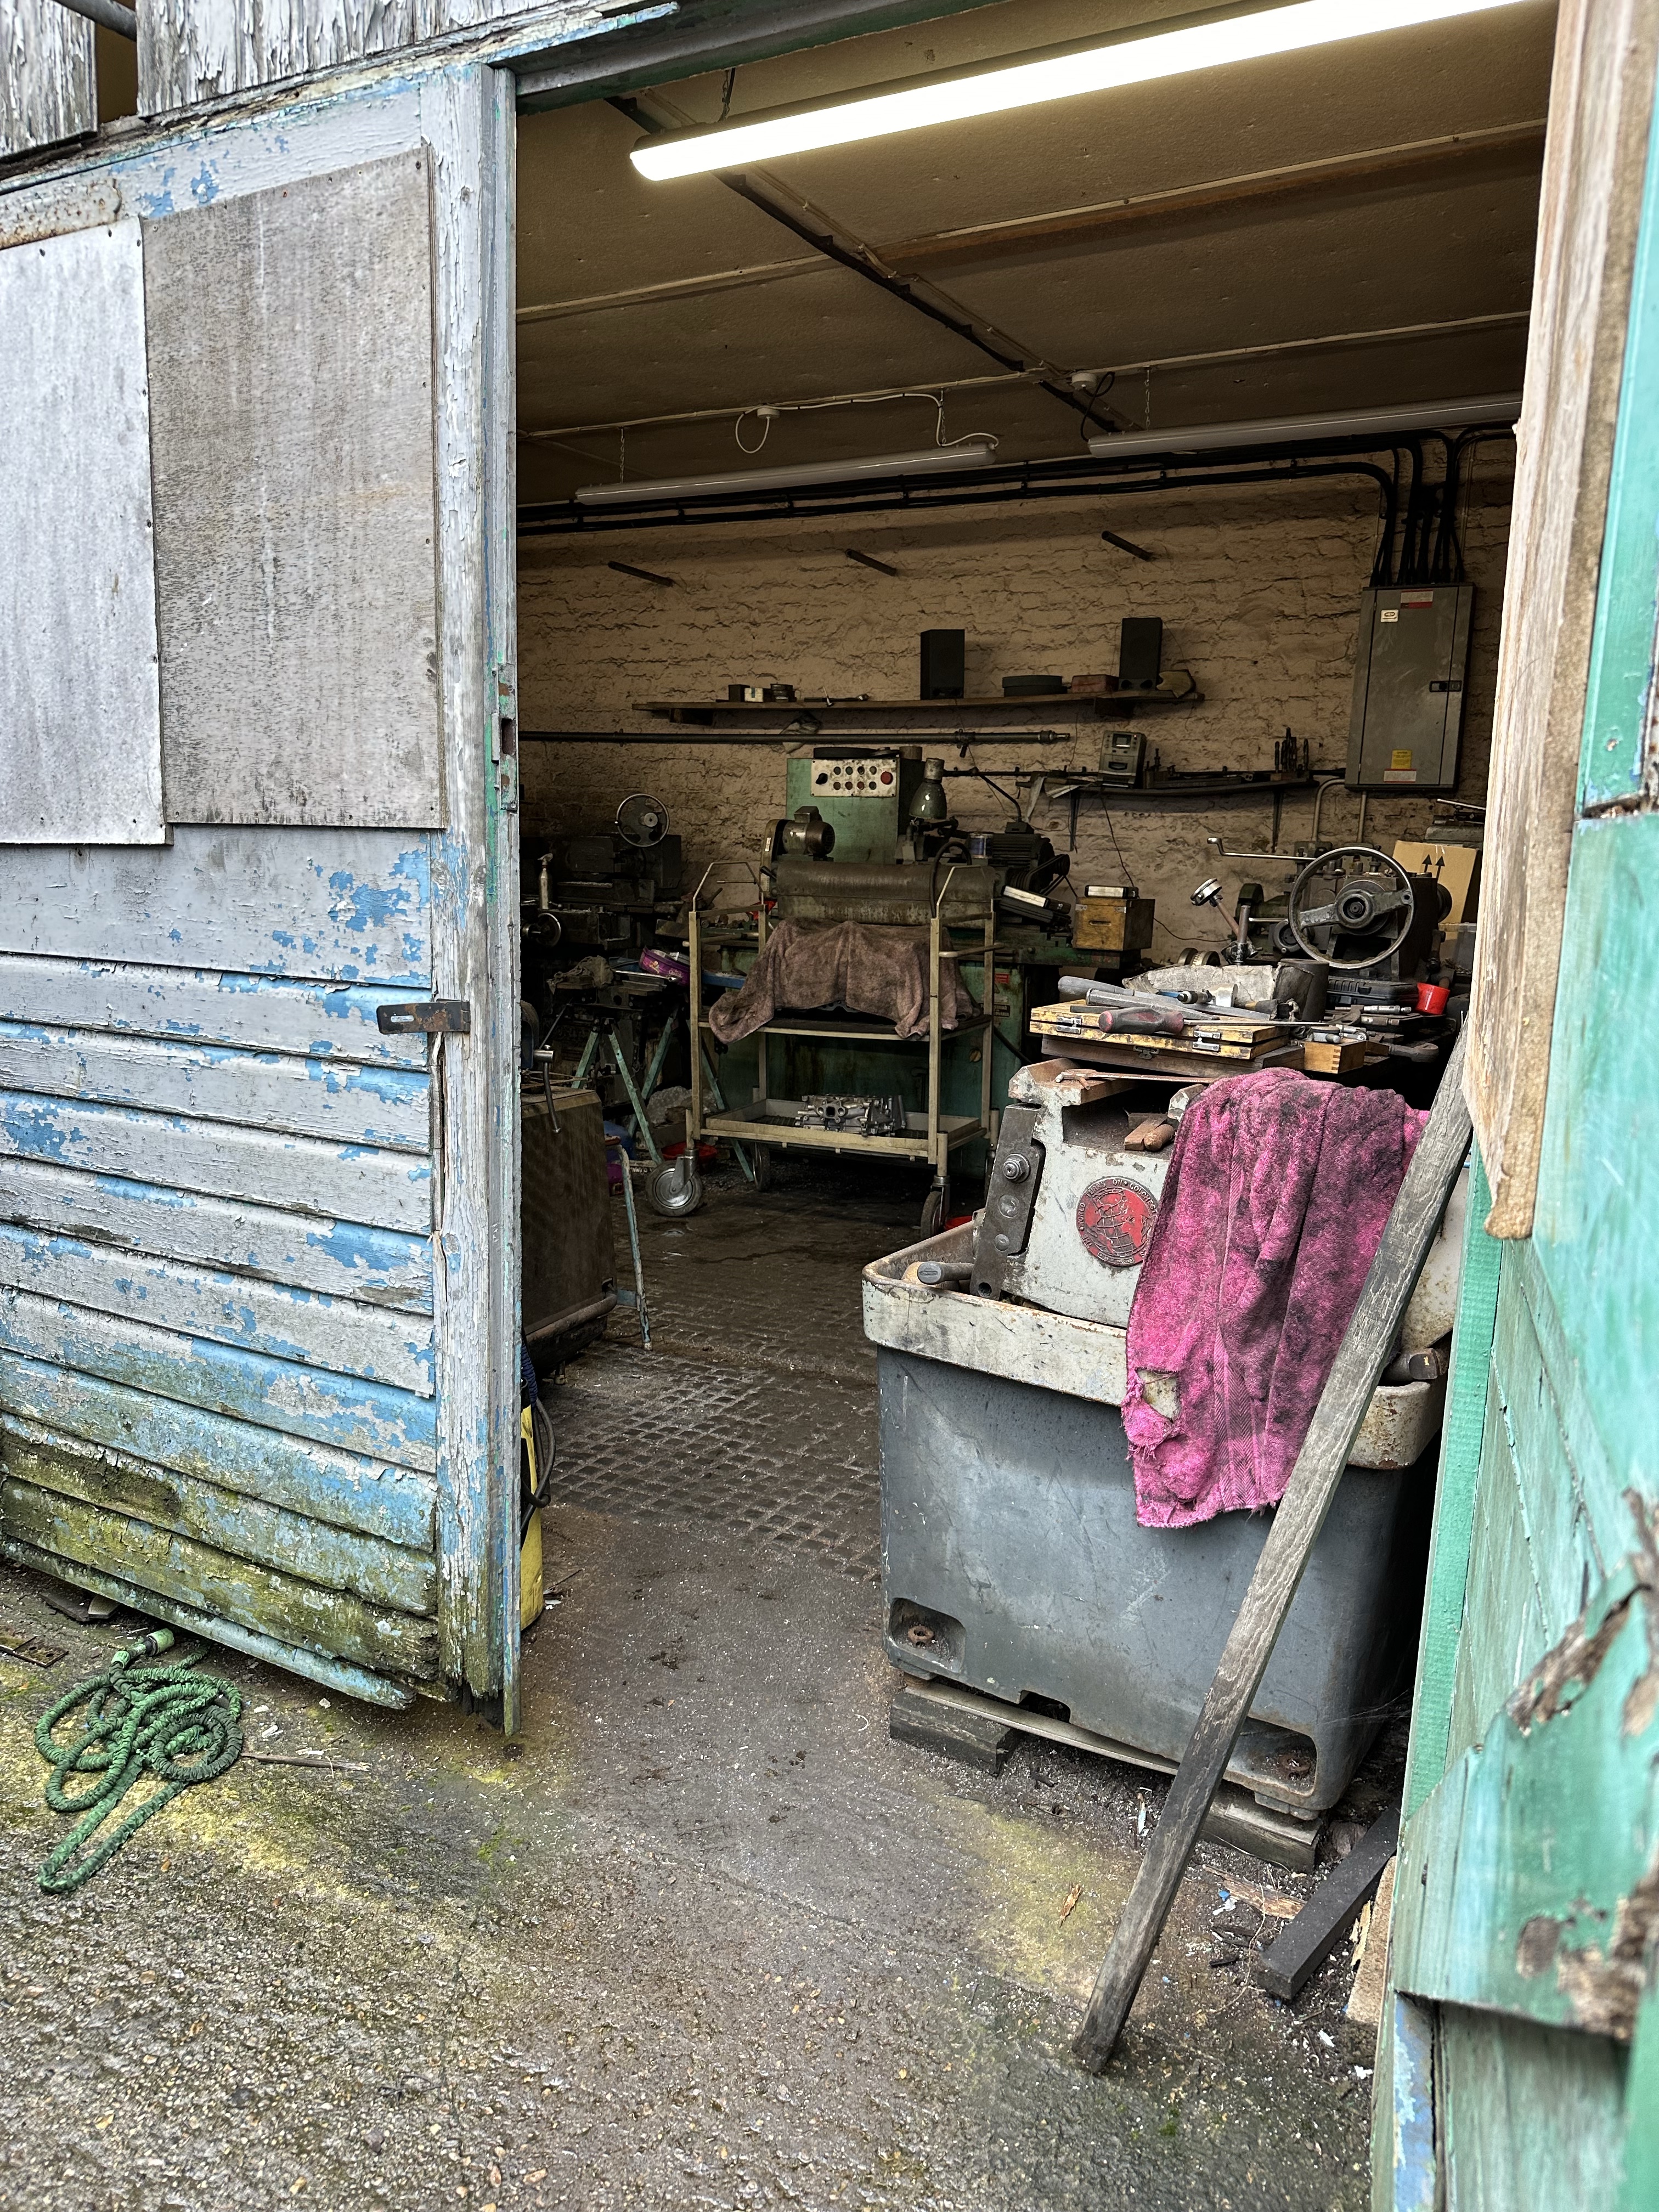
The place smelled metallic, and if I hadn’t known better, I could have sworn that Bob was infused with Steel and Aluminium from years of toil. The Machines were all set up ready to accept the day’s work, a gentle hum of Electricity filled the quiet, and lines of Cylinder Heads and Engine Parts filled the shelves.
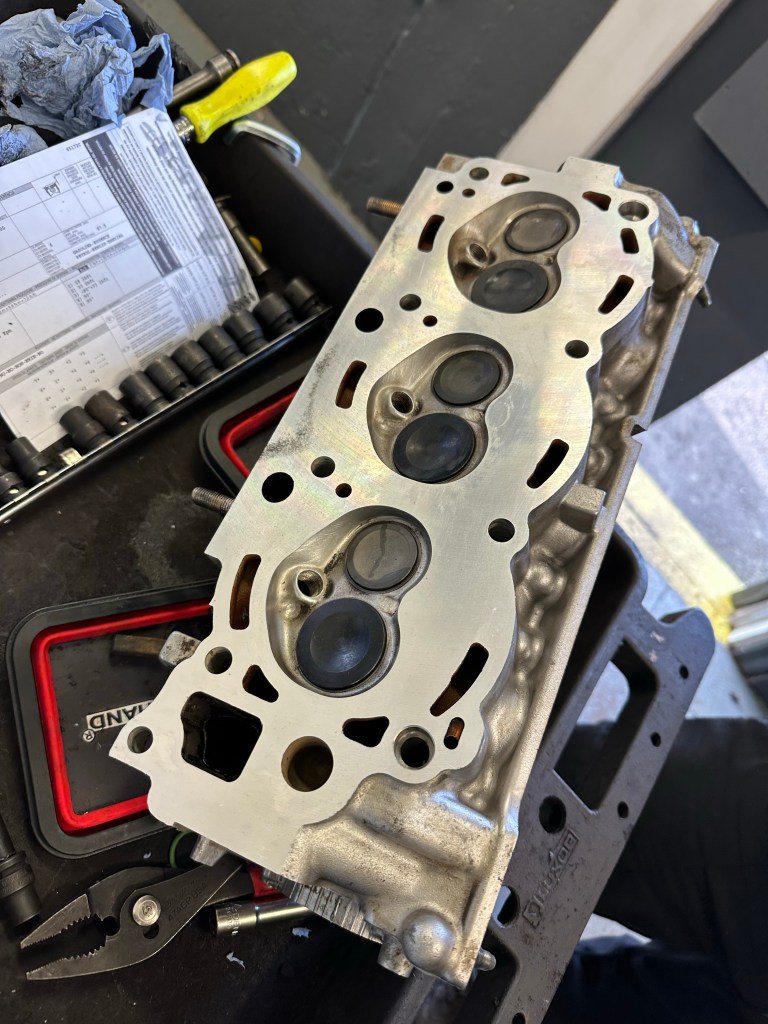
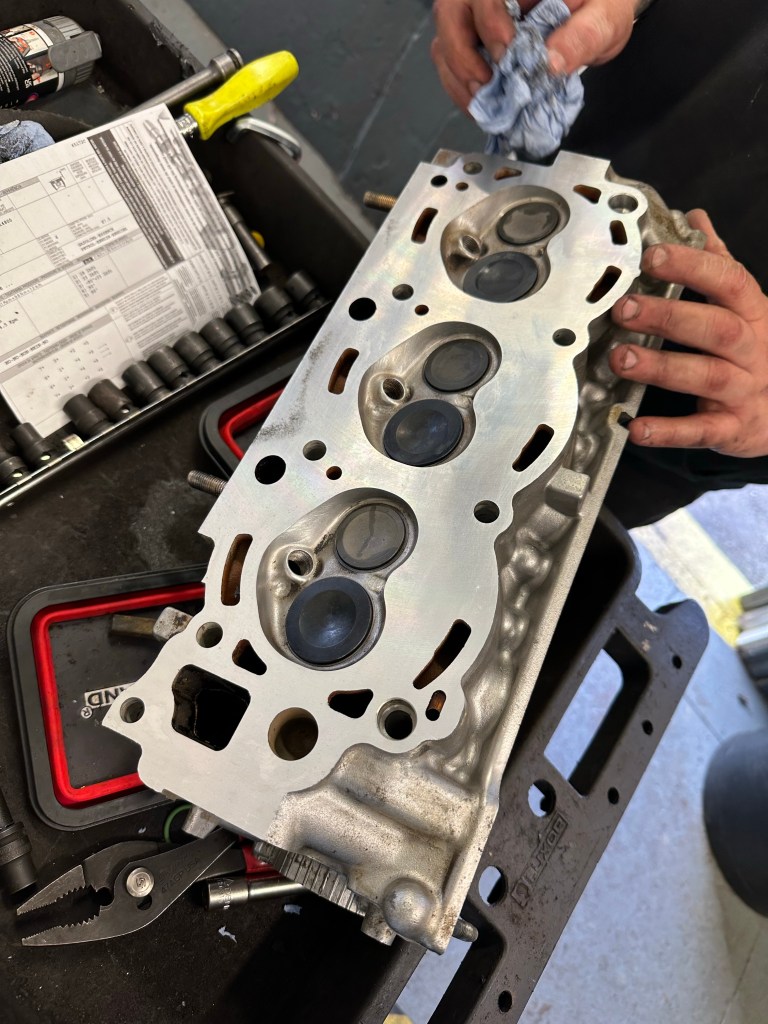
I had supplied all new Valvetrain Components, so the Rebuild was going to be perfect, I wondered if there would be any noticeable difference in the Feel and Sound of the Beast; I knew there would be a difference in Look. So being presented with the new skimmed Heads was a Happy Moment; by Wednesday evening I would know to savour those.
Block Party
Back in the Garage the Rebuild started, and time to prep the Block to take the Heads. WD40, Flat Iron Block and some Emery Cloth to smooth out any imperfections.. Nice and slow, steady and uniform down the length of the Cylinders..
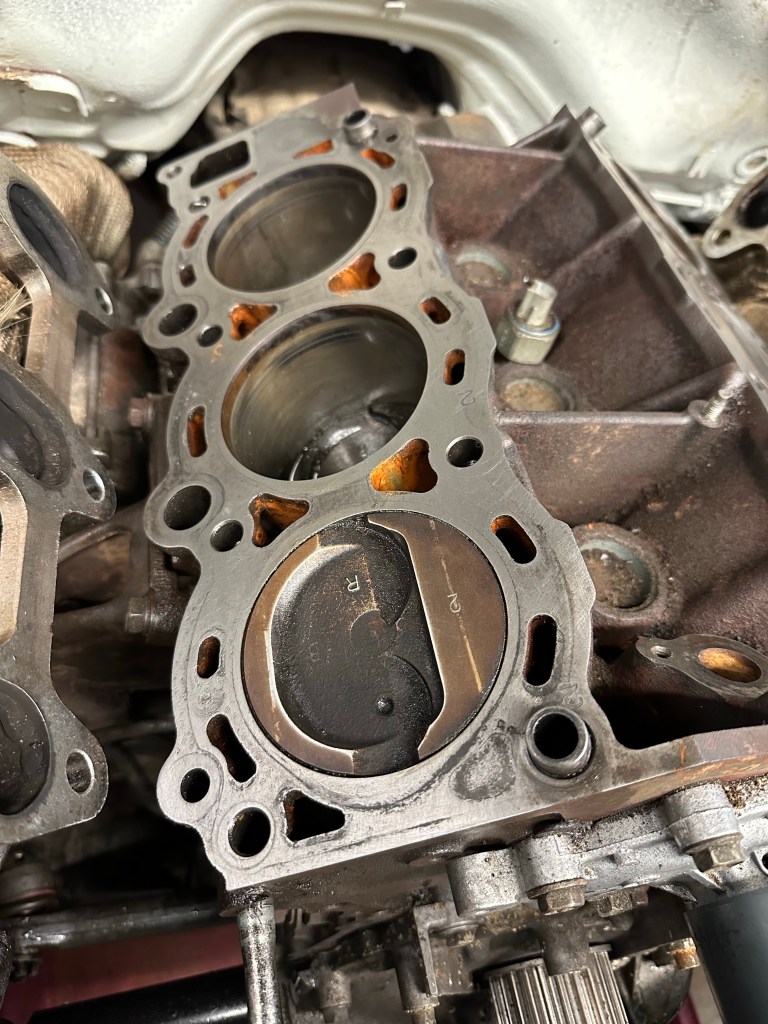


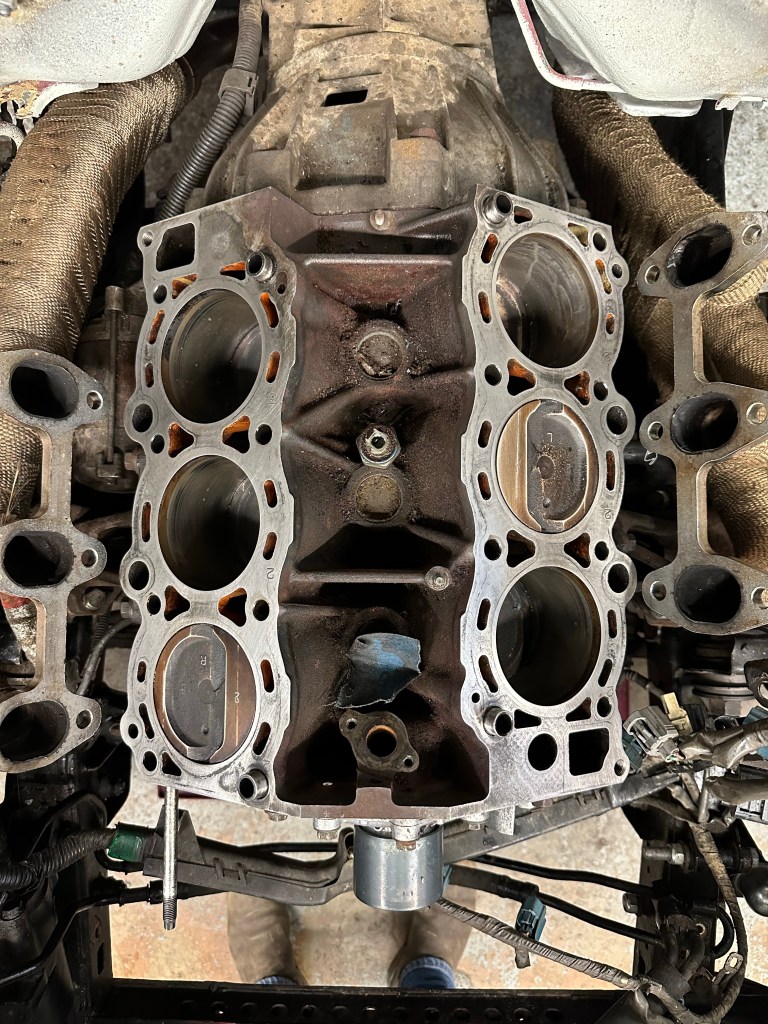
Air blown Threads clear and clean, time for the Head Gaskets to be offered up..
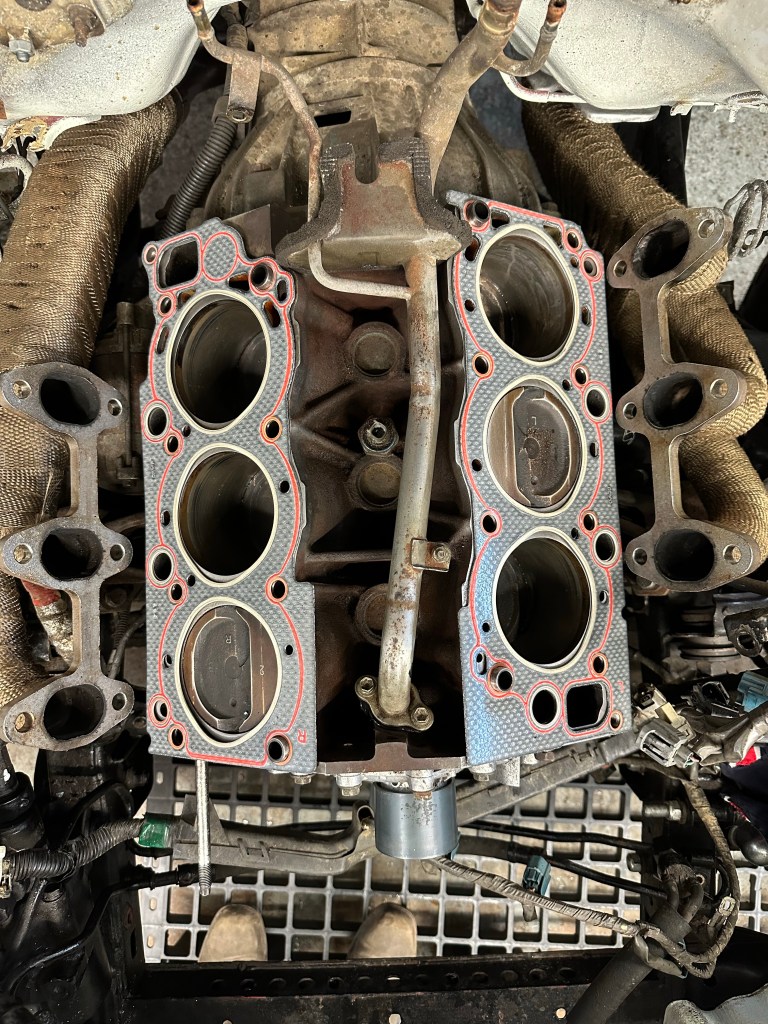

Job made easier with L & R markings to correspond with the Pistons..
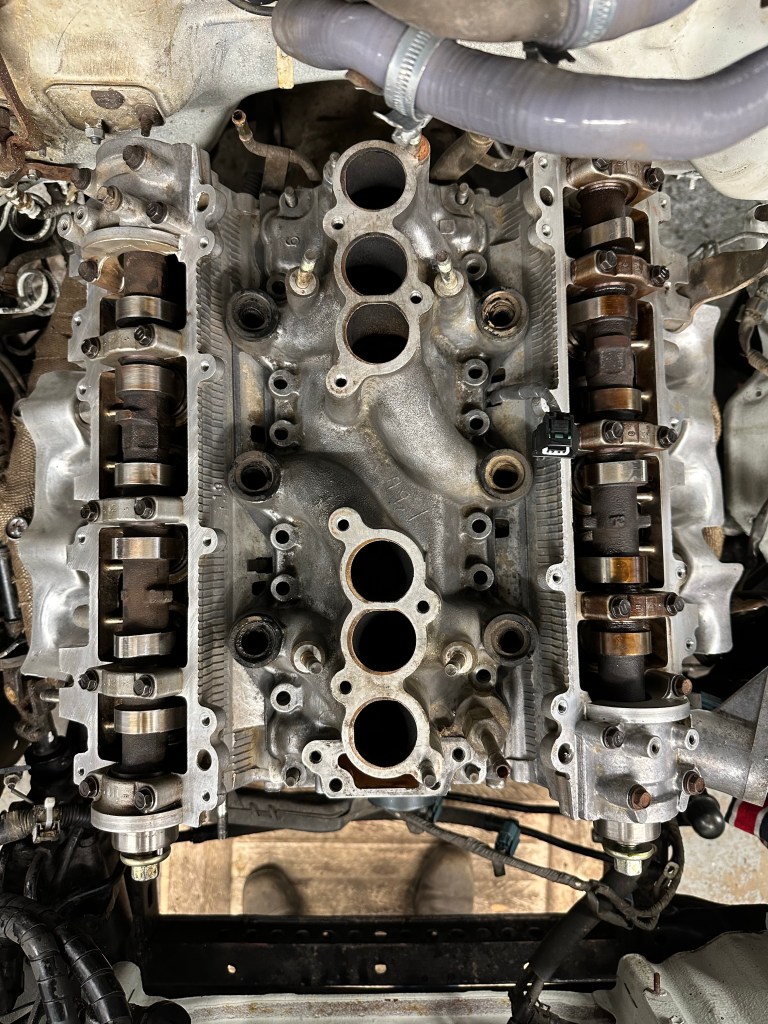
Lovely skimmed Heads, with new Valves, Springs, Guides and Seals. On they go, then the Camshafts removed to gain access to the Bolts.

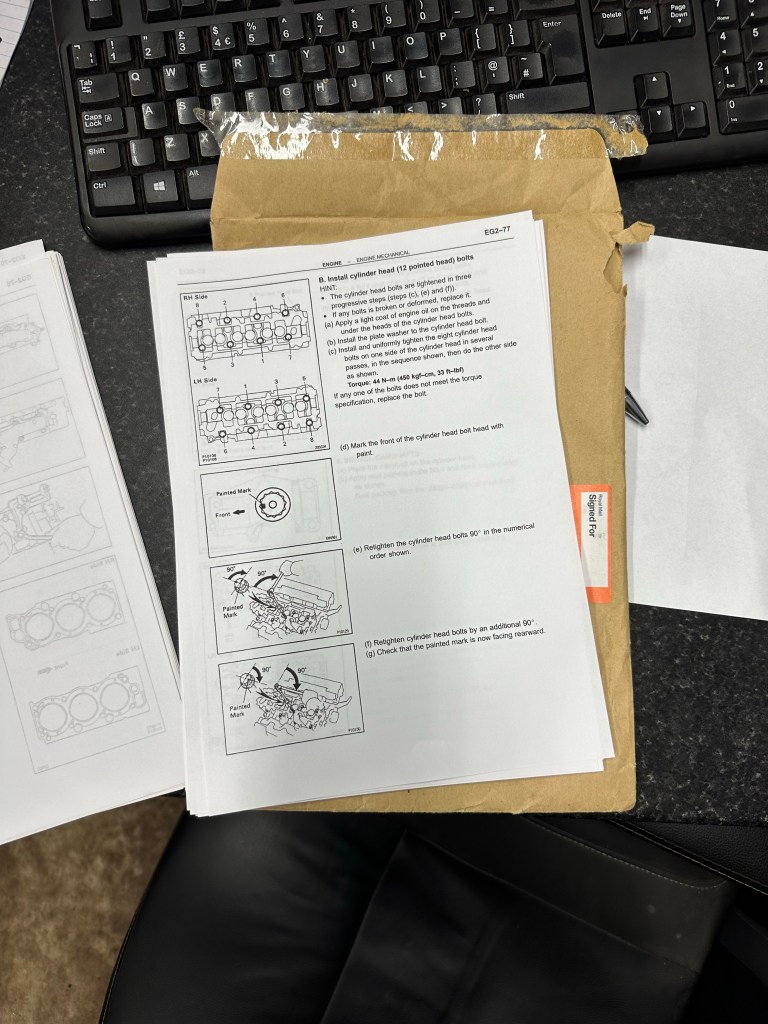
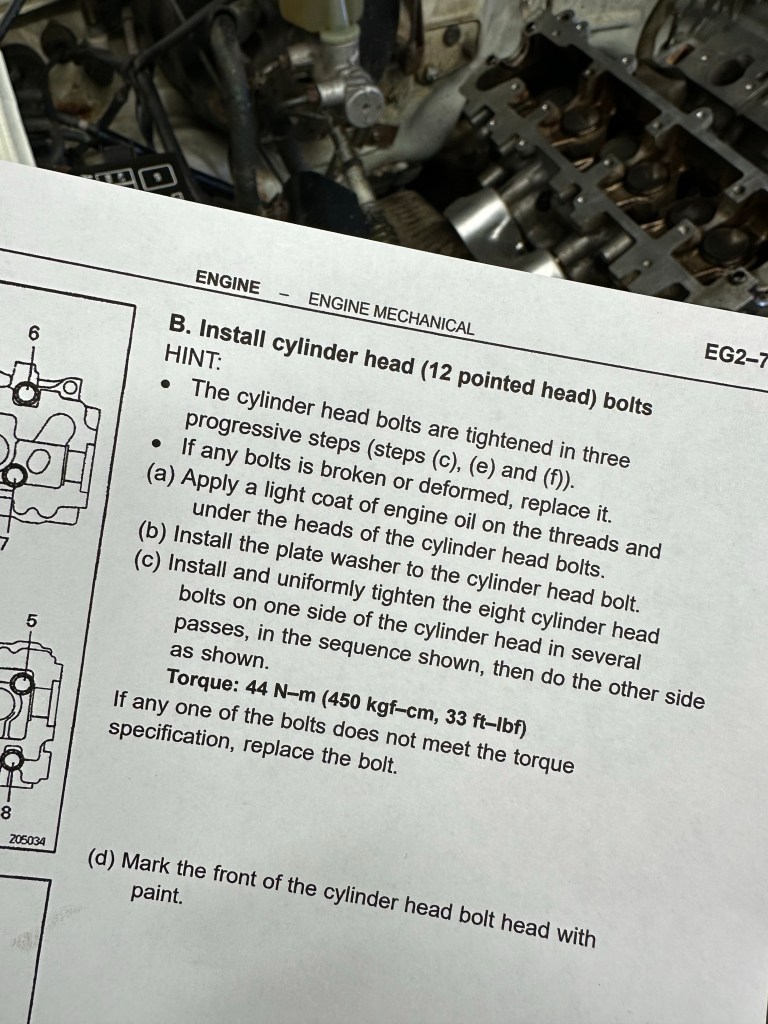
Time to RTFFSM for the Head Bolt Torque Specification. As an onlooker, this bit was a little Nerve Wracking, Andy taking the lead [this was by no means his First Rodeo] and his time to get it right.
As an aside, I host the Full Service Manual on my Dropbox, made Public..
New Knock Sensor Cable, new Lower Intake Gaskets..

Atomicity
I tackled the Fuel Injectors at this point, with a new Seal Kit from Mr Injector UK. For the 3VZE you need Kit 109, and one of two Seal Kits depending on your Engine Spec; 14mm or 16mm. They sent me both as I was unsure, but it turned out to be the latter. They came up pretty good..


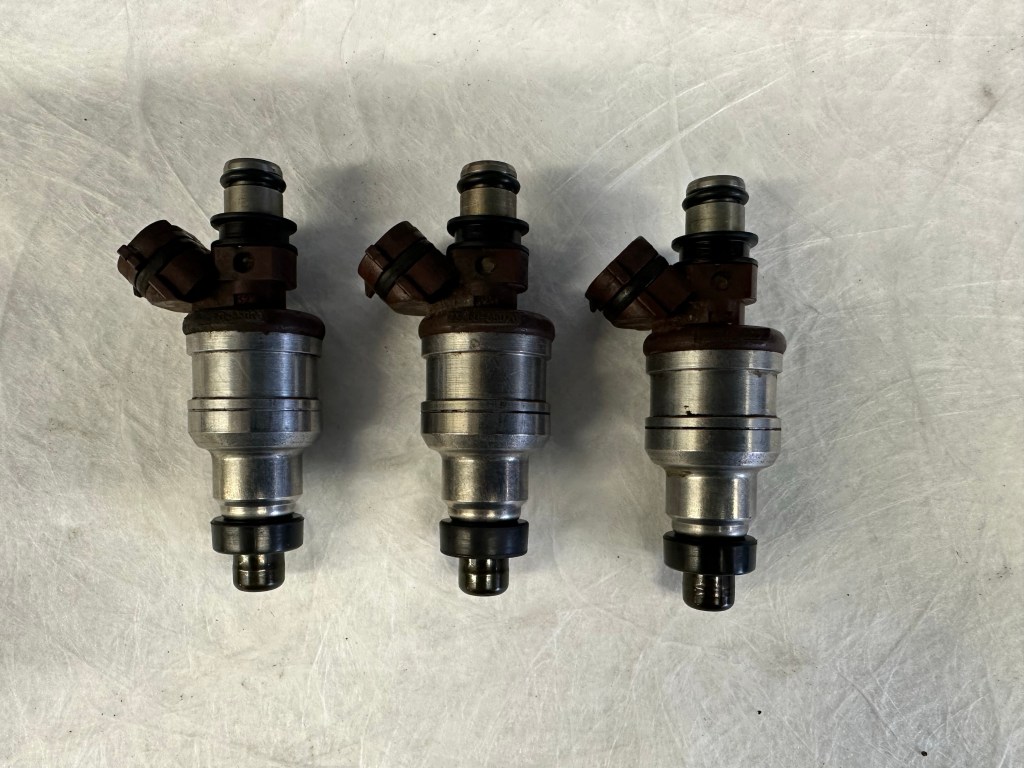
Ideally they would have been comprehensively serviced, and maybe that is a Job further down the line, but for today [and given the 3 Month Queue at Mr Injector UK] a good clean was all that we had time for.
Reservoir Clogs
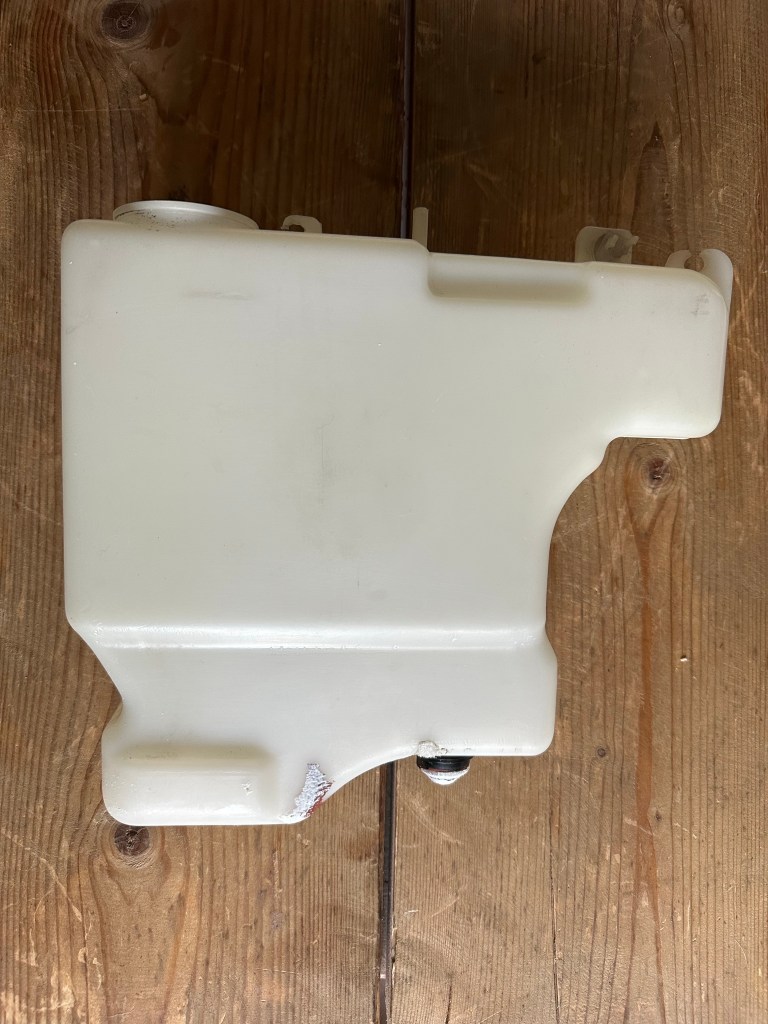
Looking into an Engine Bay, your eye is always drawn to the opaque Coolant Reservoir and Windscreen Washer Bottles, their yellowing seeming to eclipse the Oily and Road Grimed Mechanical Parts. I remember having a go at cleaning the Coolant Reservoir in my 968 Sport, rather unsuccessfully, and having to buy a new one as a result. This time was a little bit different in that these parts for the 4Runner are not available new, so that isn’t as option.
Taking both home with me after the Teardown, I searched a couple of Forums for the best method.
Pipe Cleaner and Milton’s Sterilising Fluid [specifically, apparently] are what is required, as well as a good dose of Elbow Grease. Leaving the Bottles to soak for an hour or so helps the Mild Bleaching Agent do its job. Absolutely fantastic result, although I wouldn’t suggest feeding your New Born from them once finished.


Cam Pulleys
Time to build up the Cam Belt linkage, starting with the Cam Pulley back plate.

Here we ran into a problem, that again might have erupted at any point – a Lost Thread in half of one of the Idler Pulley #2 mounts.

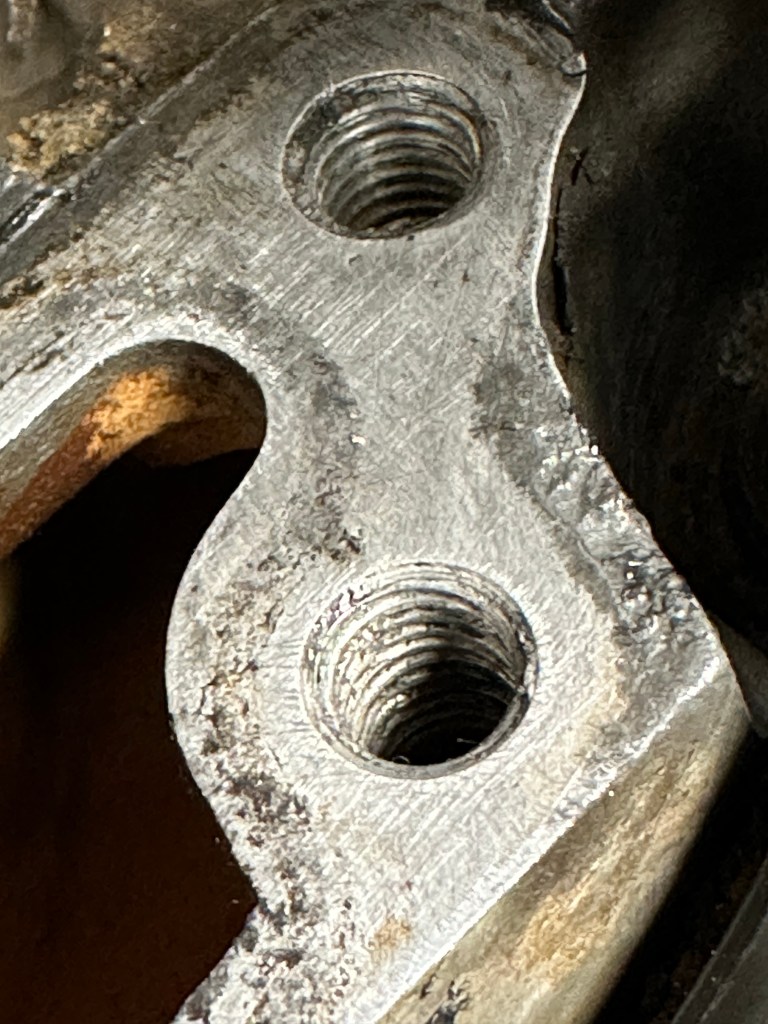
You can lose Hours on Jobs like this, and we did cumulatively, going very carefully and making sure that you don’t destroy the Thread entirely, thence the Metal in which the Thread sits; in this case, the 3VZE Block. Things can get very expensive very quickly. It’s a wonder how long this would have lasted as was, had we not spotted and remedied the Thread.
Thread sorted, and Idler Pulley #2 sealed and tightened down, we moved on to the Cam Pulleys and the Cam Belt assembly. The Pulleys themselves are keyed onto the Camshafts, so aligning for Top Dead Centre and then slipping on the Cam Belt was a straightforward Job, albeit a Two Man one. Tensioner Pulley and Pin requiring a little persuading.

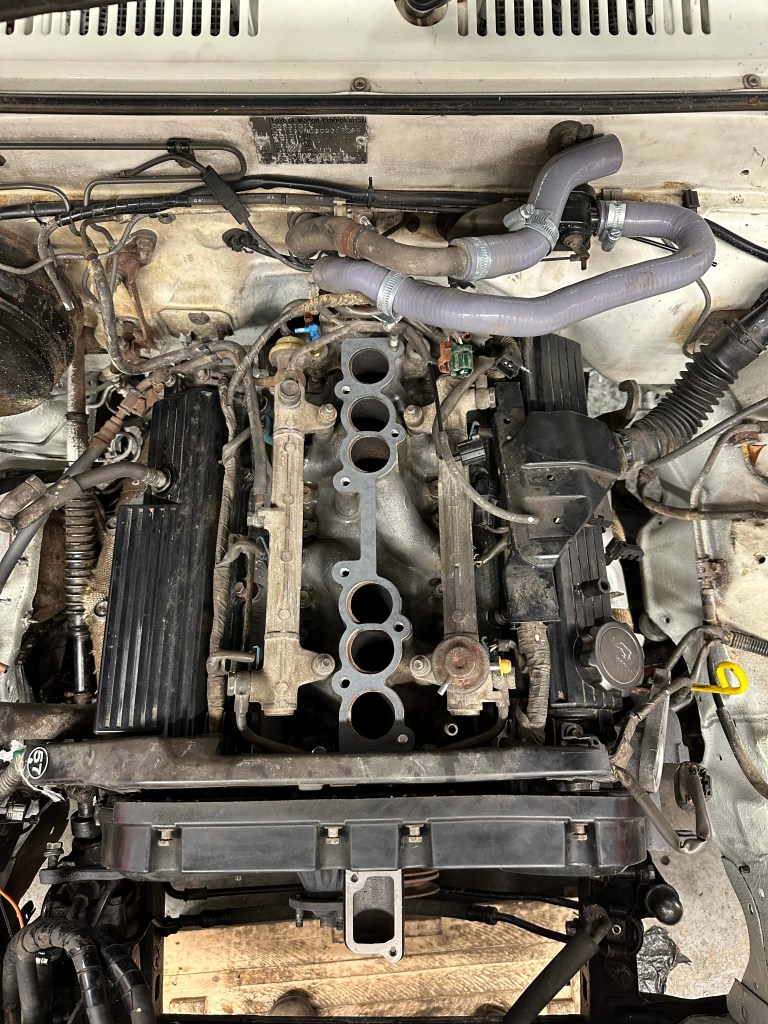
Cam Pulleys Cover, Fuel Rail and Rocker Covers on, the Upper Plenum Gasket was offered up and finally the Plenum Assembly itself. And then Vacuum Hoses, Throttle Cable and Electrical Connectors reunited.


Steering Clear
This is where I address that Steering Issue I discovered whilst disassembling the Unit to make room for the Heads to be removed.
The Steering System is composed of three sections: The Steering Wheel Hub, the Cabin Steering Column, the Engine Bay Column and the Steering Box, Using the Image below, I have colour coded the connections.

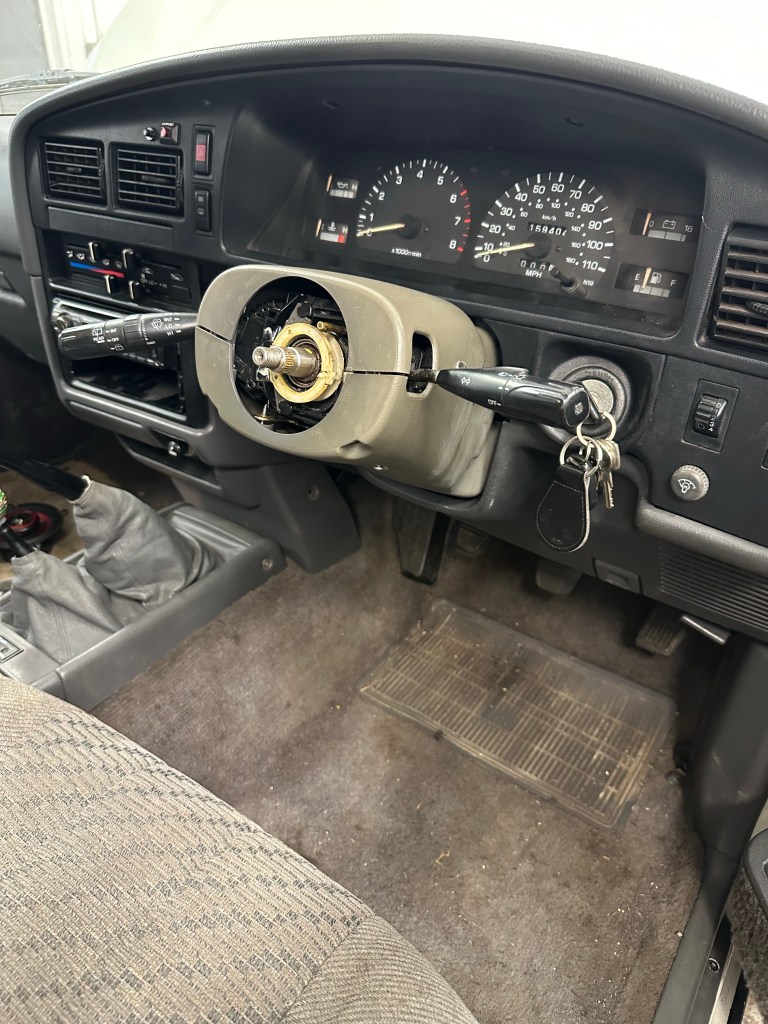
Three of the four bolted together using a Spline and Cotter Bolt Red, Green and Blur circles]; the fourth junction between the Steering Wheel Hub and Cabin Steering Column [Purple] is held together by a Spline that is held in place inside a Steering Housing [3] by means of a Bushing [1] and two Circlips [2]; Upper and Lower.
When I applied a small amount of force, pulling the Column, it fell out of the Connection [Purple 3] causing the two to be disconnected and resulting in no functional Steering. It was quite a terrifying prospect to think that this could have happened on the Open Road, or Motorway, or even whilst driving through a Town or Village jolted by a Pothole, Speed Bump, whatever. Indeed, when I used the Tilt mechanism, it fell out of its own accord. Like I said, terrifying stuff..
It became apparent that at some point during the disassembly or reassembly of the Body and Chassis while the 4Runner was in Somerset, the Steering Column was not attached/detached properly and was pulled, dislocating the Retainer Clips.


You can see below how the Lower Circlip should be, in a Steering Column I sourced during the Week between Teardown and Rebuild.
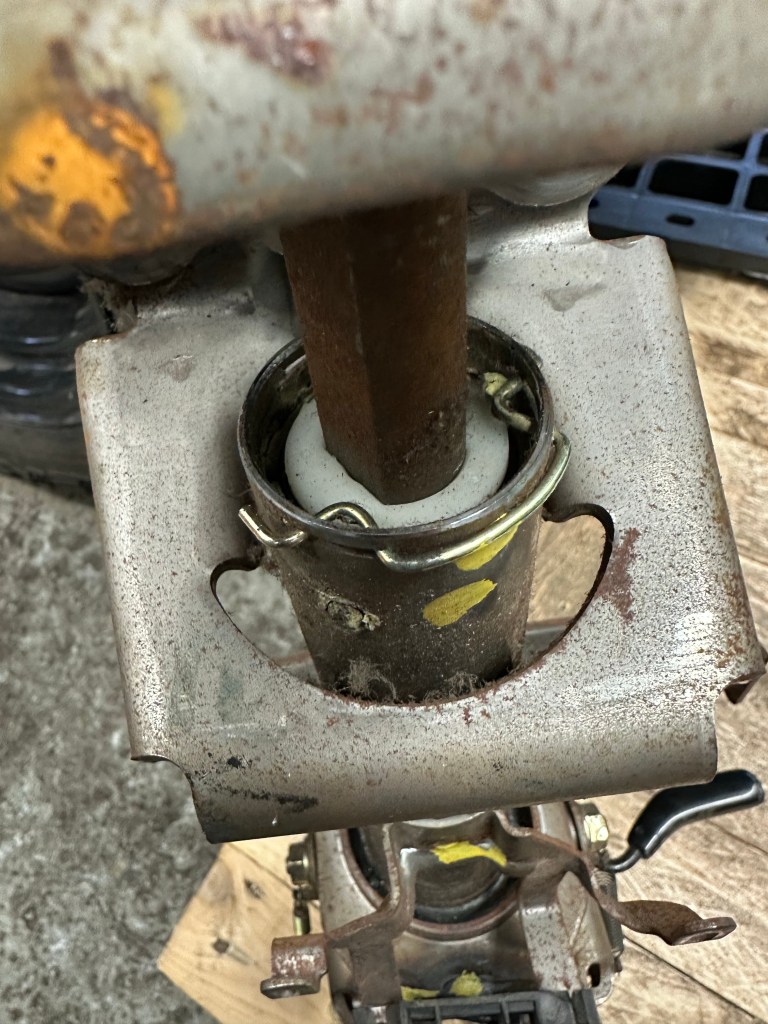

Terrifying doesn’t even come close..
Transplanting the Ignition Stalk [and integrated Steering Lock] to the new Steering Column was a tricky operation since the retaining Bolts were Sheer Bolts i.e. once tightened, the Heads of the Bolts sheered off as a Security Measure, rendering it irremovable. Not that helpful if you need to remove it. Simple solution is to tack weld a Nut to the Sheer Bolt Head and then removed with a Socket.


Fluidic Space
Once the Steering Column was in place, it was back to the Engine Bay and time to hook up the Coolant System. Progress here was pretty rapid, and nearing the end of Day Three, it needed to be. First up was the Engine Oil, and draining the old Oil out for inspection.

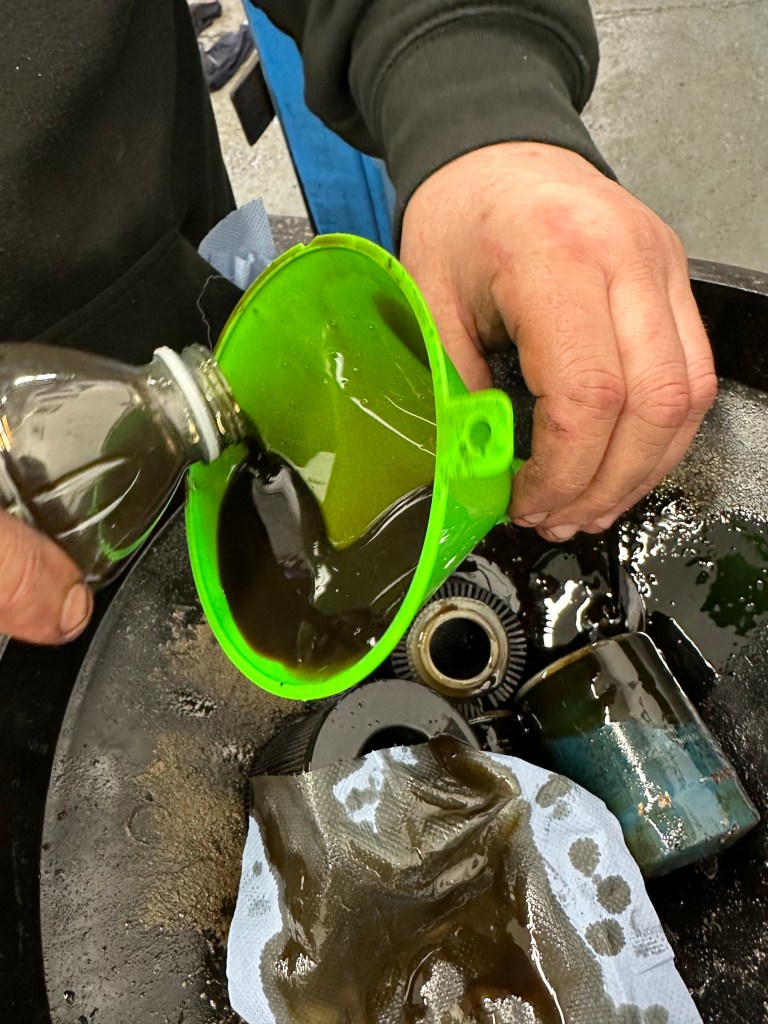
It was a welcome relief to see No Shiny Bits of Metal in the Black Stuff, sure it was emulsified somewhat, combined with the Coolant as the Head Gasket allowed free passage across the interstitial border. But at this point any Bad News would have been deemed almost Unfair.
Red Coolant filed the Reservoir, Radiator, Coolant Pipes, Heater Pipes and Heater Matrix. It was time to see if the Beast fired up.
As if I even had a Doubt..
Epilogue
While it looks as though it was Plain Sailing from the Photos above, I can tell you that it was not. The Rebuild took Three Days that were beset with distractions of running a Business, interruptions, crossed Threads, late delivery of parts, Coffee Runs and that rather serious issue discovered with the Steering Column.
I didn’t get to drive the 4Runner home that evening, Andy wanted to have a few days of Road Testing and ensuring that everything was 100%. In hindsight, that was the best option since the we were not out of the Woods yet, it transpired..
Categories

2 thoughts on “Head Gasket Series: The Rebuild” Leave a comment ›