Head Gasket Series: The Teardown

You will know by the Photo above, that we did indeed successfully strip the Heads off the 3VZE Block of the 4Runner. But it was certainly a Journey of its own, so let me tell you all about it.

Evidently, I’m no Mechanic and so the prospect of stripping an Engine down is quite a daunting one. As I peered into the Engine Bay I could see what needed to be removed, but I couldn’t comprehend the extent of what was involved in removing everything that needed removing.
Evidently, I’m no Mechanic and so the prospect of
stripping an Engine down is quite a daunting one..
I had printed off relevant pages of the Full Service Manual that details Cylinder Head Removal and Cylinder Head Installation; there were some 100 Pages or so detailing critical information such as Torque Specifications. I was instructed to take detailed Photos of the Engine before we started; of Hoses, Connectors, Cables, Wires and anything that we’d need to reconnect. Looking back, I could have done a better job of this; next time I will. Although I really hope there is never a next time.


And so it began, with the Coolant Hose jubilee clip at the base of the Radiator slackened off and the Hose disconnected, the Coolant running into the Fluid Pan.
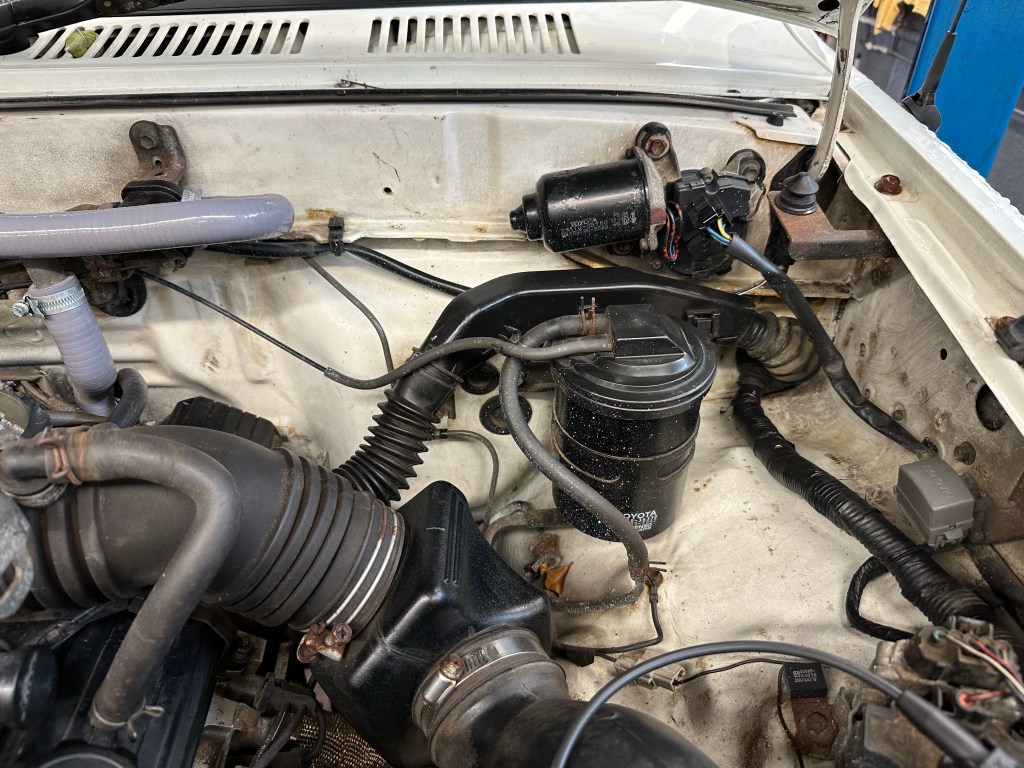
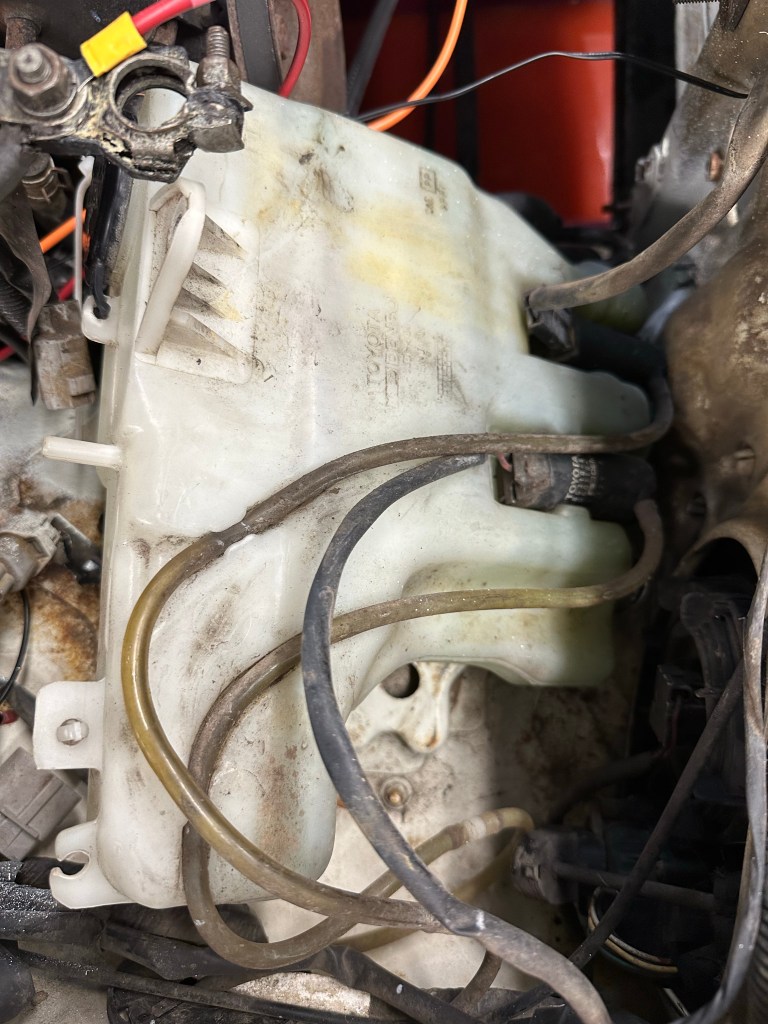
Eyes Front
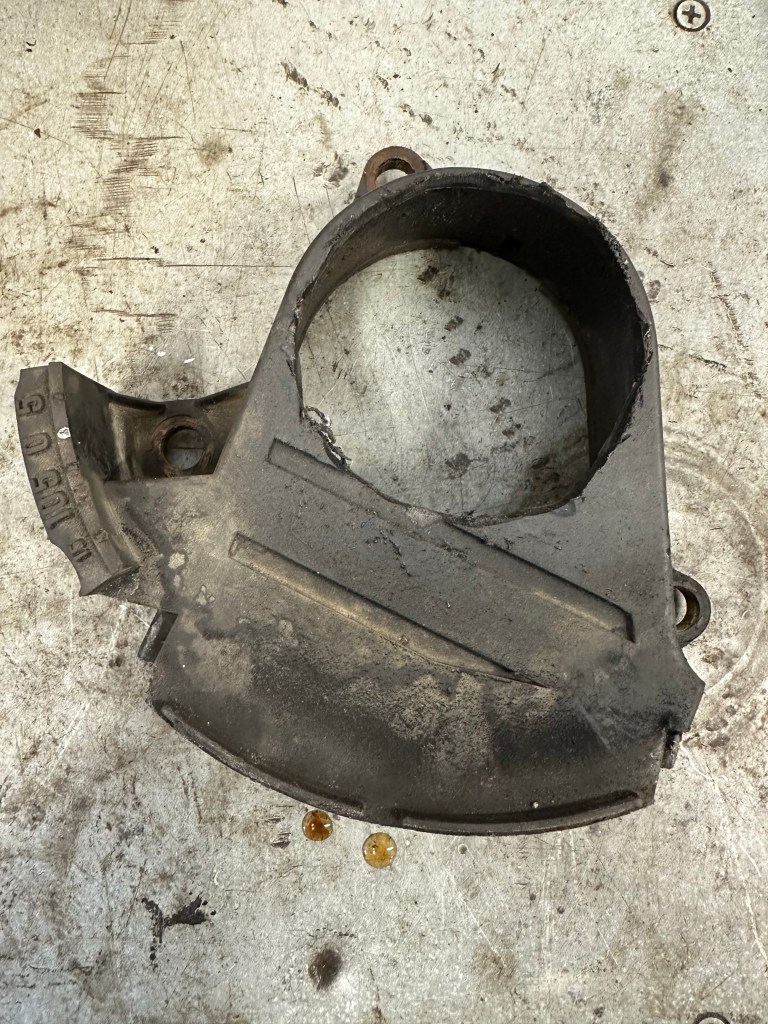
Having removed the two Reservoirs for the Coolant and the Windscreen Washer Fluid, the Air Box and its components, the Radiator, the Auxiliary Belts and the Cam Face Plate, the first of the major Bolts of the Day was the Lower Crank Pulley, that is Woodruff Keyed in. Fear was that it had been Threadlock‘d in; it hadn’t, but boy did it act like it. When the Pulley was removed, it revealed an ugly Hack from whoever changed the Timing Belt at 70K Miles [evidenced in the Service Book]. Of course, such parts [11321-65010] aren’t available new anymore, so short of sourcing a [well] used one from a Breakers in the US, it’s a fruitless endeavour finding a replacement otherwise. Doesn’t really bear thinking about why the collar was hacked so brutally with an apparently blunt Stanley Knife.

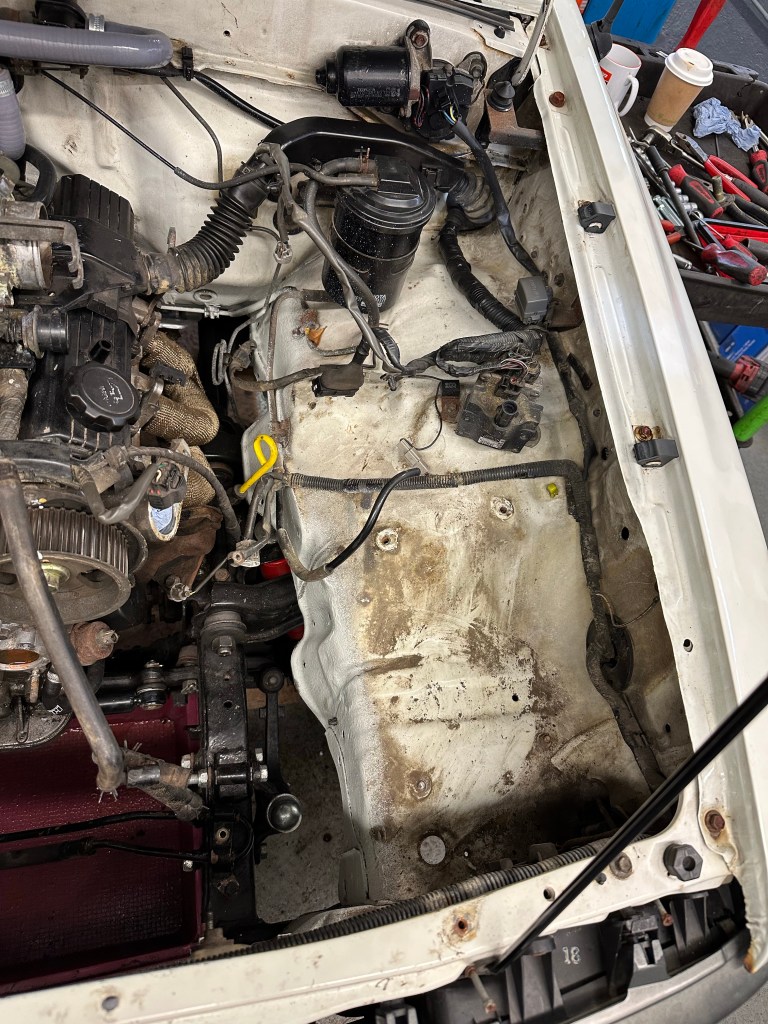


Side Pipes
It was decided that the Exhaust Headers would be left in place, only disconnecting and removing the Nuts & Studs that would allow the Heads to move up and away from the Block and Headers. The phrase There is always one is overused on Days like this, with one NS Stud not playing ball; this Cylinder Head removal would require negotiation.
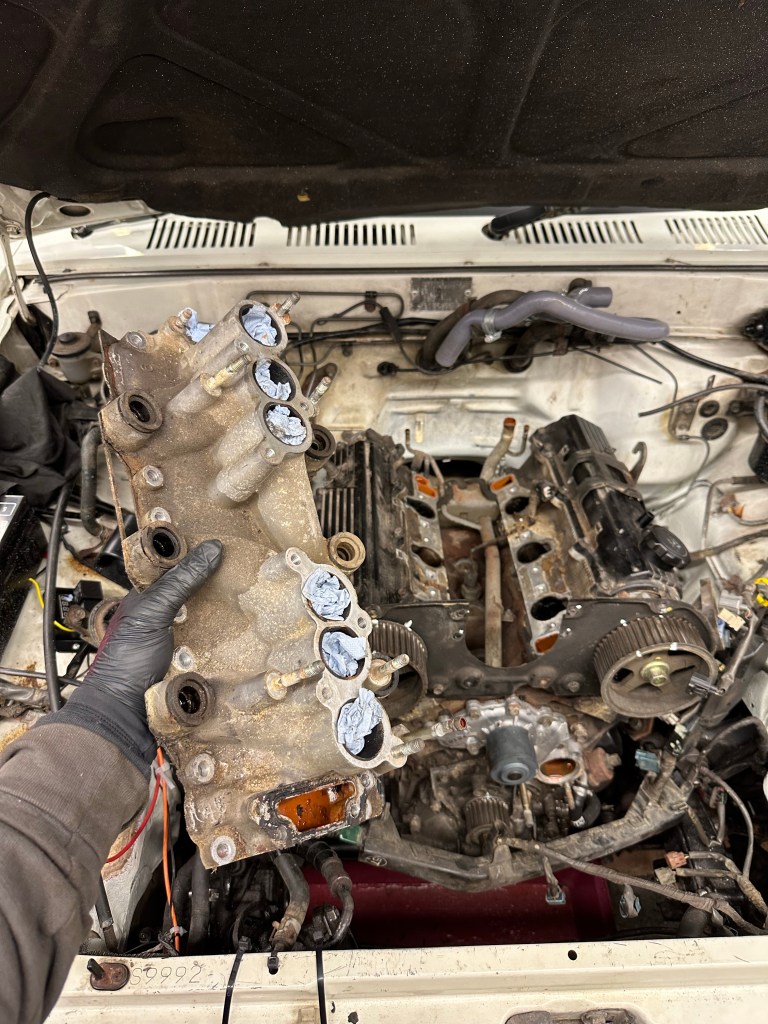
Top Off
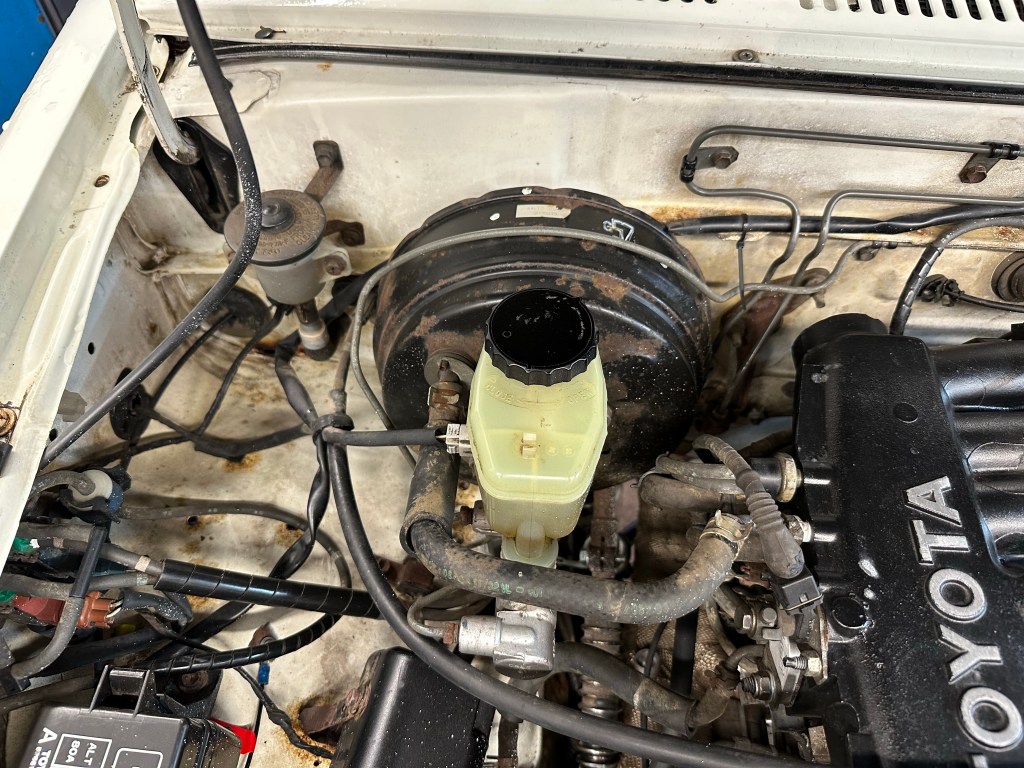
Once the Vacuum Hoses were disconnected, the Plenum was removed revealing the Intake Manifold that funnels Air into each of the 6 Cylinders. Some Fluid has made its way back up to this Union, spoiling the Gasket [which will be replaced], and later discovered into the Plenum itself. At this point I started to imagine the damage done had I not acted so quick and shut the 4Runner down within a minute of the Head Gasket failure symptoms.
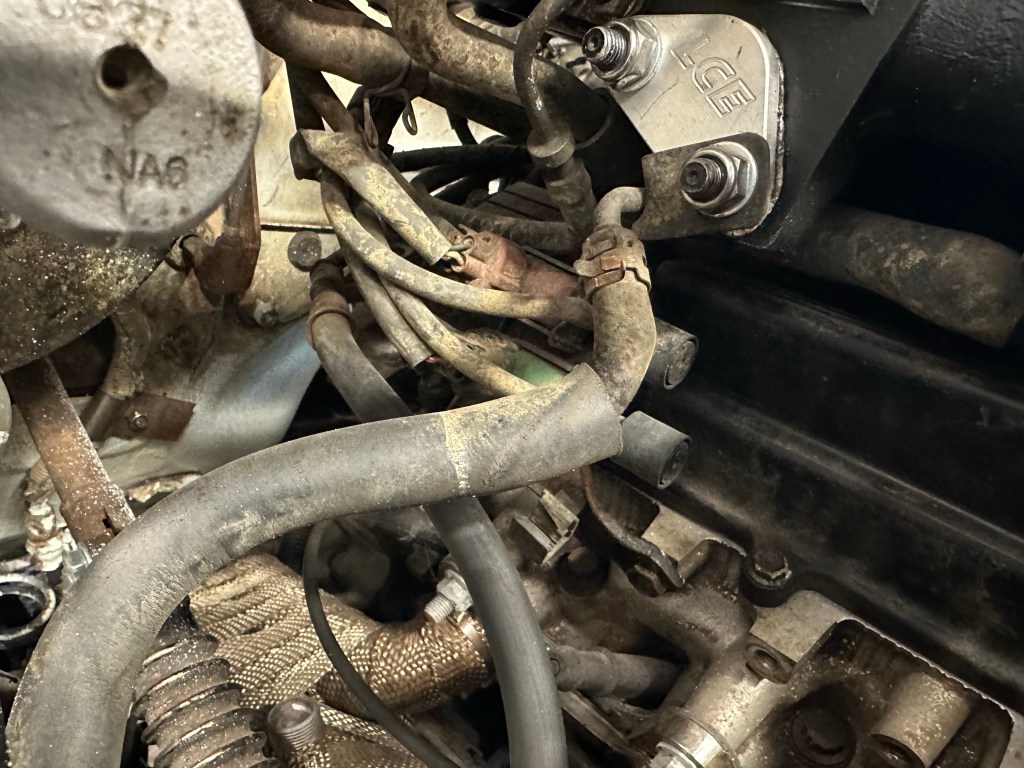
Next was the Fuel Rail and connected Injectors whose Seals had seen better days. Everything will receive a thorough clean, as the deeper into the Engine we went, the more Dirt and Grime we uncovered from 30 Years of Motoring.


Beyond this point, it felt as though we were exposing components and parts of the Engine that hadn’t seen the light of day since they were Factory fitted in 1994; it was almost an Archaeological Dig. Old Gaskets had hardened and were brittle to remove, snapping and breaking up in our fingers.
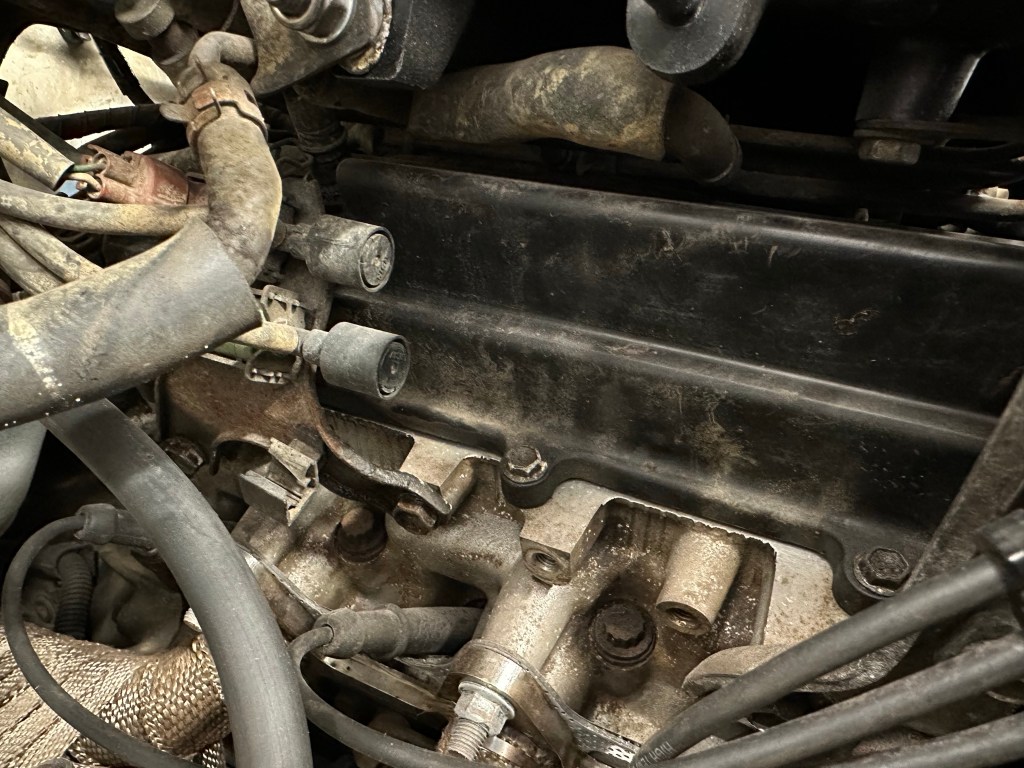
Rocker Covers
Pulling off the Rocker Covers exposed the Camshafts, and this is where it started to get a bit Oily. Whilst the Gaskets had been replaced only a few months ago, it was clear that there was Oil escaping through compromised Seals at the rear of the Cams, something I was disappointed to find since I hoped that would have been caught by Hellbent.


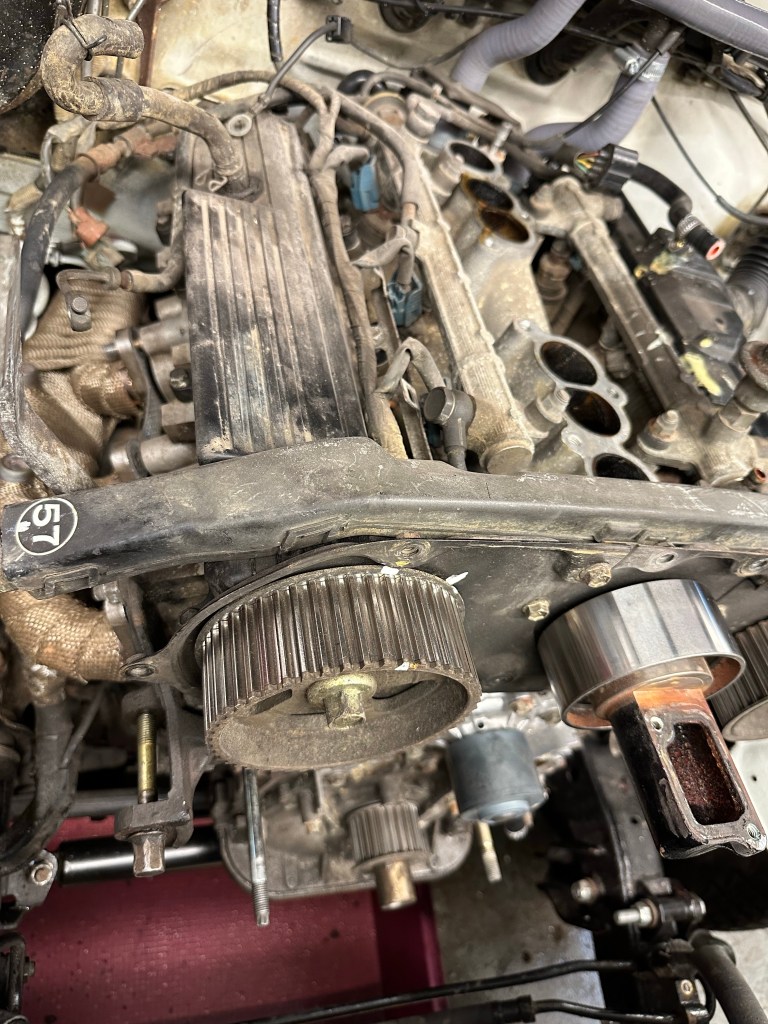
Camshaft Pulleys
Air Gun did the job of removing the Cam Pulley Bolts with ease, and from this point it seemed as if the Day’s Job was almost over. Andy removed the Cam Bearings for inspection, and to allow access to Cylinder Head Bolts.

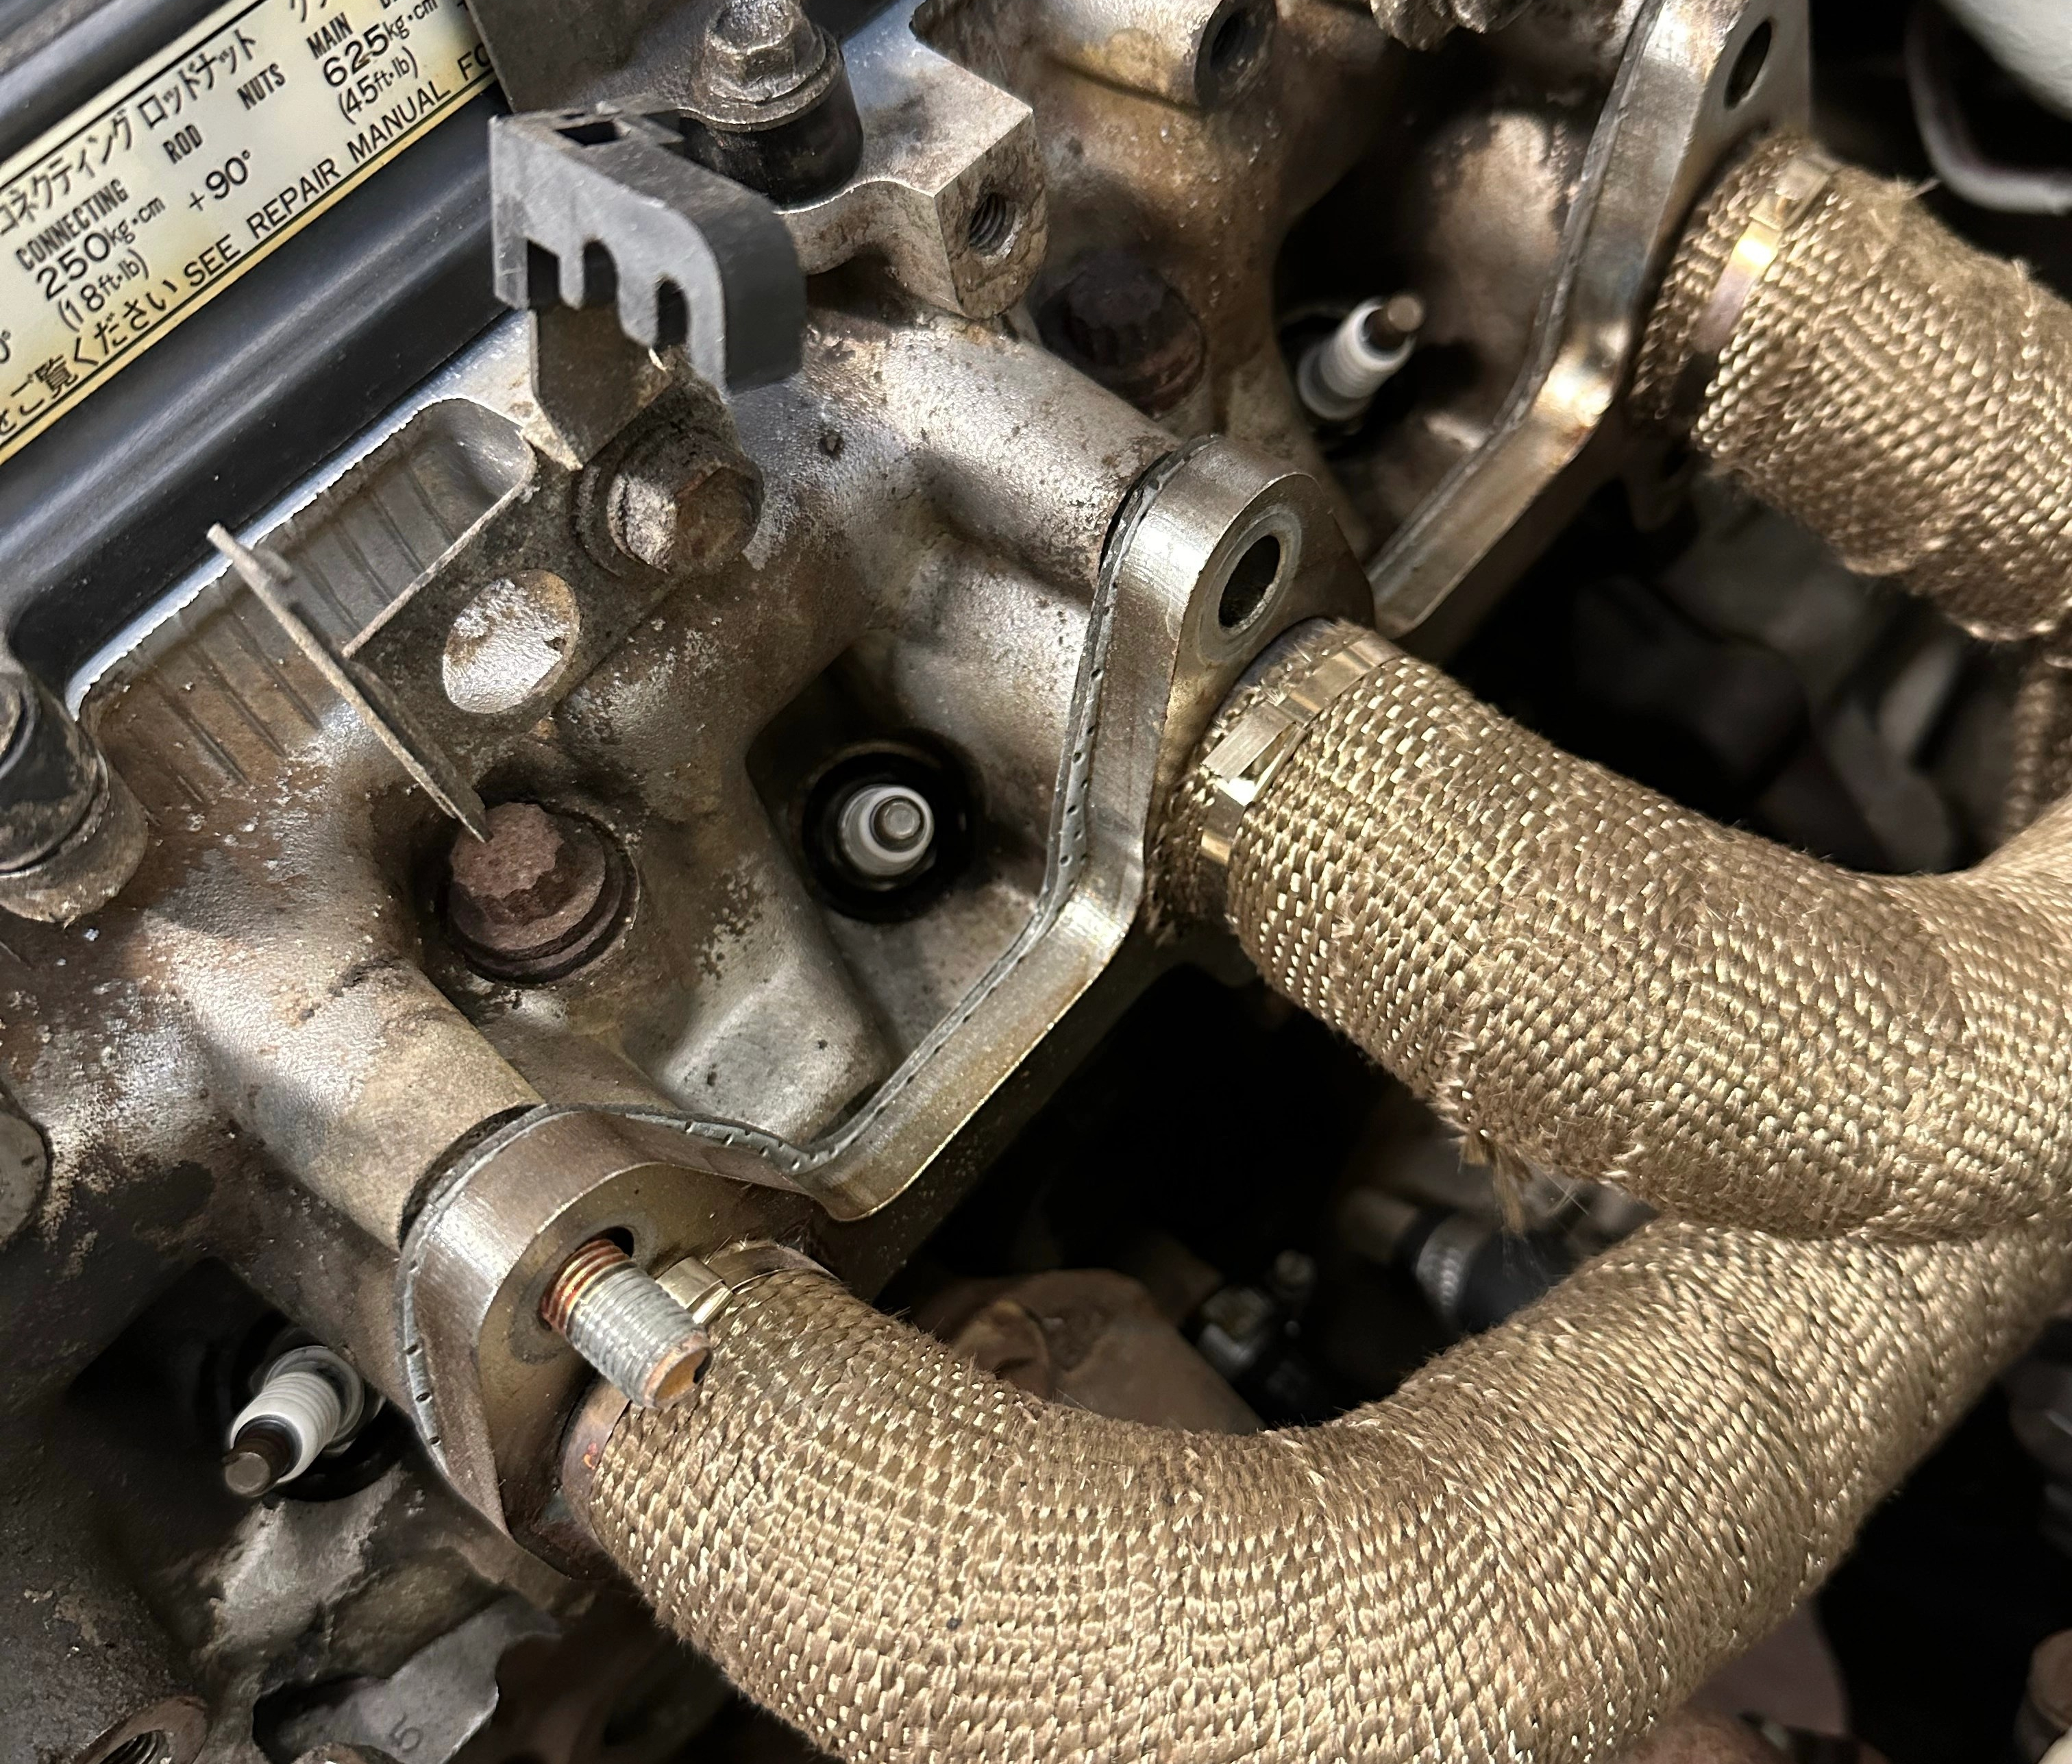
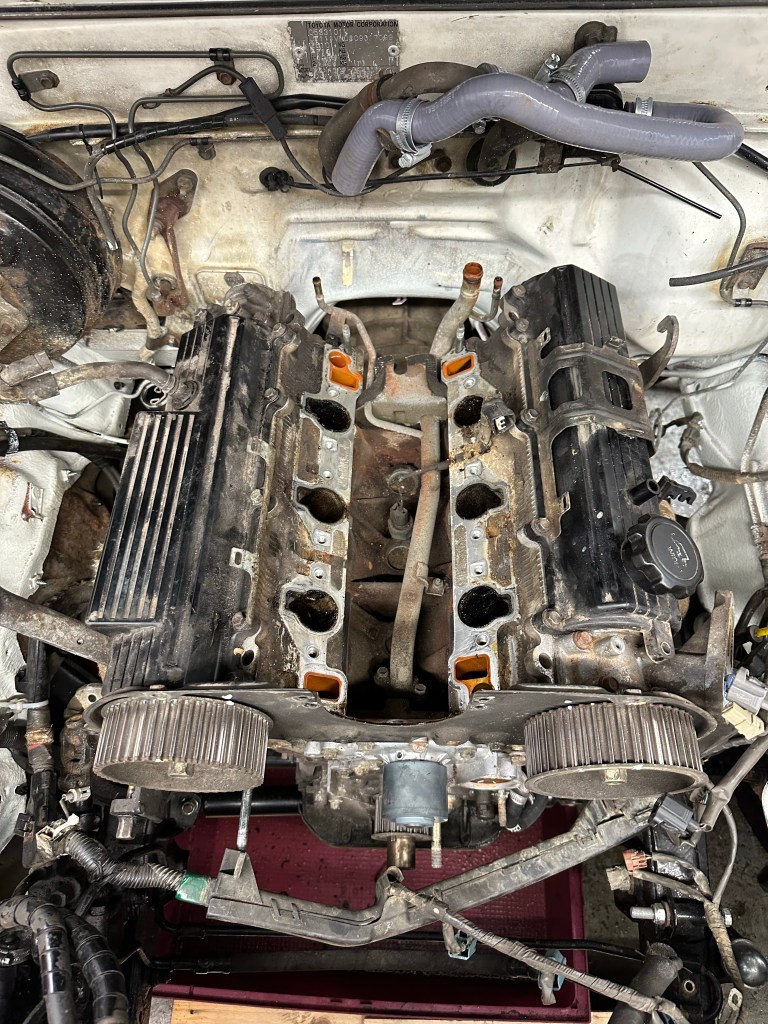
Cylinder Heads
Relieving the Torque on the Cylinder Head Bolts is an important step, with an order to the process. The creaking of the Bolts is quite unnerving, and with the knowledge that they hadn’t been removed since they were torqued down in 1994, the Fear of snapping one is front and centre.
Cylinder Heads relieved, there was much relief..
Fortunately, if there was any fortune to be had from this Job, all the Bolts were removed without snapping, or suffering damage in any way. They would all be replaced of course, and the Threads chased before reassembly, but not having to remove a Snapped Torque Bolt saves Hours and Hours of frustrating work.
Now, it is at this point that I feel I should mention that, even as a self confessed Motor Enthusiast, I had not until this moment seen the inside of an Engine that I personally had had a hand in taking apart. Sure, I have seen Engines from other Cars on Benches undergoing work, and sure, I had sometimes seen an Engine from one of my Cars laid bare. But I had never felt so close to the action and it felt personal, involving and immensely rewarding. It was obviously made better by only Good News coming from Torch Inspection of Cylinders and Pistons.
I had never felt so close to the action,
it felt personal, involving and immensely rewarding..
Cylinder Heads relieved, there was much relief.


Looking at the Offside Bank, there was no obvious sign of compromise, but without even looking I knew where the breach was going to be. The usually suspected Cylinder Six failure was confirmed, with a washed clean Cylinder and visible damage to the Gasket. Not much to do here except be thankful that it was only a compromised Head Gasket and move on with the next step, which was to have the Aluminium Cylinder Heads skimmed and the Valvetrain rebuilt.
Andy wouldn’t have it any other way; do it once, do it properly..
Since the Valves in the 3VZ-E Engine are shimmed, supplying the Valvetrain in situ was a must, otherwise each would need re-shimming again which would be a time consuming and expensive way to go. As there was no visible damage to the Camshafts thankfully, only new Valves, Springs, Retainers and Oil Seals [!] were needed for the Rebuild.
And Head Bolts, Gaskets, Timing Belt [you never fit a used one, no matter how low the Mileage is] and Rocker Cover Gaskets.
And the Thermostat, and its gasket.
And Coolant, Engine Oil, Oil Filter and.. Well, it was a complete Top End Rebuild, but Andy wouldn’t have it any other way; do it once, do it properly.
I jumped on the Train home, with a metallic and oily aura about me, and an exhausted grin from ear to ear..
Categories

3 thoughts on “Head Gasket Series: The Teardown” Leave a comment ›